A Quick Guide to Buckhorn Sights

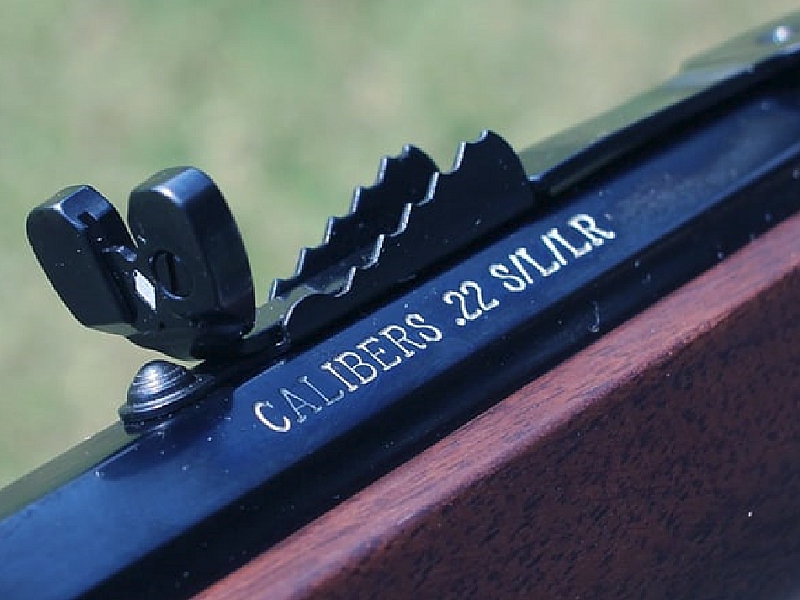
Buckhorn sights are not all that widespread these days. We usually find them on lever guns like the Henry Golden Boy .22 I recently purchased, or maybe on some muzzleloaders. I had never used buckhorns before the Henry, so I did a little research on how to shoot properly with them. This is not an all-encompassing article about the nuances of buckhorns. But it will get you started, and, as I’ve found, learning for yourself is half the fun.
Buckhorn sights are so named because they stand up, and sometimes curve, like deer antlers. They may also have interior nubs that resemble the tines on those antlers. So, the name works, but the sights don’t all look the same.
Buckhorns and Semi Buckhorns
One thing I quickly learned is that there are buckhorn sights (full buckhorns if you will) and semi-buckhorns. It seems that these two terms are often grouped under the name “buckhorns,” even though there is a difference.
Here’s the easy way to distinguish the two: If your sight tines curve upward and inward to where they are pointing back toward one another, you have the full buckhorns. If they go straight up and the tips do not curve inward, you have the semi-buckhorns. Semi buckhorns also have a subset in which the tines are flattened on top instead of coming to a tip. These are called…wait for it…flat tops. Semi buckhorns, of one variety or another, seem to be the most common.

All will have a notch at the bottom in which to index your front bead. My Henry came with semi-buckhorn flat tops. You use the sights the same way, though some folks prefer one over the other for reasons we’ll touch on below.
Built-In Range Finder
The big advantage that both varieties of buckhorn sights have over more basic iron sight systems is that they are designed to aid the shooter judge distance. But this isn’t like a laser rangefinder or bullet drop compensator (BDC) reticle. The buckhorns require estimation and trial and error to dial in adjustments for your particular rifle.
Here’s basically how that works. For close-range targets, place the front bead in the bottom notch. That’s the easy and obvious part. For intermediate range, and what that is depends on your rifle and caliber, index the front bead part way up the rear sight’s tines. This is where the estimation and trial and error come in. But a little diligence and practice will quickly yield positive results as you learn how the sights relate to various distances. For long-range shots, index the bead higher up the tines and follow the same process.

It doesn’t sound very scientific and may not appeal to folks accustomed to precision optics. But open sights have been around a lot longer than scopes, and shooters have made astounding shots with them. They made those shots by learning to correlate their sights with their rifle’s performance. Buckhorns are designed to allow that process for those who want to shoot that way.
Adjustable
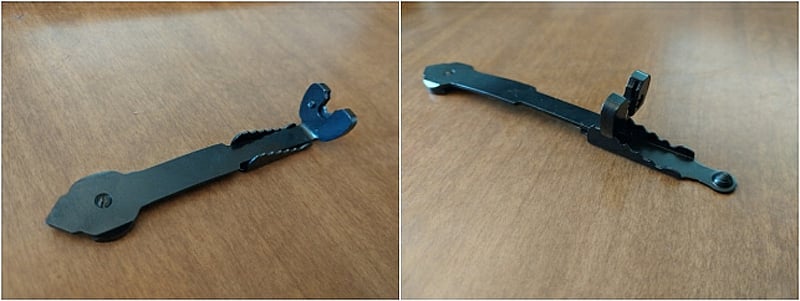
But buckhorns aren’t always about estimation and Kentucky Windage. Many, including the sights that came on my Henry, have a sliding “ladder” to help with elevation. They’re really quite simple to use. Just lift up on the rear buckhorns. The ladder slides out or in, depending on what you’re trying to do.
On the Henry, the further you pull out the slide, the higher your sights are elevated. This forces the shooter to raise the barrel to see the front bead. This method allows the bead to stay in the rear notch for longer shots if so desired. But, again, the ladder’s steps are not marked for particular ranges, unlike the ladder sights on old military surplus rifles. You will have to experiment to see where your rifle hits on each step. But once you learn it, adjusting your elevation is not difficult at all.

Buckhorns are also windage adjustable, but you need a mallet and punch to do it. Usually, the buckhorns are at the rear of a metal strip about three inches long. There’s a small set screw near the front. Loosen the screw just a bit. Too much will cause you to overcompensate. Once you loosen the screw, place the punch against the strip where the screw is and gently tap it with the mallet. It doesn’t take much. When your sights are aligned where you want them, tighten the screw back down.
This method is obviously not intended for the field. It’s really only necessary if your sights are not dialed in at the factory or they are somehow knocked off kilter. Windage adjustments in the field should be estimated based on the situation. Attaining that skill requires practice.
Some Like Buckhorns and Some Don’t
While researching buckhorns I found that some people like them and some don’t. It’s like anything, I suppose. That’s why different options exist. It looked to me like those who liked them had taken the time to learn their proper use and vice versa.

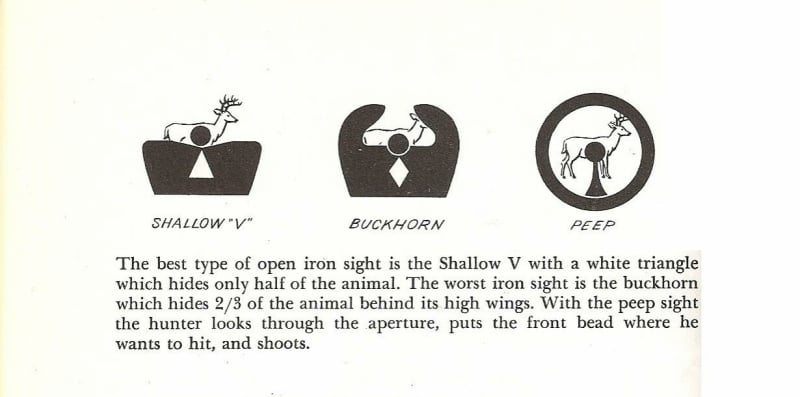
It also seems that most who like them prefer the semi-buckhorns. I saw several folks say the full buckhorns obstruct the sight picture with the inward curving tips. Some say the same about the semi-buckhorns, as noted in the image above, though the semi-buckhorns offer a better picture than the full buckhorns.
For my part, I like the buckhorns. I shot pretty well with them, but my eyes aren’t what they used to be, and I sometimes had trouble picking up the bead against certain backgrounds. Recently, I replaced them with a Hi-Viz LiteWave system that I can pick up more easily. I kind of wish they were semi-buckhorns, but they’re definitely what I needed. Plus, it’s not like I’ll be taking many long shots with .22 Long Rifle. If I get a larger caliber rifle with semi-buckhorns, I’ll probably try to keep them.
So, if you buy yourself a rifle with buckhorns, maybe give them a shot before deciding you want something else. They really are a pretty cool system once you understand how they work.


