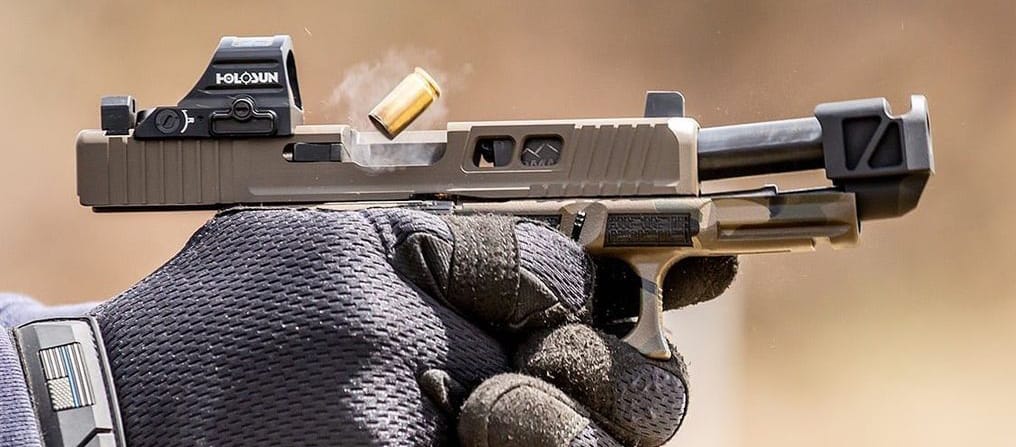
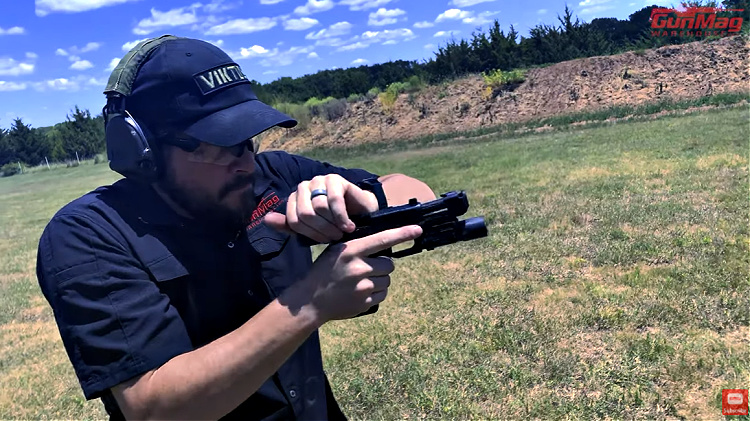
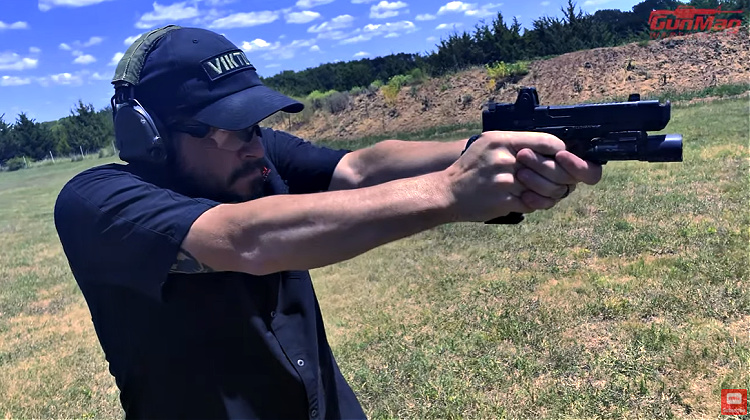
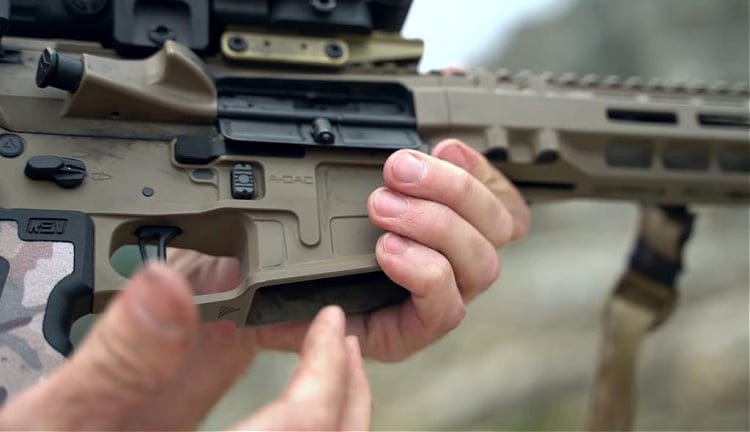
Attention all lumen lackeys, flashlight situs judi slot yang sering menang fanatics, and touters of torches that proclaim performance—we have a brilliant bulletin for you. The folks over at Modlite Systems have released their new weapon-mounted light: The Modlite PL350 Pistol Light. The release of their weapon light is something that fans of Modlite have been coveting for some time. Thankfully for them, it is finally here, and initial responses indicate that it does not seem to disappoint. On top of the weapon light, Modlite has also introduced the “Modlite PL350 Holster” to complement the light.
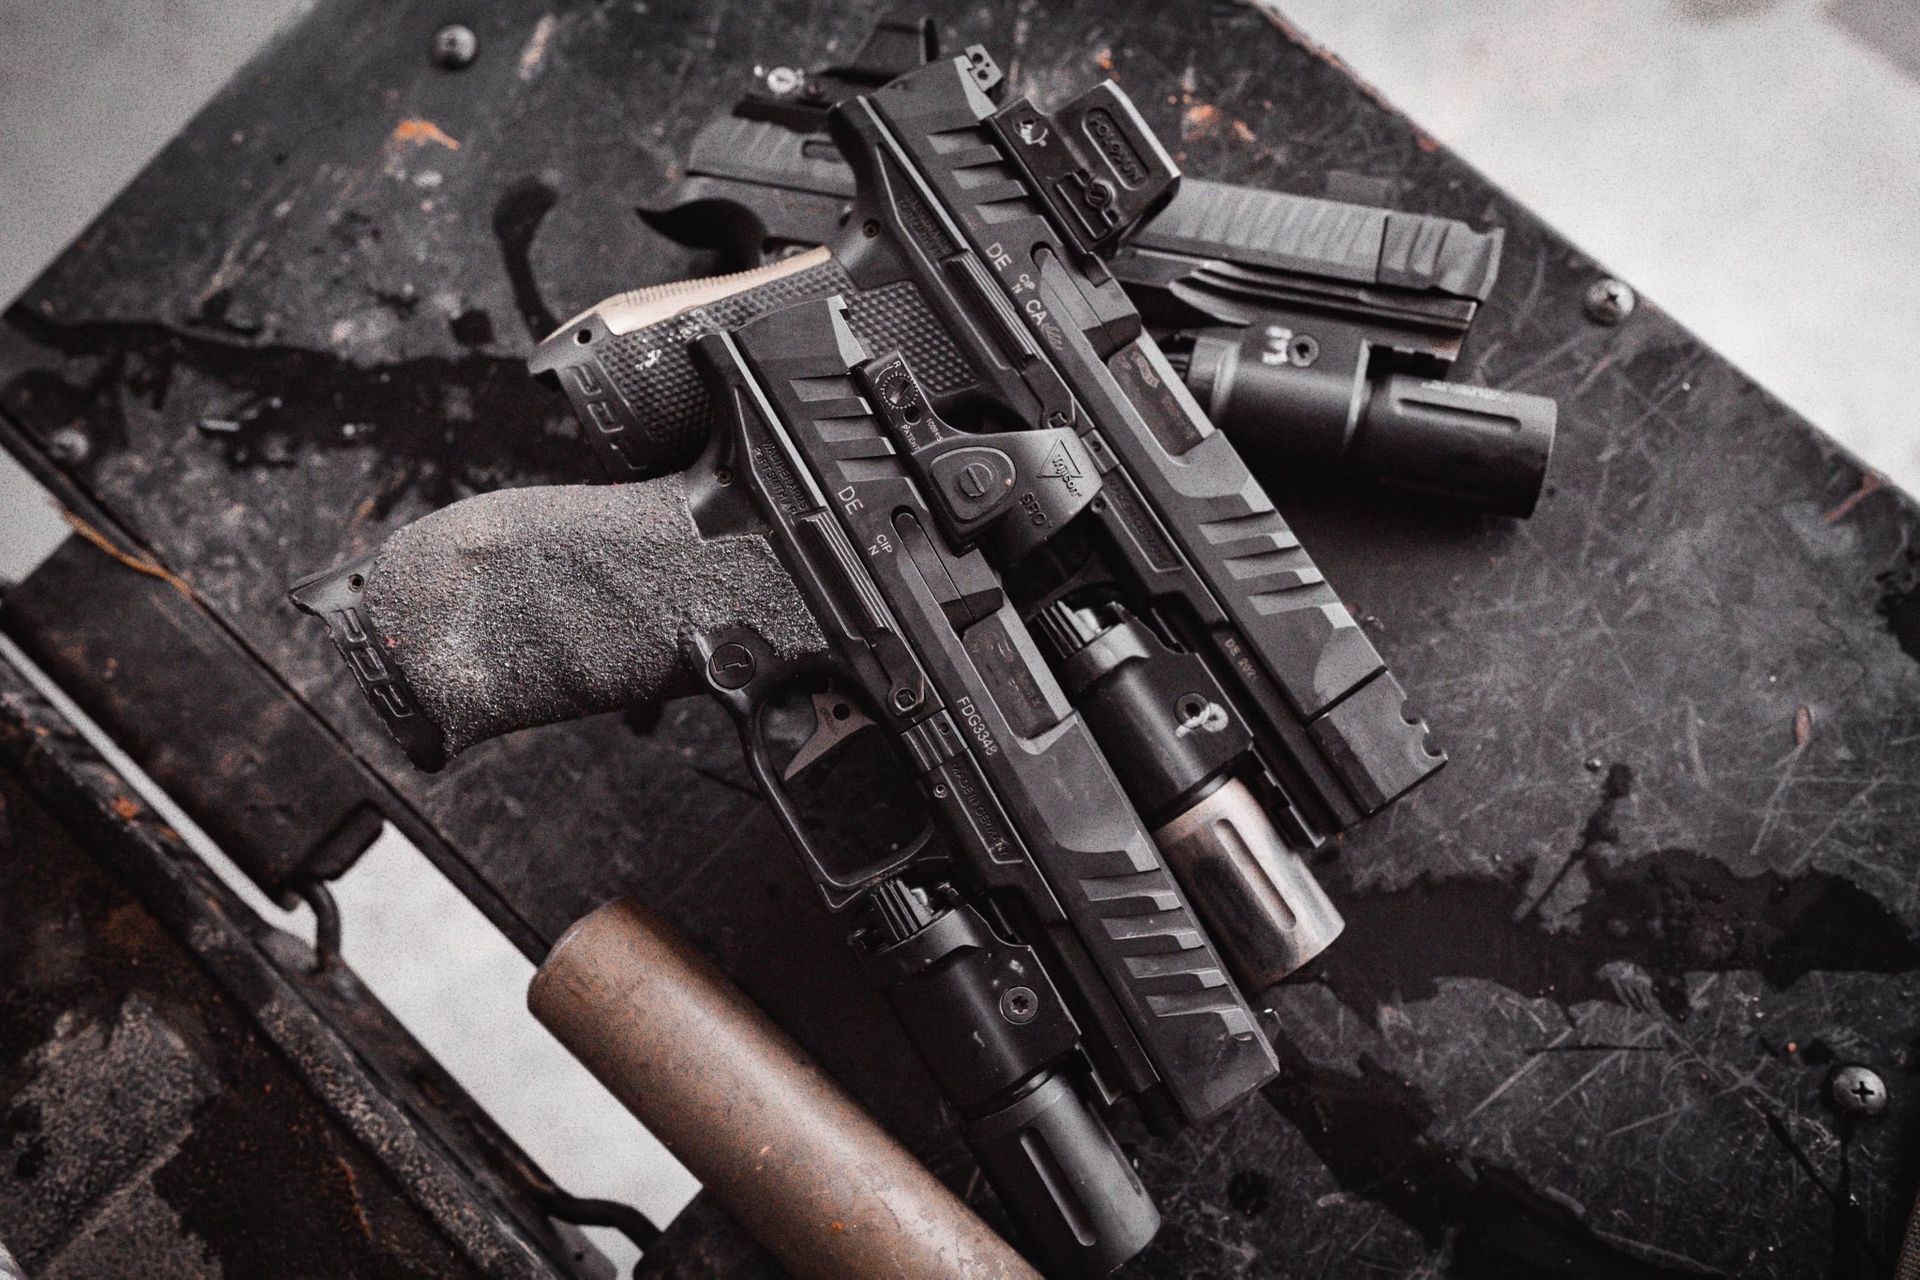
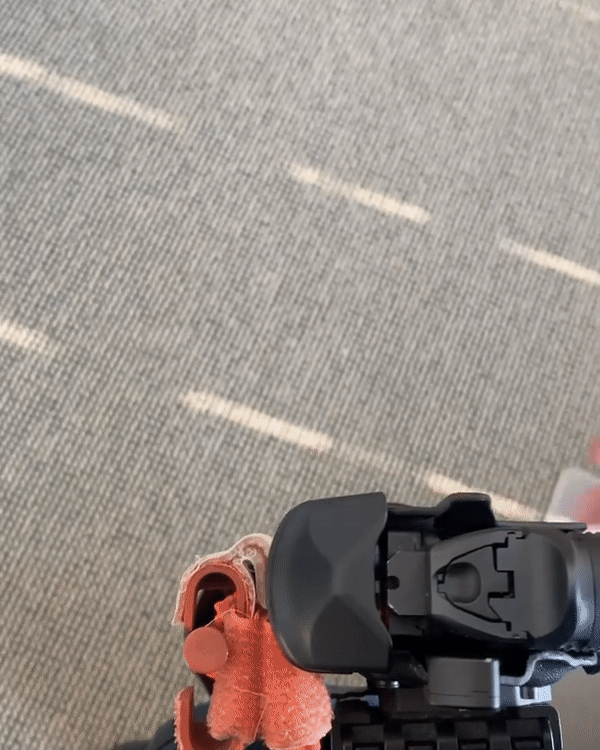
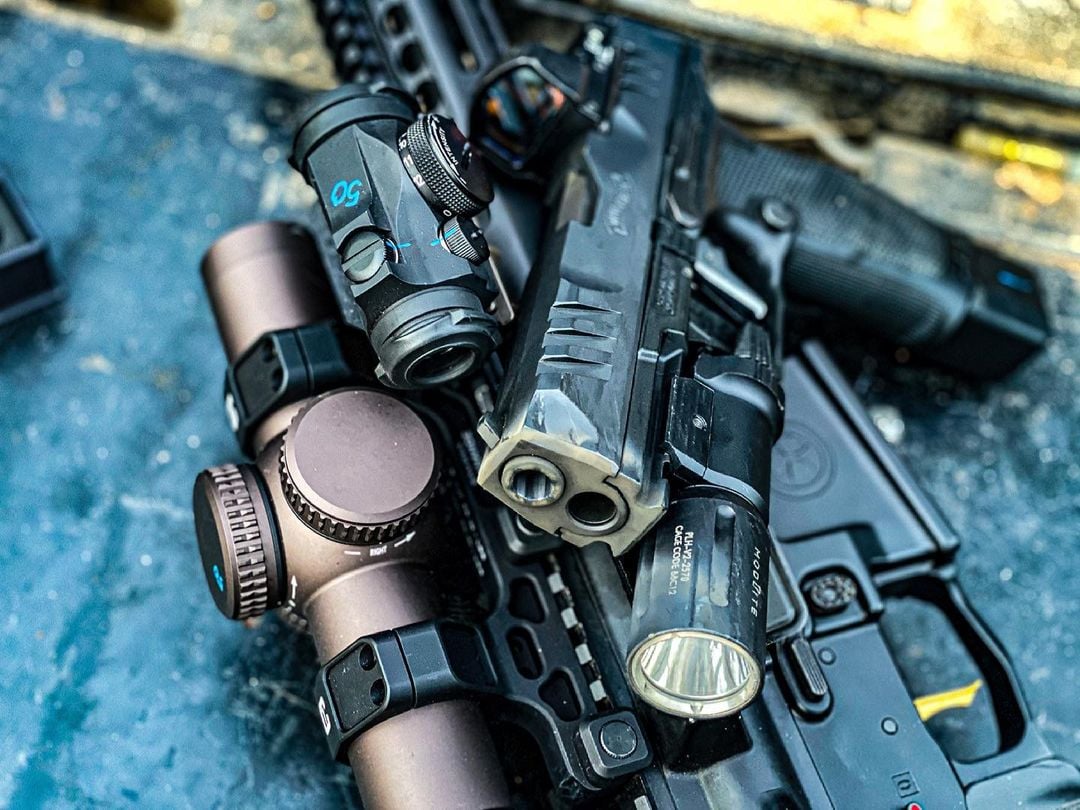
Just a few of the Modlite PL350s all hooked up. – Photo credit to @Modlitesystems on Instagram
The Modlite PL350 Pistol Light: Casting Light on the Subject
The specific light package that we are discussing today is the Modlite PLHv2-PL350 Light package. There are two more models, the PLH5K-PL350 & the OKW-PL350, that are coming out later with different Kelvin color temperatures and features. However, from here on out in this article, we will be referring to the PLHv2-PL350 as just the PL350.
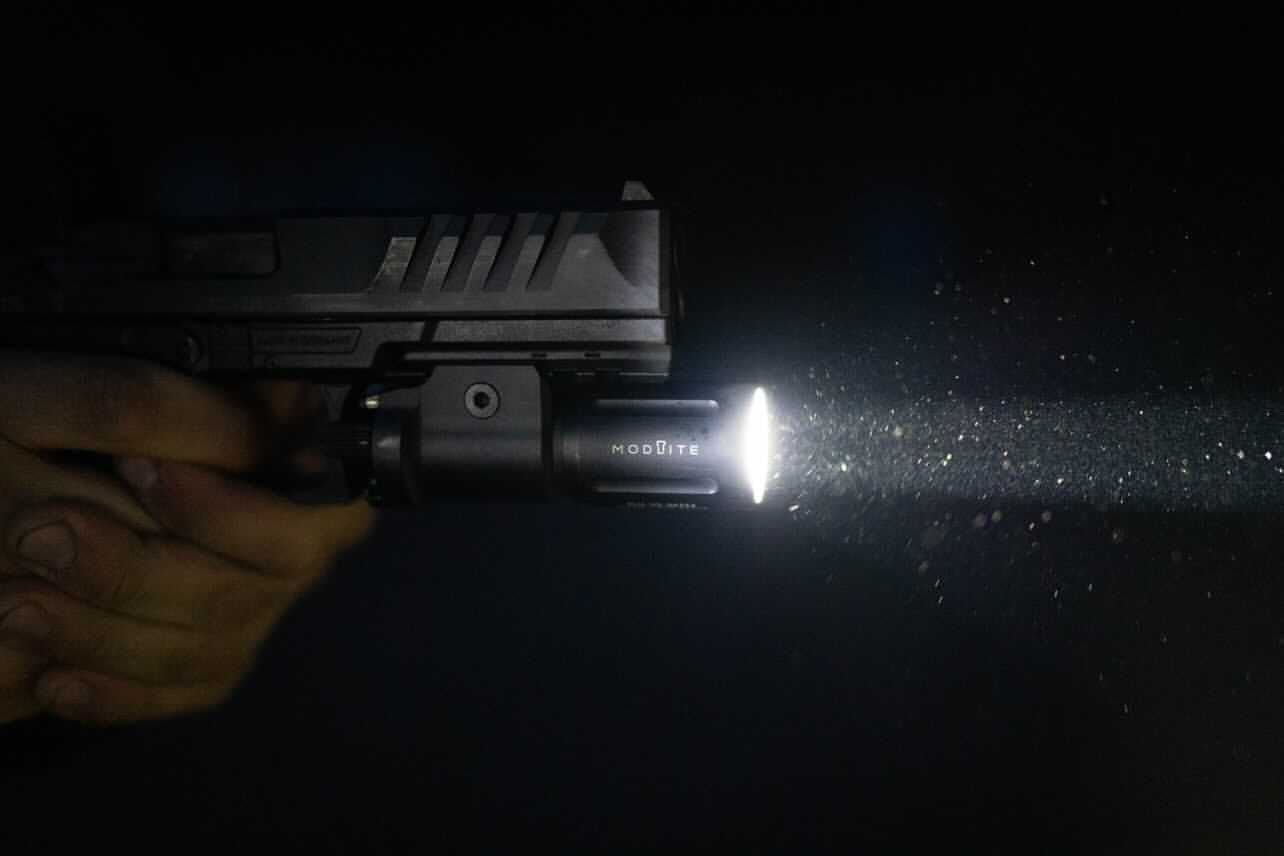
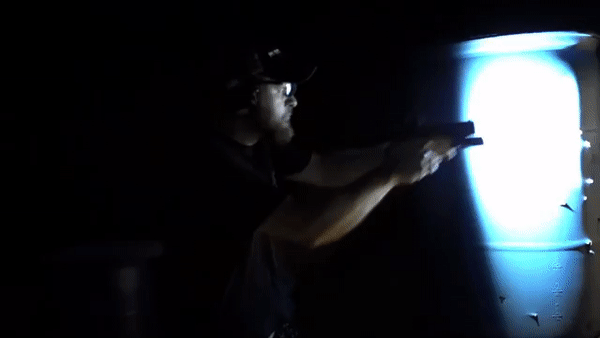
“How far that little candle throws his beams!” – William Shakespeare. He was probably talking about good deeds or something, but we prefer to think he was a Lumen Lackey too. – Photo credit to @Modlitesystems on Instagram
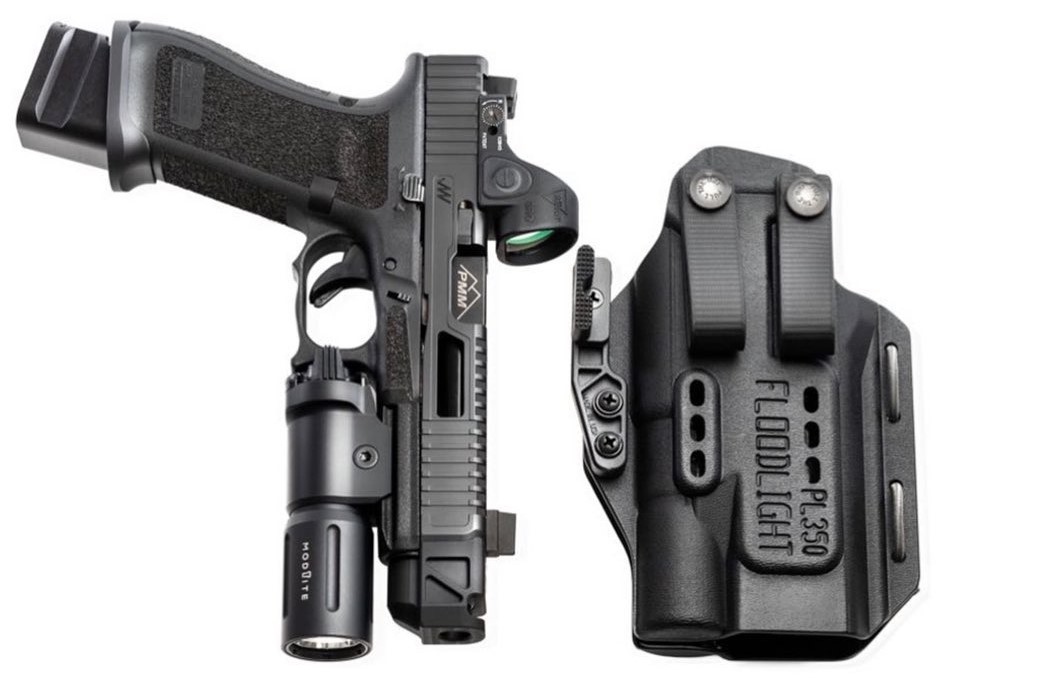
The Modlite PL350 Pistol light comes with a switch and body assembly. In addition to that, the package also includes a 18350 rechargeable battery and a set of PHLSTER ARC Switch paddles. The 18350 battery allows the Modlite PL350 for roughly 35-40 minutes of continued usage.
Packages are available with and without a two-cell XTAR USB charger. The light is an “Out the front” battery change, allows you to quickly replace batteries without tools and without taking the light off the pistol.
Here is a gif of everything that comes inside the Modlite PL350 box and few pictures of it attached. – Photo credit to Modlite Systems
Specific statistics on the PL350 light, for the illumination intellectuals:
5800 Kelvin color temperature
1350 Lumens
54,000 Candela
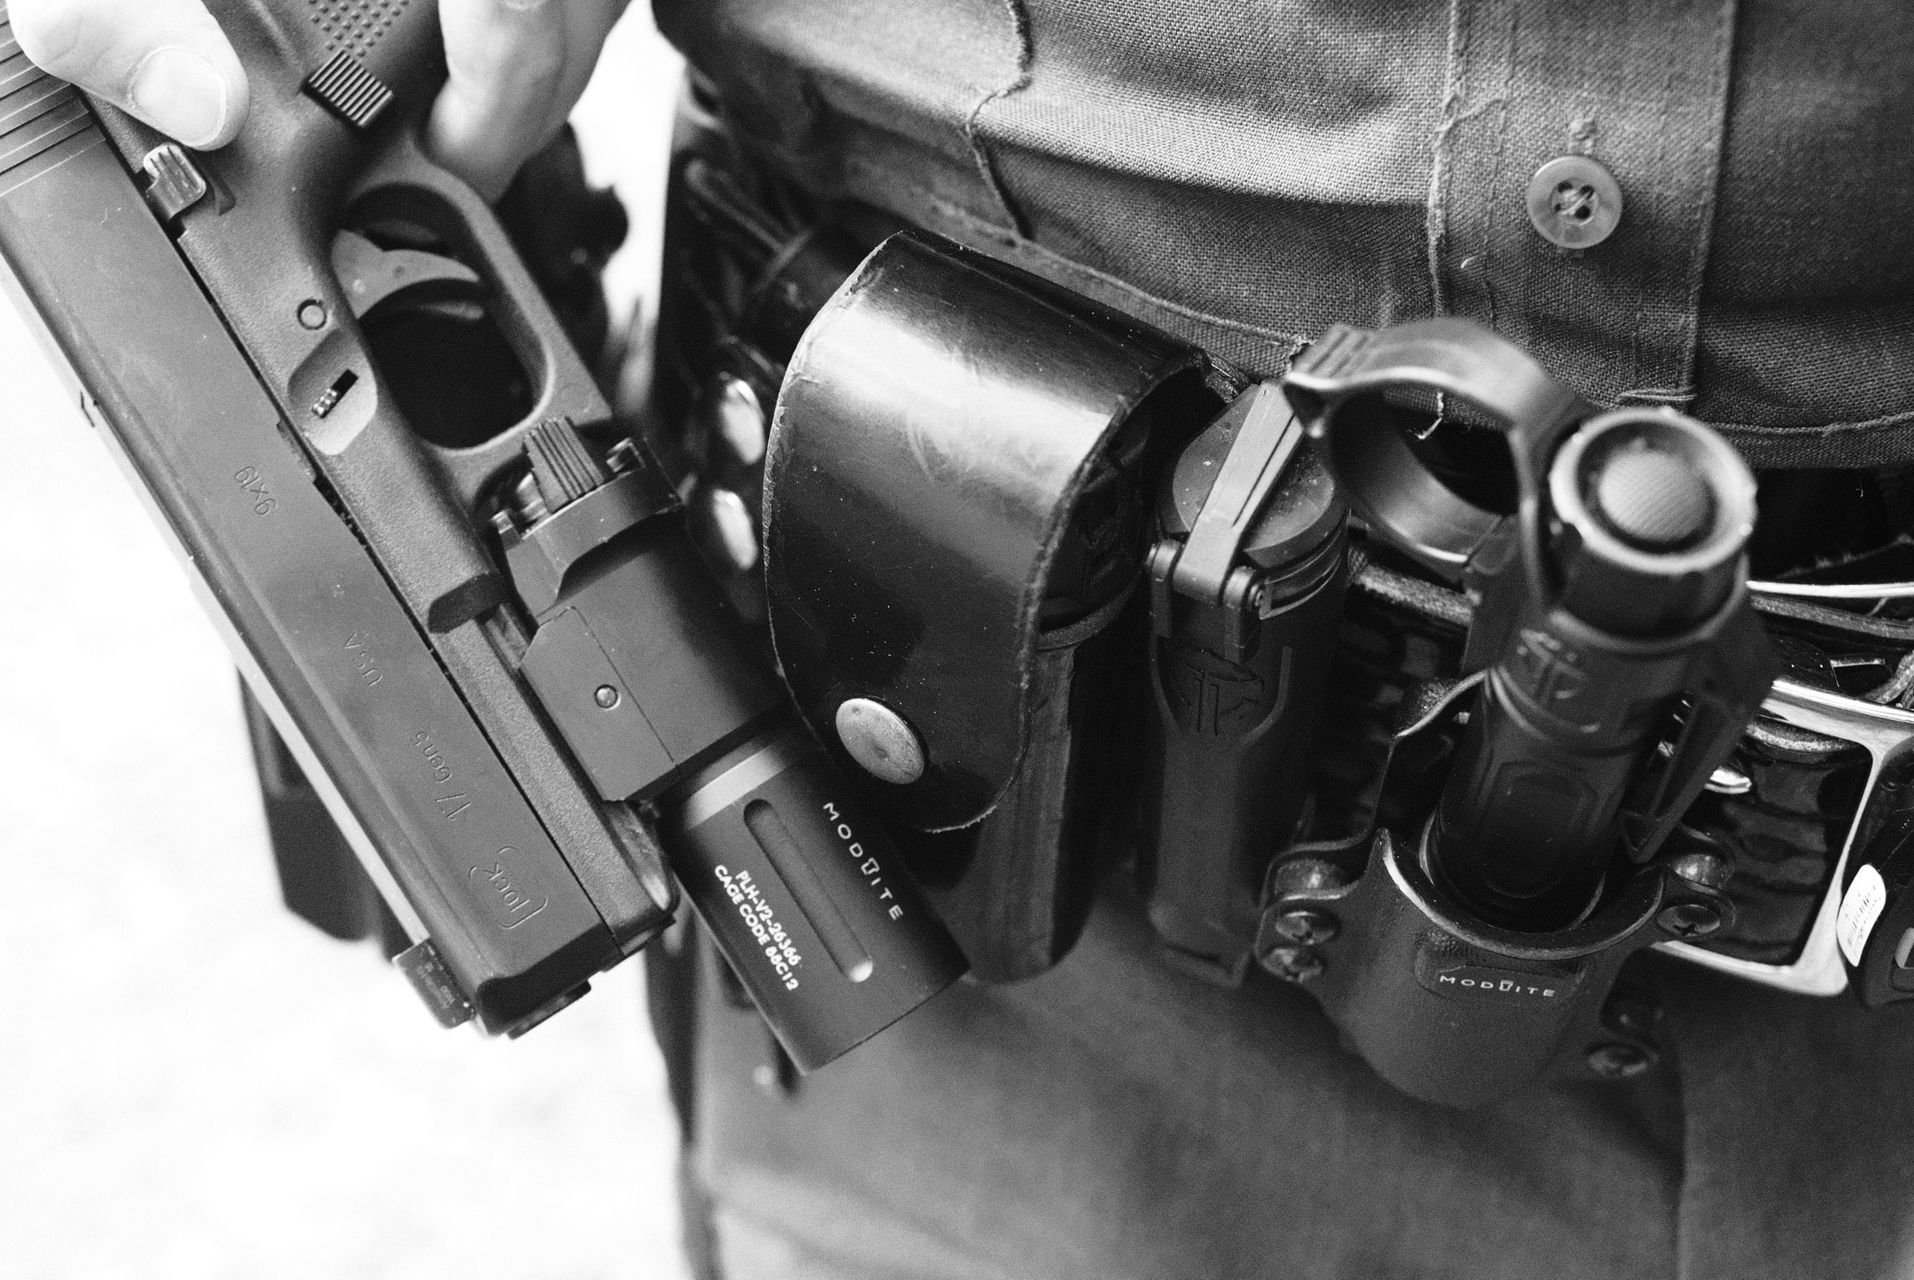
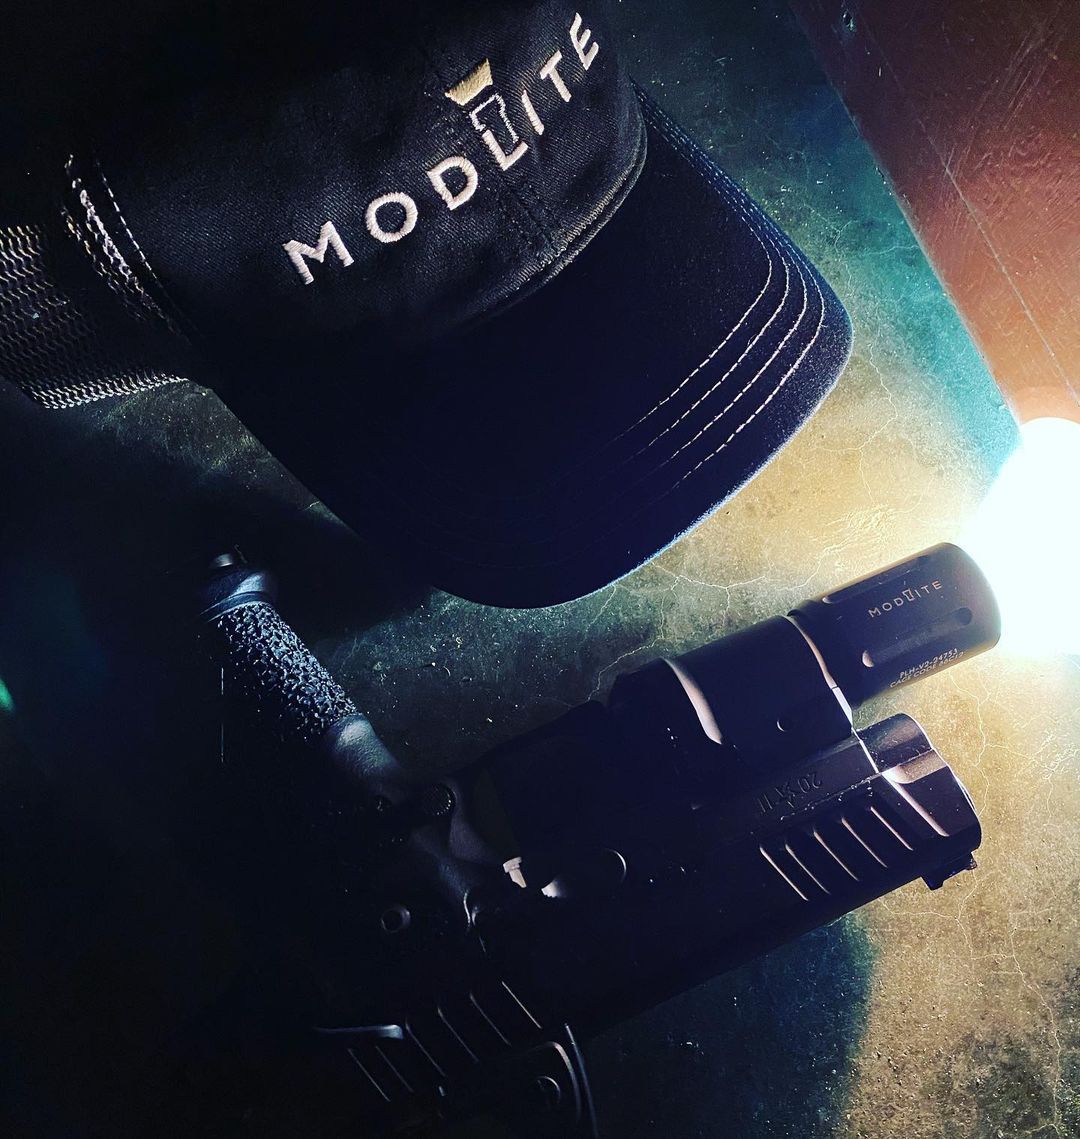
Here is the Modlite PL350 with a duty belt. According to Modlite Systems, the PL350 was tested and fielded by professionals with different agencies. – Photo credit to @Modlitesystems on Instagram
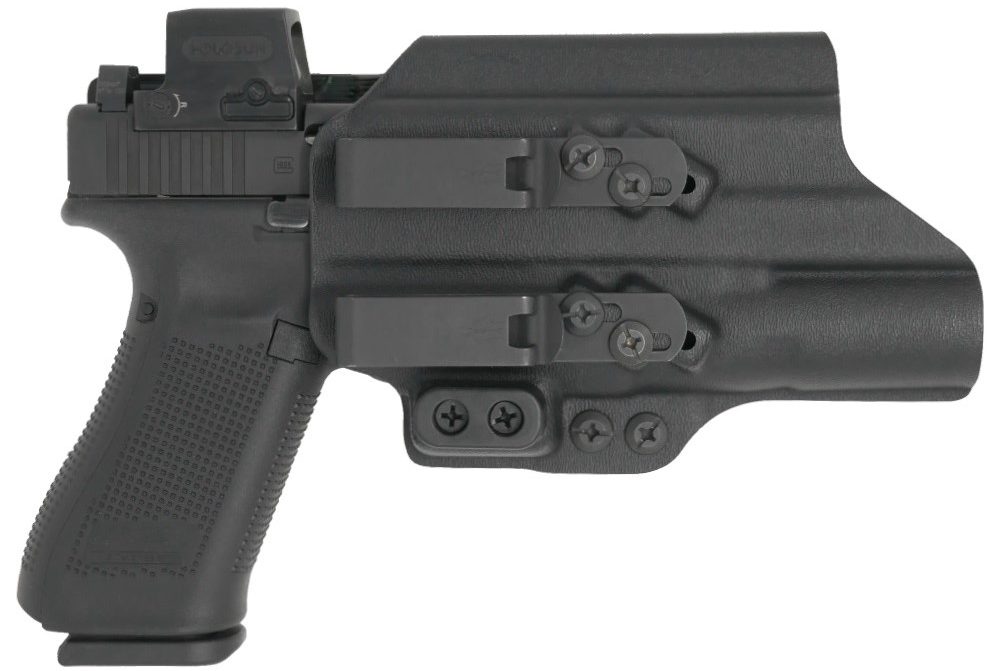
The Modlite PL350 Holster: What options are there?
As with any weapon-mounted light holster, compatibility is always an issue, but few manufacturers step up to the plate. Enter the Modlite PL350 Holster. We will be updating this page as we find more holsters for you.
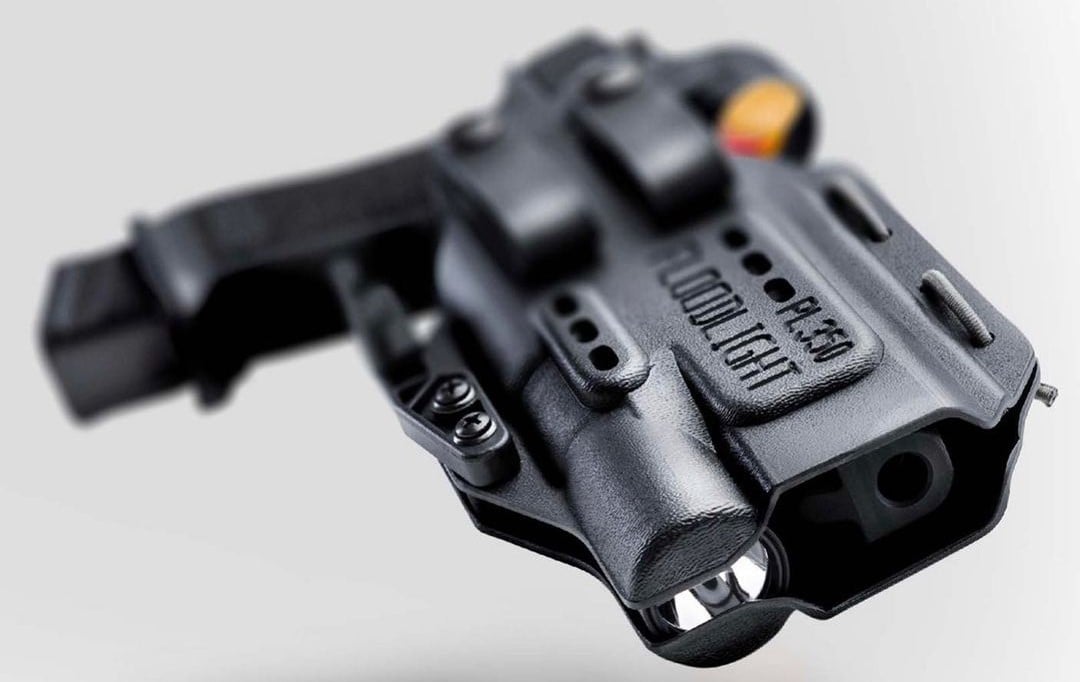
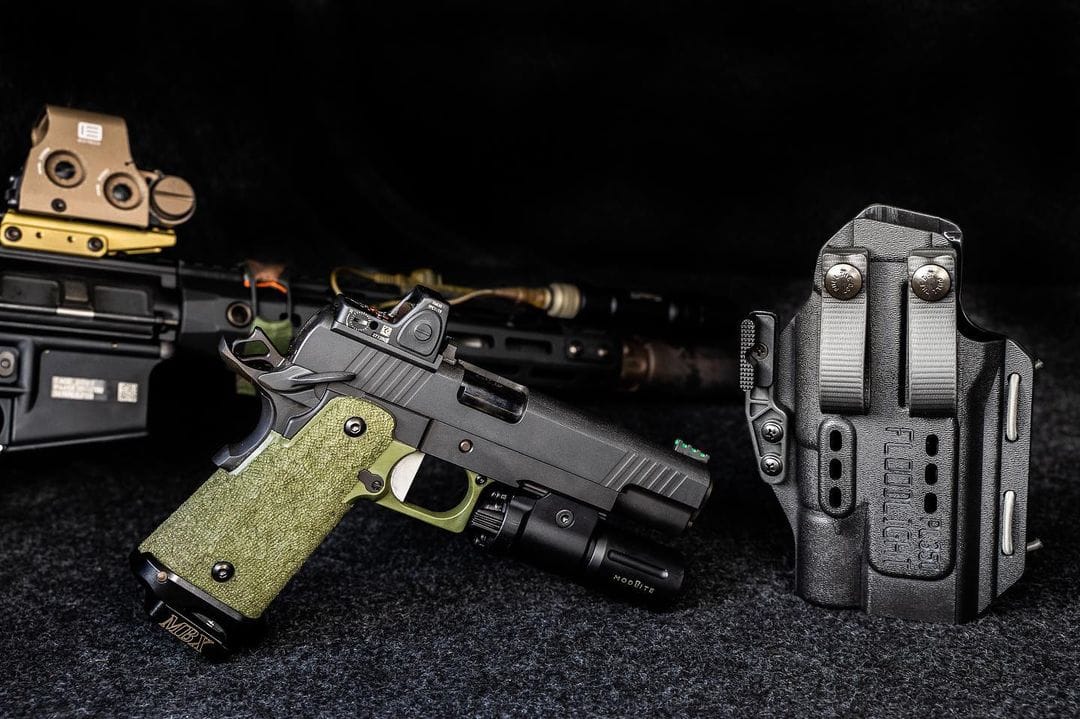
PHLster Floodlight PL350
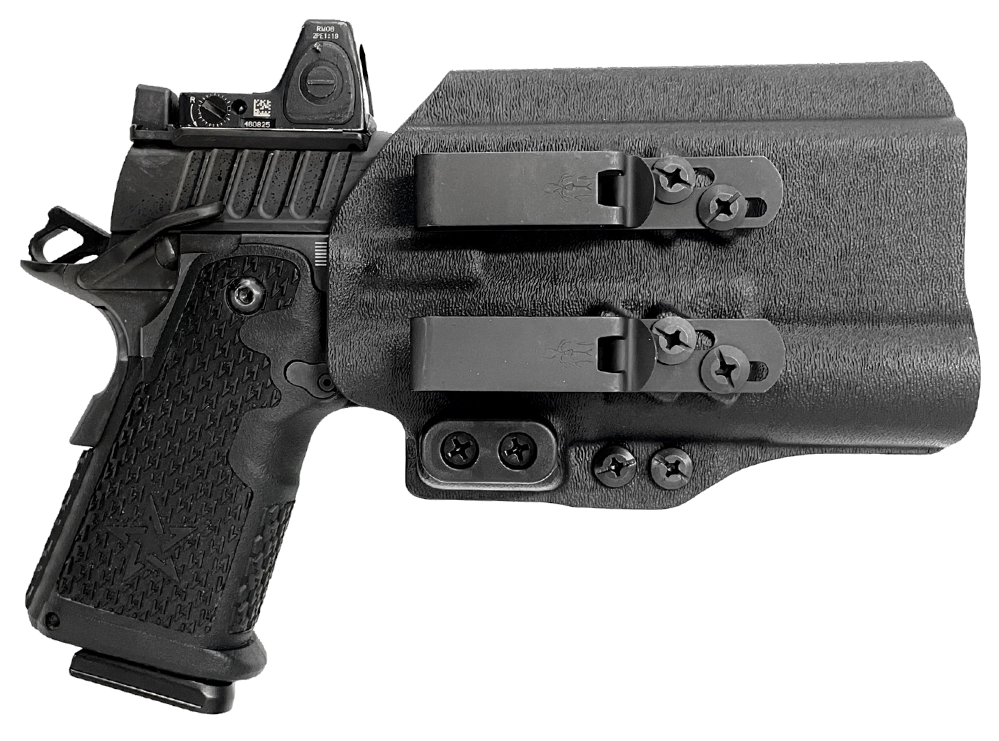
Here is the PHLster Floodlight PL350 Holster. It has soft loops for inside the waistband and belt clips, features adjustable retention, adjustable slide-contact, adjustable ride height, and can be carried appendix inside the waistband (AIWB) or strong-side inside the waistband. (IWB) – Photo credit to @PHLster on InstagramHere is another angle of the PHLster Floodlight PL350 Holster for your viewing pleasure. – Photo credit to @PHLster on Instagram
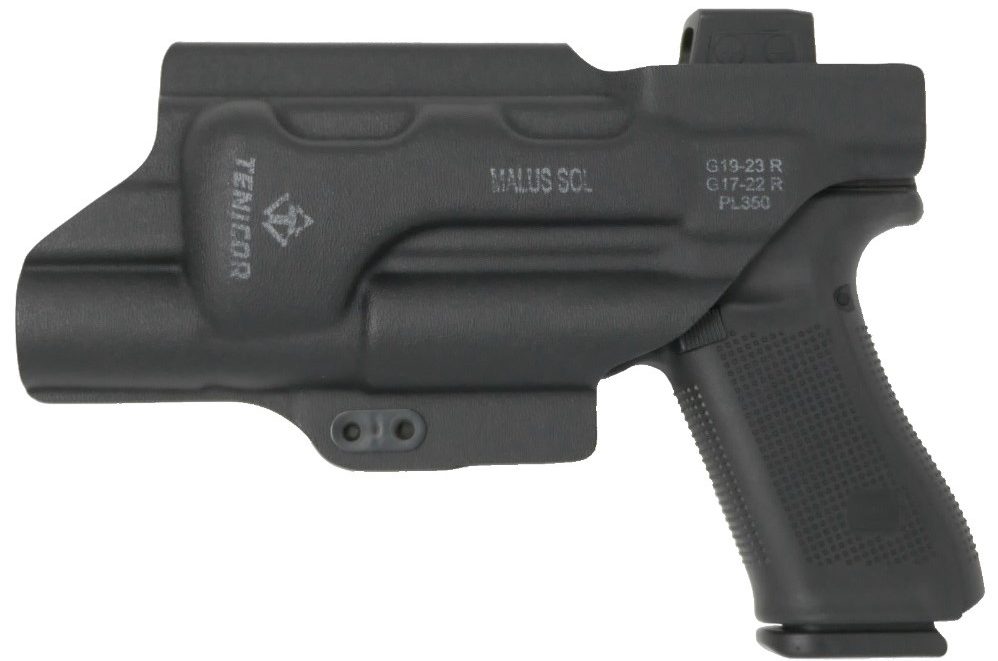
Tenicor MALUS SOL Light Holster for the PL350
MALUS SOL AIWB for various Glocks
More than likely, more than a few of you interested in the Modlite PL350 are Glock geeks; this might pique your interest.
The Tenicor MALUS SOL AIWB Holster for Glock has a Tenicor T1 belt clip for carrying appendix inside the waistband (AIWB), an adjustable camming bar, dual tension screws, and even has room for suppressor height sights if you are into that kind of thing. Completely compatible with the Modlite PL350. – Photo credit to TenicorHere is another angle of the Tenicor MALUS SOL AIWB Glock Holster for you. – Photo credit to Tenicor
MALUS SOL for 1911/2011
If there are a few of you that are Glock Geeks there has to be plenty of you reading this that are 1911 diehards and for good reason!
Tenicor also has the MALUS SOL compatible with most 1911/2011 pattern guns. However, according to Tenicor, it was explicitly designed for the Staccato 2011 family of pistols. – Photo credits to Tenicor
Author’s note, it looks like Tenicor only has the MALUS SOL AIWB for 1911/2011 compatible with the Modlite PL350 in the full 5″ barrel version of this holster as of this writing.
More Pictures and Videos From Social:
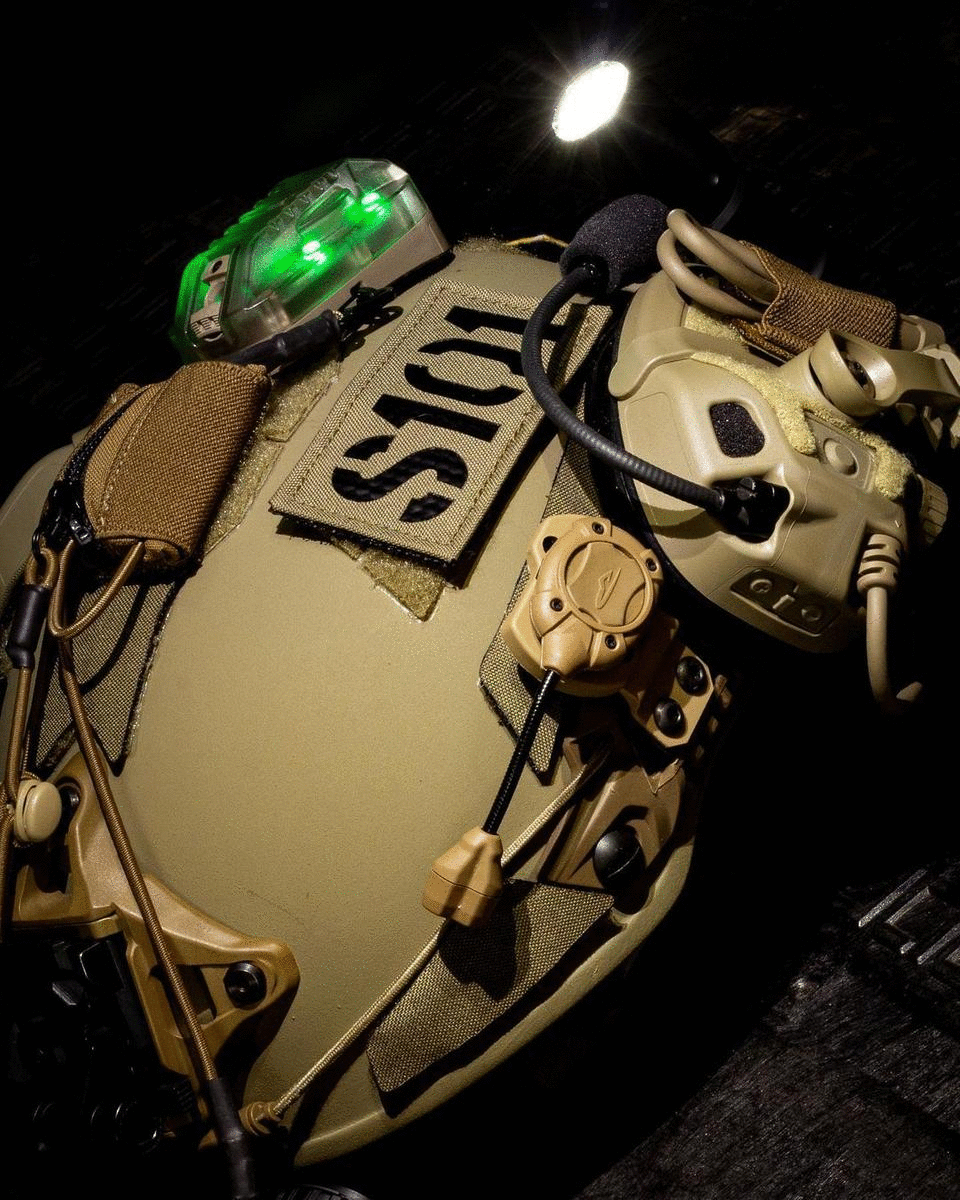
“Today is the day? @modlitesystems @phlster” – Photo credit to @bigtexordnance on Instagram“It has begun” – Photo credit to @mochabear_actual on Instagram“Same, same, different, but the same.” – Photo credit to @sagedynamics on Instagram“Folks were asking about @safarilandgroup fit with the @modlitesystems PL350. Well here you go, this one has a @ghostmendesigns portal in it and zero issues.” – Video credit to @tacticallysound on Instagram“Couldn’t wait for the weekend, got to warm up the PL350. Initial thoughts are that the switching is great, very clicky, and it’s just so…much…light. Very cool. I’ve been wanting a new pistol light to come to market since we started having lowlight matches here locally and this fits the bill. Plus it takes the same batteries as my handheld, so that’s a plus.” – Video credit to @cannon762 on Instagram“Initial impressions are..whoa. We’ve entered a new era.” – Photo credit to @matthelmknives on Instagram“Who’s ready for the PL350?” – Photo credit to @spartannc on Instagram“I didn’t officially make a post about it, mostly because I was on the road home from teaching, but he dropped out Skotos Holster for the @modlitesystems PL350 yesterday morning at 5am. The good news – they are in stock and ready to ship, yes colors too, with no wait times for these. The bad news.. we sold a bunch already in the last 24 hours and certain colors are already sold out. We hope to stock these moving forward as a few other products that are in high demand. Might even see some of these at dealers as well. Should have some OWB options stocked in a few days as well.” – Photo credit to @veilsolutions on Instagram“Modlite Systems PL350 providing the Umbrella lighting for this Galvion Caiman helmet. Green vis and IR strobe marking provided Core Survival Helstar6. I’m a huge fan of Princeton Tec MPLS WL/Red task light. Counterweight is provided by Microbat Systems with their Vampire Flathead. OpsCore AMP providing comms and hearing protection. Sensitive item retention provided by Costa Defense with there Squid Retention System as well a NVG mount retention add to the SRS via an extra shock cord with a split ring to attach to the SRS and a small spring loaded carabiner to connect to the Wilcox mount.” – Photo credit to @shooters101_utm on Instagram
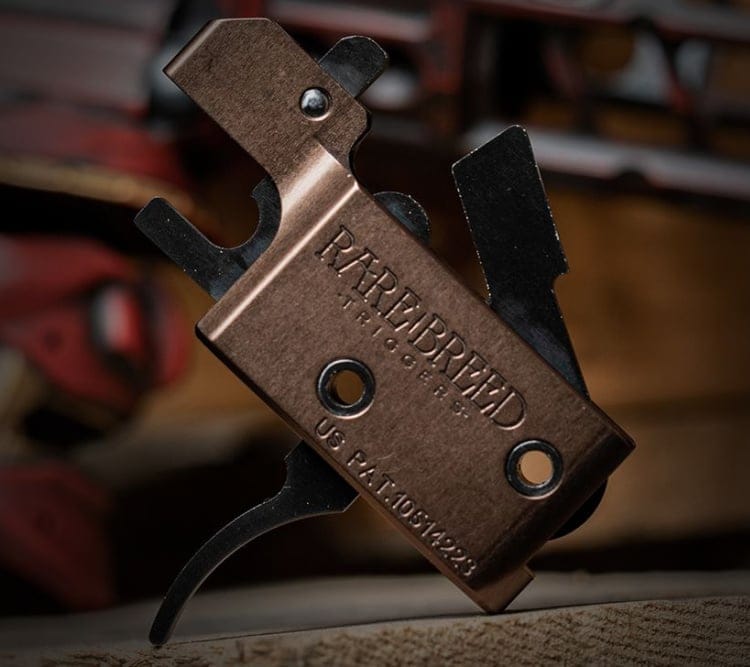
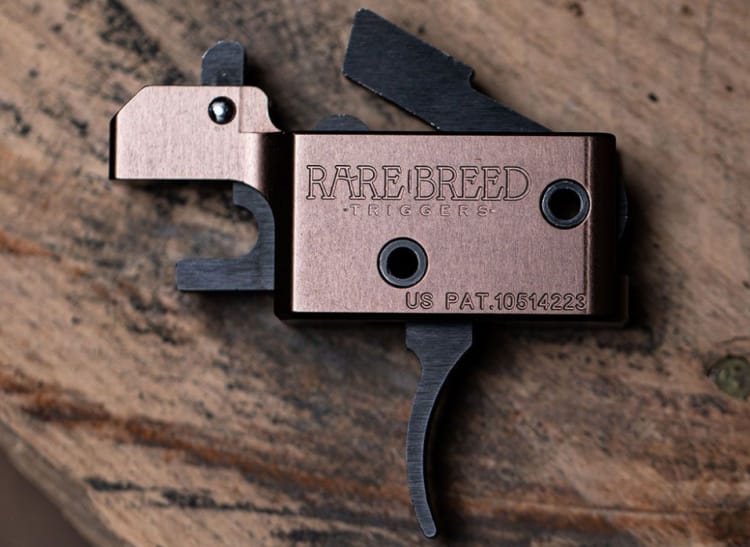
By now, you’ve probably heard of the Rare Breed FRT-15 Trigger https://albertanails.com/slot-online/, if only because of the company’s coming fight with the Feds over the attempt to brand the trigger a “machine gun.” If you haven’t heard about that mess, we have a separate follow-up article on the way to break it down. For now, though, let’s look at exactly what the FRT-15 trigger is and what it does. If you already know this stuff, you’re excused and can go to recess early. If not, read on.
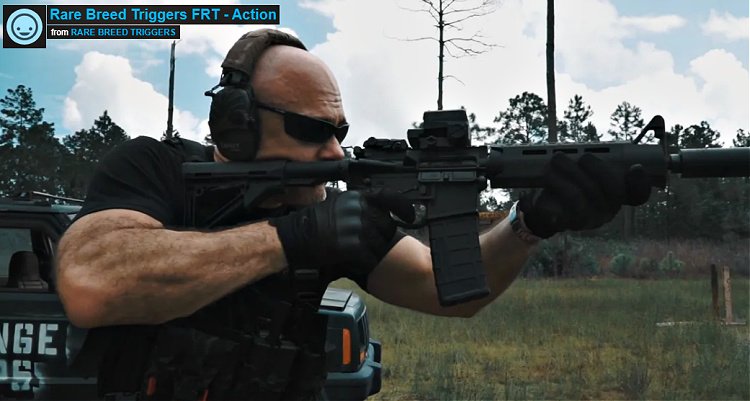
Rare Breed President Lawrence DeMonico puts the FRT-15 through its paces
FRT stands for “Forced Reset Trigger.”
The “15” part means that it’s designed for the AR-15 platform chambered in 5.56 NATO or .300 Blackout. It won’t work in AKs, SCARs, or anything else. Its function is dependent on the design of the MILSPEC AR bolt carrier.
The FRT-15 is designed especially for the AR-15 platform in 5.56 NATO and .300 Blackout.
It MAY work in an AR-9, depending on how the gun is set up. An FRT-9 (for AR-9s) and FRT-10 (for AR-10s) are in the works but not yet ready for manufacture. Rare Breed says that the FRT-15 will NOT work in an AR chambered in .22 Long Rifle, but I saw a guy who had one tuned to 80 to 90 percent reliability on YouTube. You decide for yourself, but when the manufacturer warns against it…
Rare Breed is careful to point out that the FRT-15 may require some tuning to any gun in which it’s installed. “Tuning,” in this case, refers to gassing and making sure you have the proper buffer and bolt carrier. More on that in a minute.
The term “forced reset” is an accurate descriptor of how the trigger works. Your standard AR trigger resets when the shooter releases rearward pressure, thus allowing the trigger mechanism to move forward, whereupon another press of the trigger starts the whole process over. Like you didn’t know that.
The cycle of a standard AR-15 trigger system. This cycle is animated, with a verbal overlay, on the Rare Breed website.
The FRT-15 uses a newly designed hammer that, as it is cocked by the bolt carrier, forces the trigger forward to the reset, along with the shooter’s finger, as the bolt moves forward to chamber the next round. A locking bar prevents the trigger from being pressed again until the bolt cycle is complete. By maintaining pressure on the trigger, the shooter can take advantage of the hammer-assisted reset to dramatically increase the rate of fire. Or not. Based on what I have seen, with some practice, the shooter can manipulate the trigger to fire only one shot or the equivalent of a short burst.
The cycle of the Rare Breed FRT-15. The brown component is the hammer. The green component is the locking bar. Note how the movement of the bolt carrier forces each to engage the trigger, controlling the reset. This cycle is animated, with a verbal overlay, on the Rare Breed website.
Keep in mind that the locking bar’s pressure on the trigger prevents another press until the bolt cycles. Indeed, it is the completion of the bolt cycle that releases the locking bar. Between the hammer and the locking bar, the shooter cannot simply hold the trigger to the rear. It must execute its function for each round fired. So, while the FRT-15 is capable of a prodigious rate of fire, it is still a semi-automatic trigger.
Now, back to the part about tuning your gun so the FRT-15 operates properly.
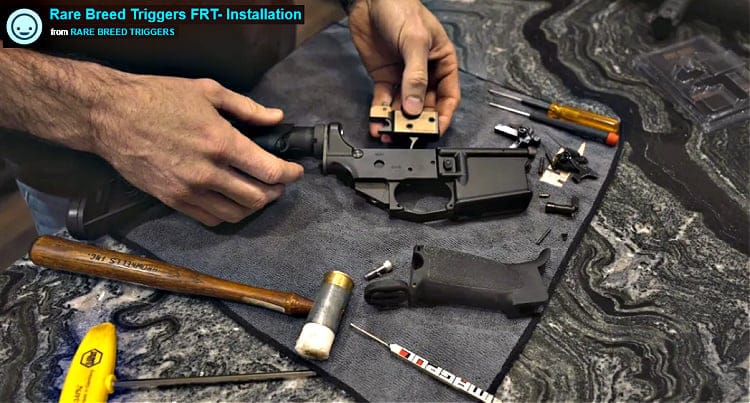
The FRT-15 is a drop-in system, but may require some tuning to each individual gun
Here’s what Lawrence DeMonico, Rare Breed’s president, has to say about it:
You must have a MILSPEC full-auto bolt carrier. This is non-negotiable. If you have a lighter weight or semi-auto carrier with the longer slot in the bottom, it will not actuate the locking bar and the trigger will not work. Period.
Every gun is going to be a little different, based on barrel length, gas system, buffer, and bolt carrier weight. Some guns will run the trigger right out of the box. Don’t be discouraged if yours doesn’t because there are some simple things you can do.
Lawrence recommends an H3 buffer with a standard carbine spring. This is dependent on the next point, which is…
You have to have enough gas. The trigger’s design places a small amount of drag on the bottom of the bolt carrier as it cycles. So, you have to factor this in when working out the right combination for your gun.
Ejection patterns can tell you where your gassing is before you install the FRT-15: If you’re ejecting at 1 o’clock, you’re way overgassed; if you’re ejecting at 4 o’clock, you have the opposite problem and you’re way undergassed; 2:30 or 3 o’clock is the sweet spot and that’s where you want to be before installing the trigger.
The gas/buffer interaction is something you can play with. If your gun isn’t cycling properly, you have some choices: get a lighter H2 or H1 buffer; use hotter ammo; or open up your gas port. You can also speed up or slow down your rate of fire by adjusting these combinations.
As noted above, part of the tuning is your own trigger pull. If you have a death grip on it, the bolt won’t function properly, and your gun will malfunction. Keep your trigger pull between five and ten pounds.
Finally, Lawrence acknowledges that some shooters may have to employ the services of a gunsmith or armorer. Again, there are several variables, and every gun is going to be different.
Are there any problems with the Rare Breed trigger?
If you’re researching the FRT-15, you may run across some folks who have had problems with the locking bar spring. There was an issue caused by stacking tolerances in some ARs, which resulted in the spring kinking when the locking bar traveled further than it was designed to. Rare Breed addressed the problem by modifying the housing. All FRT-15s shipped on or after 1 March 2021 have the modified housing, thus fixing the problem that some people had. Those with a trigger from before that time were provided with a modified locking bar which also solves the problem.
I saw several people who addressed the problem on their own with homebrew modifications and fixes. Some worked better than others. Do what you want, but it looks to me like Rare Breed has addressed the problem and will take care of anyone who has experienced it. Keep in mind that these folks are only a small fraction of those who bought the trigger, so, while it is a problem, it is not widespread and appears to have been fixed. I offer this more as a PSA than anything. I have no personal skin in the game when it comes to Rare Breed, but the problem with the locking bar spring came to my attention and they seem to have handled it conscientiously.
Having said that, the vast majority of customers have had zero issues with the trigger. While researching, I found a lot more people who loved it than people who didn’t. And many of the folks who had the locking bar problem either fixed it themselves or let Rare Breed do it for them, resulting in the happy face.
All-in-all, the FRT-15 looks like a helluva lot of fun. But, as you might expect, the ability to achieve that higher rate of fire comes with some trade-offs. Accuracy is number one. If you think you’re gonna roll out there and drive tacks with this thing…well, you’re not. Depending on your range to target, you’ll be doing well to score a hit 50 percent of the time. You’re gonna have to practice. A LOT. Which brings us to the second point, this thing burns through the ammo. If you have it to burn, then good on ya. But it will take some time and some ammo to get the accuracy you want. Or should want. Finally, if you want to fire one round at a time, you will have to practice that too. I saw some guys who had gotten it down, but they had to put in the work.
Rare Breed has sold tens of thousands of these triggers and I’m glad to hear that. Glad to hear that someone’s innovation and hard work paid off. Glad that shooters who want a product like that can get it and, hopefully, benefit from it. Glad the company is backing up its product the right way. But, as I mentioned earlier, the AFT (snicker) is trying to throw cold water on everyone’s fun. More on that soon. Hopefully, my editor will insert a link to that article HERE when it becomes available.
Is this a machine gun? We’ll talk about that in the next article
Let’s talk red dots. Specifically, let’s talk about the differences between an open and enclosed red dot optic. Red dot optics come in lots of configurations and designs with various colors, reticles, and designs that range from tubular to square, and most importantly, today, we are talking open and enclosed optics. We’ll cover the benefits of each design as well as the downsides and where they fit most appropriately in the world of defensive, duty, and competitive firearms.
Open Vs. Enclosed Optics
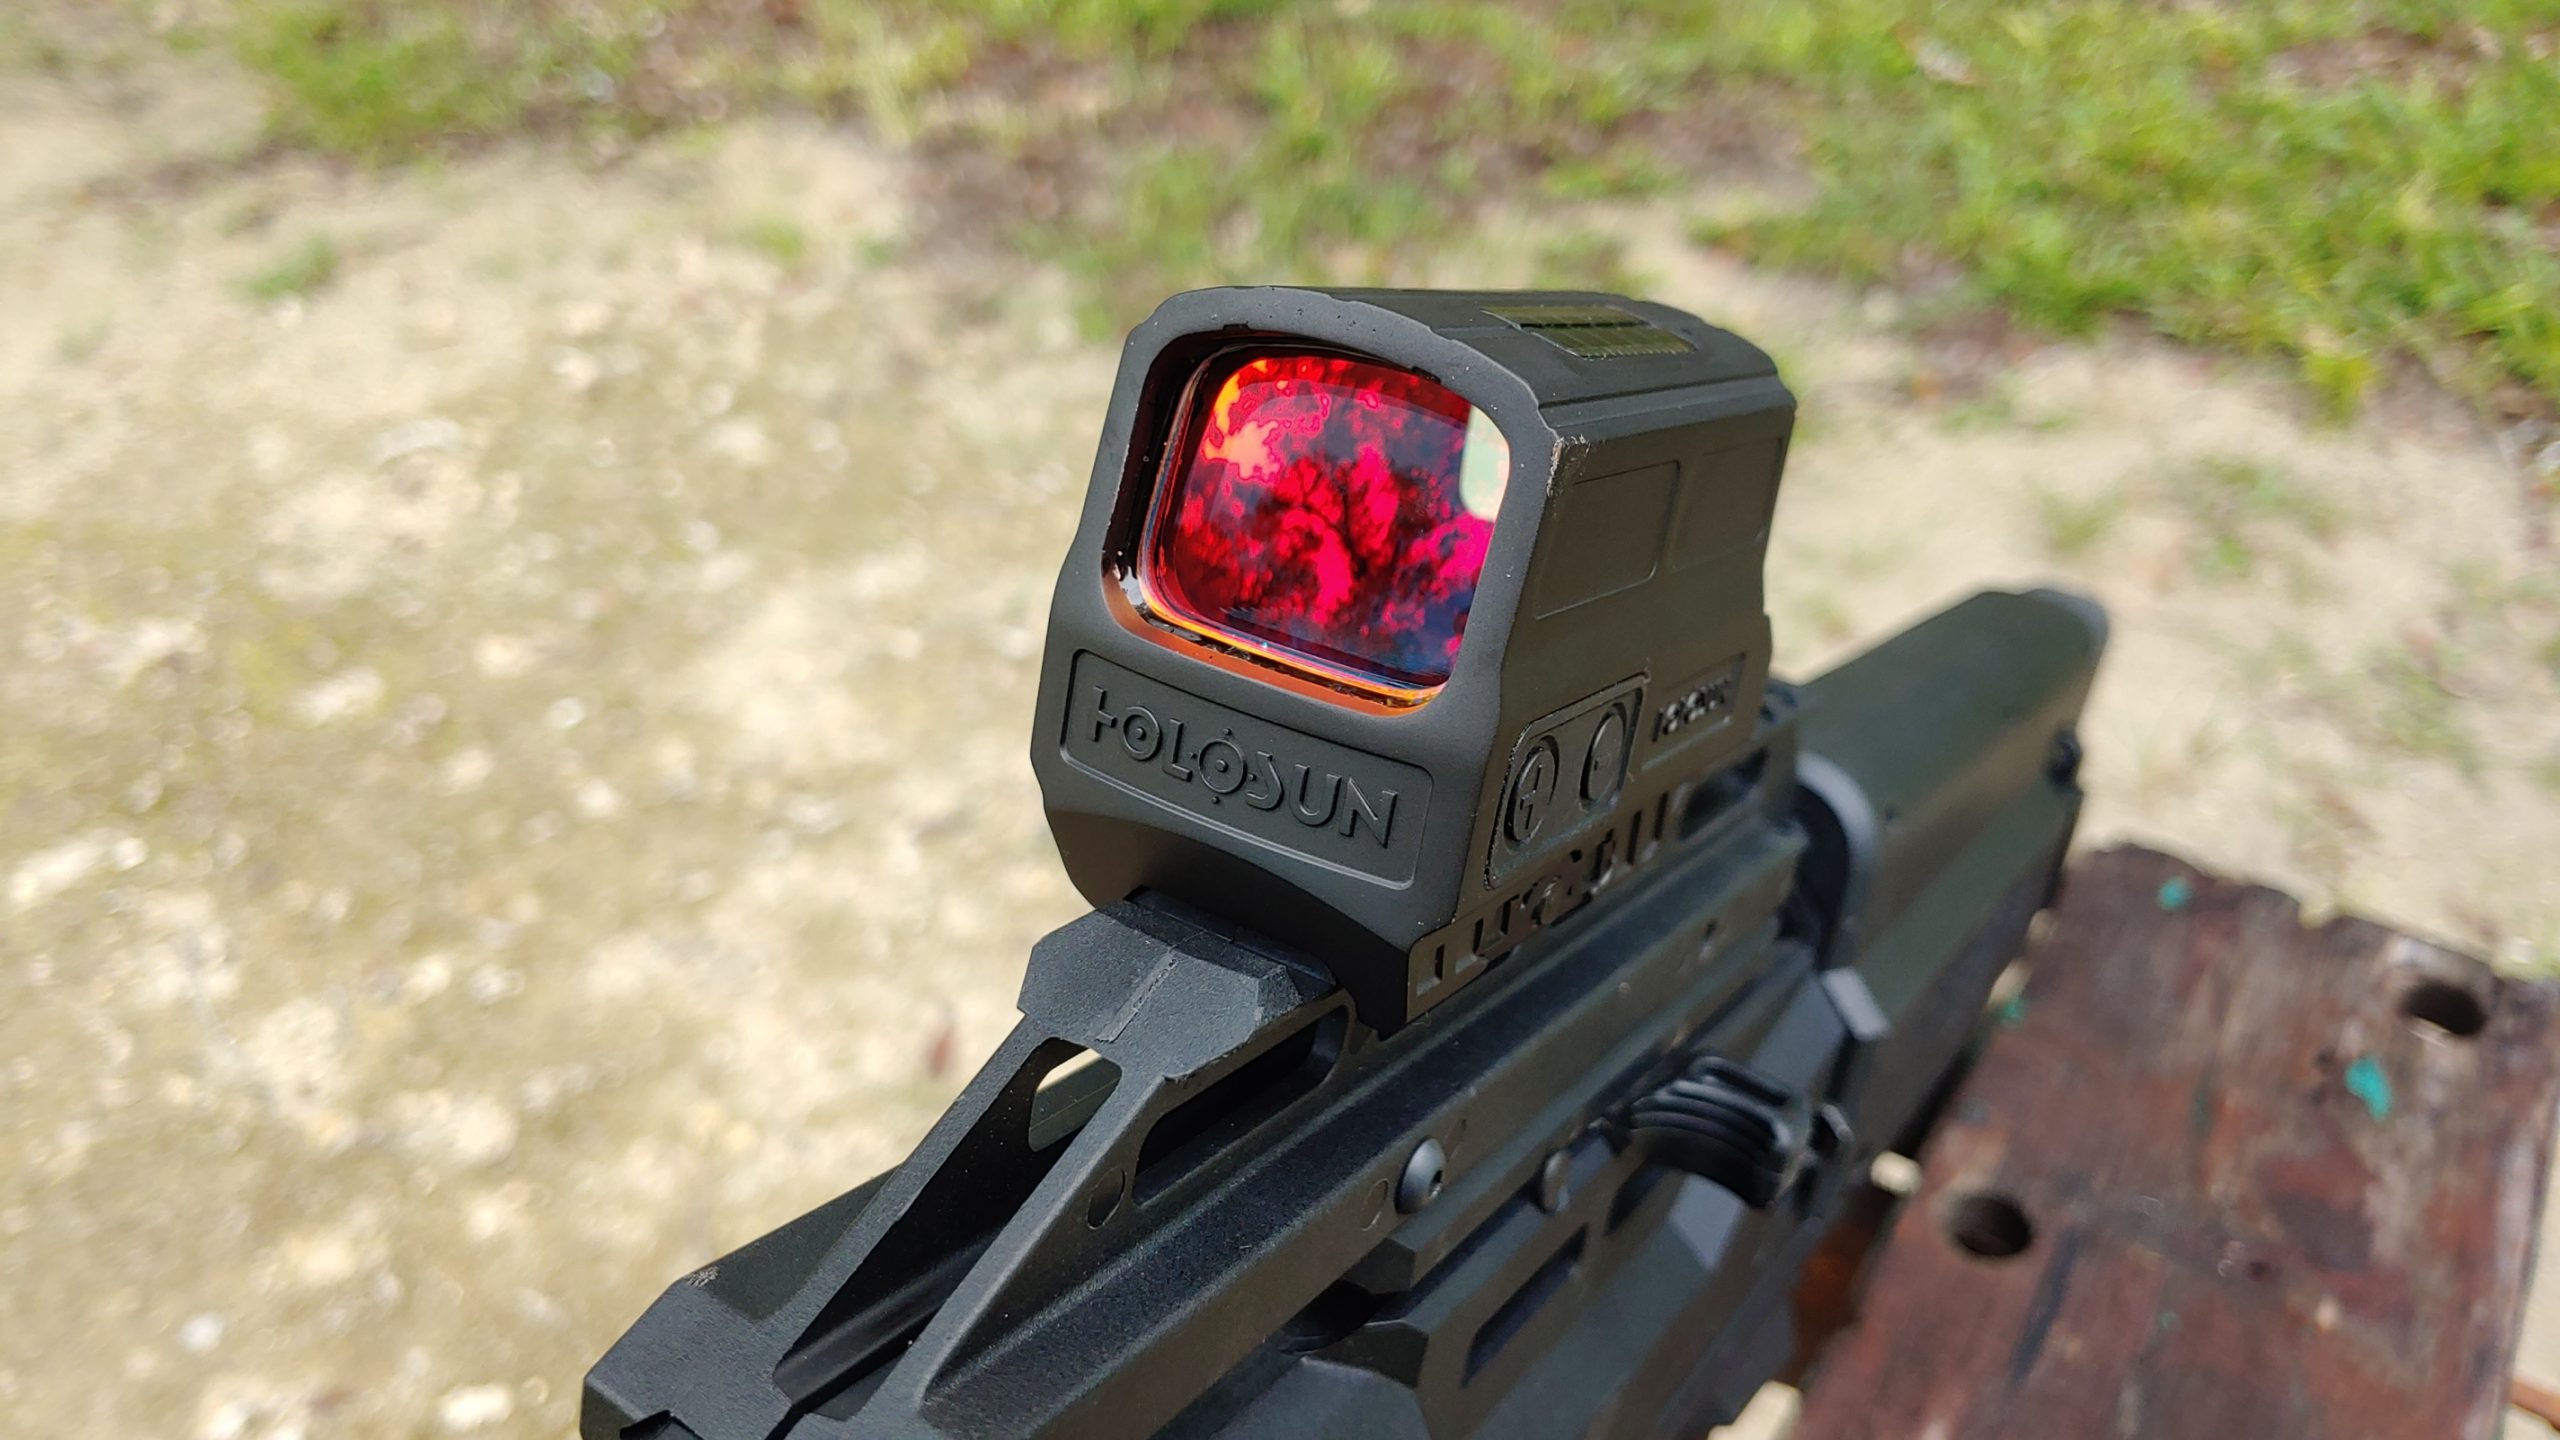
Let’s define open and enclosed optics before we dive too deep into the subject. Open optics in the world of red dots refer to the lack of a hood over the emitter. These are most popular with handguns. Optics like the Holosun 507C, the Sig ROMEO1PRO, and Trijicon RMR all have open emitters.
Sig Sauer AXG with Romeo1Pro red dot sight.
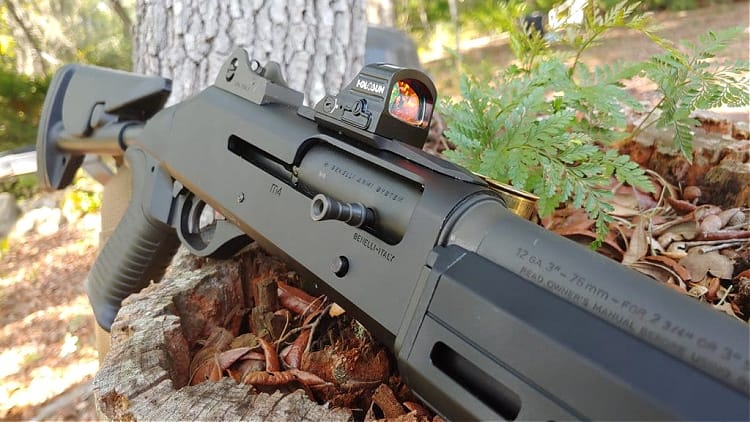
Open emitter optics are not just dedicated to handgun optics, but some rifle optics feature an open emitter. Notably, the Holosun HS510C sports an open design and is intended for long guns.
Enclosed optics feature an enclosed emitter that utilizes a hood-like system and an additional lens. This protects the emitter and ensures nothing can come between your lens and emitter. The closed emitters are more common with rifles, and optics like the Holosun 512C, AEMs, Sig Romeo5, and Aimpoint series all use enclosed emitters.
Enclosed optics mean bigger optics.
Enclosed optics might be more popular with long guns, but pistol-sized optics exist. The Holosun 509T, Aimpoint ACRO, and Sig ROMEO2 all utilize some form of the enclosed emitter. These ultra-small optics can be readily and reliably used on long guns.
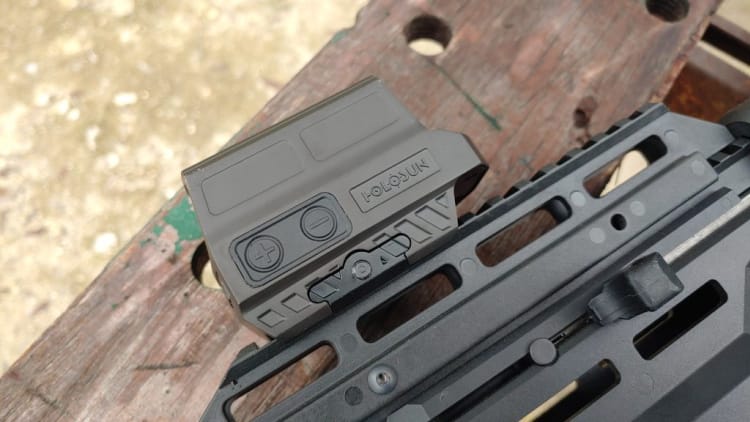
Today we will be using a variety of optics to compare and contrast the benefits and downsides of enclosed and open optics. I’ll be using the Holosun HS510C, a long gun-oriented red dot optic that utilizes an open emitter. Besides it, I will use the Holosun 507C as a mini red dot with an open emitter.
The perfect shotgun and the perfect optic.
For enclosed red dot optics, we will compare the HS512C and the Holosun 509T. The 512C is a long gun optic, and the 509T is a micro-sized optic.
Benefits of an Open Optic
Let’s talk about the main benefits an open emitter optic offers over an enclosed optic. The lack of a hood and second piece of glass cuts weight a fair bit between open and enclosed optics. For example, the HS510C is approximately ten percent lighter than the 512C. For rifle optics, this isn’t a big deal but notable.
On handguns, no one wants a boat anchor as a weapon. The difference in weight between the 507C and the 509T is .22 ounces. That’s not much, but it does provide a clear difference between the optics.
Open is light and easy.
As you’d imagine, the open optics are smaller in general than the enclosed optics. The dimensional differences are few, but a smaller optic tends to be a less obtrusive optic. The lack of a hood and a second lens does provide some benefits worth noting.
First, the lack of a hood does help open up your peripheral vision a slight bit. With rifles, it can be easier to get a compromised view through the optic in awkward situations. This can be slightly more appealing when you are shooting from awkward positions behind cover.
The 510C works well on lots of guns.
Open emitter optics also grant you a clearer overall view. The lack of a second lens helps keep things nice and clear. A single lens provides less distortion, and it’s a nice clear view through optics like the HS510C.
Finally, a lot of open optics tend to be cheaper than enclosed optics. For example, the Trijicon RMR is cheaper than the Aimpoint Acro series, but both are duty-grade optics.
Benefits of an Enclosed Optic
Red dot optics work via an emitter casting a red dot onto the lens in front of it. It’s very simple, and all you really need is a single lens. However, with a hood and second lens, anything that gets between the emitter and the lens can cause the optic to fail and eliminate your reticle from appearing on the lens.
Enclosed emitter red dot optics offer higher levels of reliability than other pistol-sized red dots.
This could be rain, dust, snow, and whatever else you might run into in the big wide world of unpredictable environments. A drop of rain on the emitter can cause your reticle to spatter and starburst. With no reticle, an optic is quite useless. With an enclosed optic, this is not an issue at all.
The emitter remains protected by the hood and second lens. This level of protection ensures the highest level of reliability. Nothing can stop you, and you shoot in the rain, snow, and sleet without complaint.
That’s one of the few benefits of this design, but it’s remarkably important for duty use and when loves are on the line.
Enclosed increases reliability.
That’s the most significant benefit, but the enclosed pistol optic does offer one advantage over opened. The enclosed design forces you to look through the optic and allows you to find the dot a bit easier. It’s a minor advantage and really only applies to new pistol red dot shooters. Once you figure out proper presentation, then the enclosed optic does offer that advantage.
Which for What?
When choosing an optic, you have to consider a few things.
What weapon is it being mounted to?
What size do you need?
Which manufacturer provides the features you want?
What’s its purpose? Purpose is where the biggest difference between the open and enclosed optics appears.
The HS512C is a duty-ready optic.
On handguns, your choice of miniature red dot isn’t nearly as important as on a long gun. Concealed carriers have a handy dandy garment and holster to protect the emitter. Soldiers rarely use handguns, and the biggest difference would be apparent for police. We’ve seen military, and police forces utilize optics like the open Trijicon RMR without issue for years. You’re unlikely to run into problems, but if you want the best and most reliable optic, then an enclosed emitter is the way to go.
With long guns meant for duty, it’s all about the enclosed optic. These rifles are slung to your body and exposed to everything. The enclosed optic provides more durability and reliability in any situation. That makes it tough to justify an open optic on a duty rifle.
The 507C represents a great pistol optic enclosed or not
For home defense and competition, an open optic works fine. For home defense, it’s not likely to be exposed to the elements, and competition doesn’t have the same risks as duty use. In fact, optics like the HS510C have become quite popular for competitive use in PCC divisions. The clear lens and great peripheral vision often make finding those small PCC targets fast and easy.
Open the Door or Close it
The presence of an open or enclosed emitter is a small but important detail. Considerations like durability, mounting options, clarity, and beyond also need to be considered. It’s plenty easy to make crappy optics in open and enclosed variants; however, once you’ve narrowed down who makes good red dot optics and who doesn’t, then you can start considering whether to go enclosed or open.
Which do you prefer? Let us know below and let us know why.
If a new vertical holster system is on your Christmas list, you may want to check out Galco Holster’s VHS 4.0. They say their 4.0 shoulder holster has a new design.
Vertical Holster System 4.0. (Photo courtesy of Galco Holsters)
Galco’s Description
Galco’s original VHS (Vertical Holster System) was field-proven across the globe from Afghanistan to America. Thousands were used by US military personnel fighting in Iraq and Afghanistan. Countless others are in use by US and international law enforcement, being particularly popular among police helicopter pilots. The VHS also provides an alternative for those who want the concealment of Galco’s Miami Classic but prefer the traditional vertical carry style.
Now, after over a decade of experience with the VHS, Galco has improved it further. The VHS 4.0 brings a reshaping/redesign of the harness straps, replacement of harness screws with a key-hole harness fastener attachment, and the addition of an innovative new tie-down system.
A key component of the VHS 4.0 shoulder system is its spider harness. All four points of the spider harness can pivot independently and are connected by our clover-shaped, trademarked Flexalon swivel back plate. This, along with our patented swivel connectors, results in a perfect fit and lasting comfort for virtually all body sizes and shapes.
The 2.75″ wide harness straps on the VHS 4.0 have been recontoured to enhance both comfort and concealment. The VHS 4.0 also features Galco’s improved key-hole harness fastener system that replaces the earlier screw-and-post system, resulting in greater security, ease of assembly, and greatly reduced chance of fastener loss.
VHS 4.0. (Photo courtesy of Galco Holsters)
The VHS 4.0 also introduces a new tie-down system that is simple to use, compact and concealable, and fully ambidextrous.
The VHS 4.0 comes complete with vertical holster, harness, ammo carrier, tie-downs and a set of harness fasteners. Fully modular, optional accessories and components for the VHS 4.0 may be purchased separately.
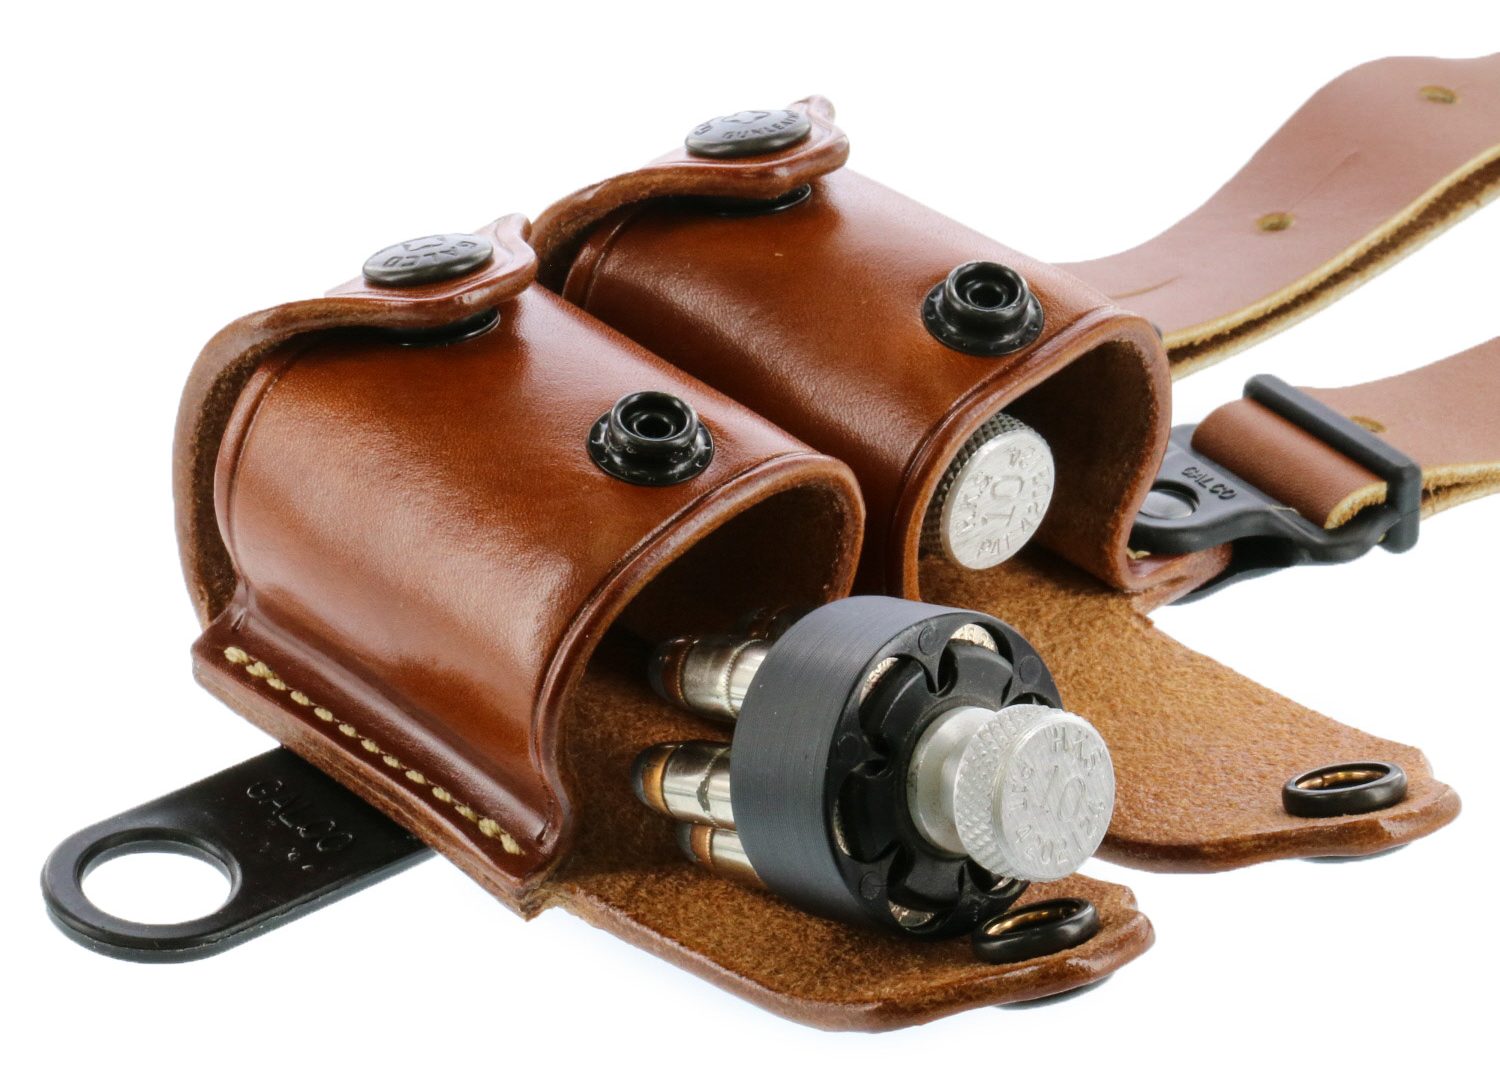
Double speed loader carrier for revolvers. (Photo courtesy of Galco Holsters)
Whether you patrol metropolitan America on the ground or from the air, exercise your Second Amendment right to bear arms, or stalk the hunting fields of the world, the VHS 4.0 will help you and your handgun stay secure in an often-dangerous world.
Made for semiautomatic pistols and revolvers, the VHS 4.0 is ambidextrous and available in tan or black finish.
Shoulder Holder Features
Premium Steerhide construction
Vertical handgun carry
Vertical double magazine carrier with secure flaps
Double speedloader carrier for revolvers
Converts for right or left-hand use
Comfortable 2.75″ wide harness with swiveling Flexalon backplate
Accepts optional accessory attachments
Includes tie-downs for both holster and ammo carrier
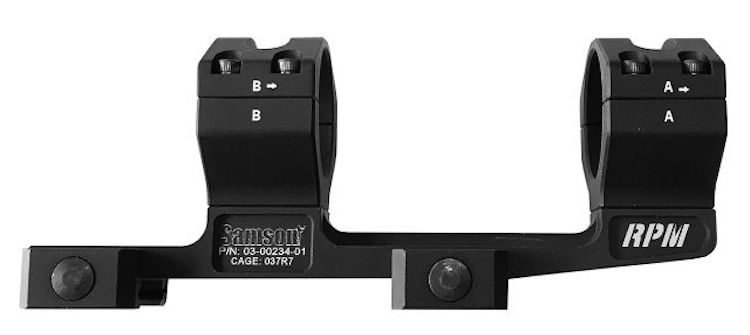
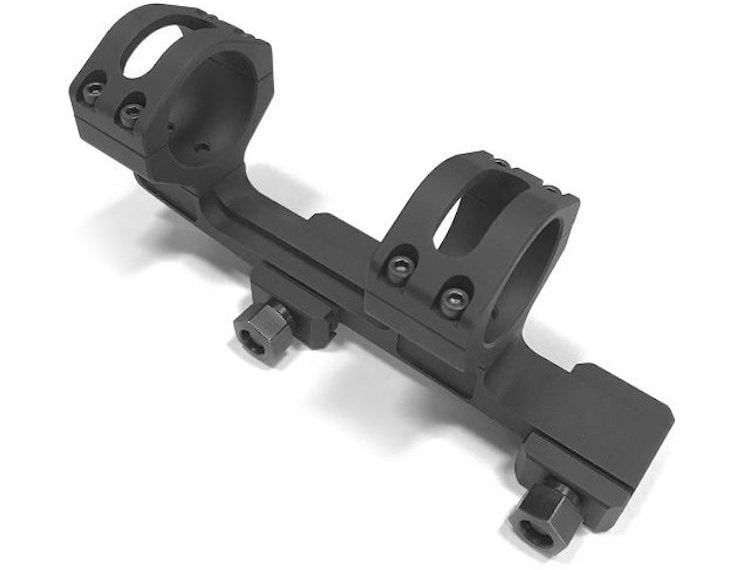
Samson Manufacturing recently introduced their Rapid Precision scope mount. The mounts, with a 2″ offset feature a lightweight design.
Rapid Precision Mounts (RPM) with 2″ Offset. (Photo courtesy of Samson Manufacturing)
From Rapid Precision
Precision machined from 6061-T6 aluminum, these scope mounts are perfect to mate your favorite optic to your favorite firearm. Integrated into the clamp cross bolts are two steel recoil lugs to eliminate scope base movement during heavy recoil to better maintain zero. The scope ring bases utilize threaded steel inserts to prevent the internal threads from being stripped by the ring cap screws, extending the lifespan of the rings if you decide to change out the optic.
Requires 7/64″ hex wrench for rings and 1/2″ wrench for thumb nuts.
Rapid Precision Mount (RPM).
RPM Scope Mount Features
Lightweight design
Offset mount to achieve proper eye relief
Dual steel recoil lugs integrated into cross bolts
1/2″ steel cross bolt thumb nuts
Threaded steel inserts for ring base
1913 Picatinny MIL-SPEC
Made in New Hampshire, U.S.A.
Specifications
Material: 6160-T6 aluminum
Finish: Type III Class 2 Hard Coat Anodizing
Samson says the 34mm, 35mm, and 1″ rings with 2″ offset will be coming soon.
The new scope mount will cost you $148.95 plus shipping. There were some questions as to the actual weight (what is lightweight?). The shipping weight is listed as 0.95 pounds on their site. The specifications tab lists the 30mm rings with the 2″ offset at 8.4 ounces. Those coming soon will be between 7.0 and 7.2 ounces.
About Samson Manufacturing
Samson Manufacturing is the premier manufacturer of firearms parts and accessories, helping customers find solutions to their needs. Specializing in the AR-15, HK, Kalashnikov and other MSR enhancements, Samson offers free-floating handguards, optic and magnifier mounts, fixed and folding rifle sights and more. Delivering quality and value to the commercial, military, law enforcement and OEM markets since 1994, Samson Manufacturing has what you need, when you need it.
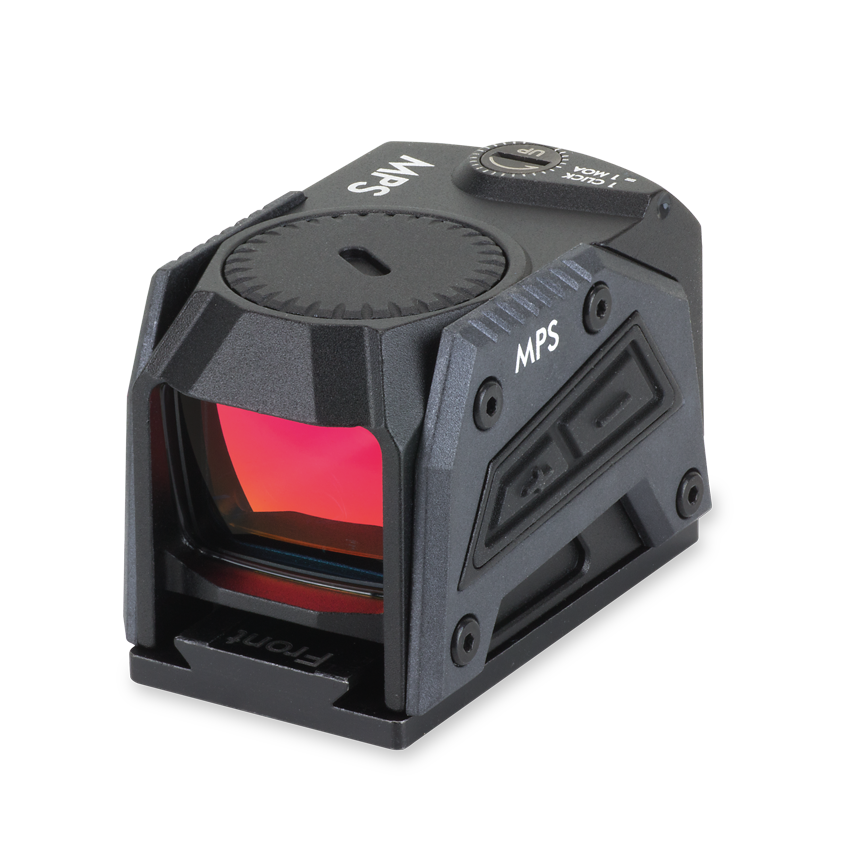
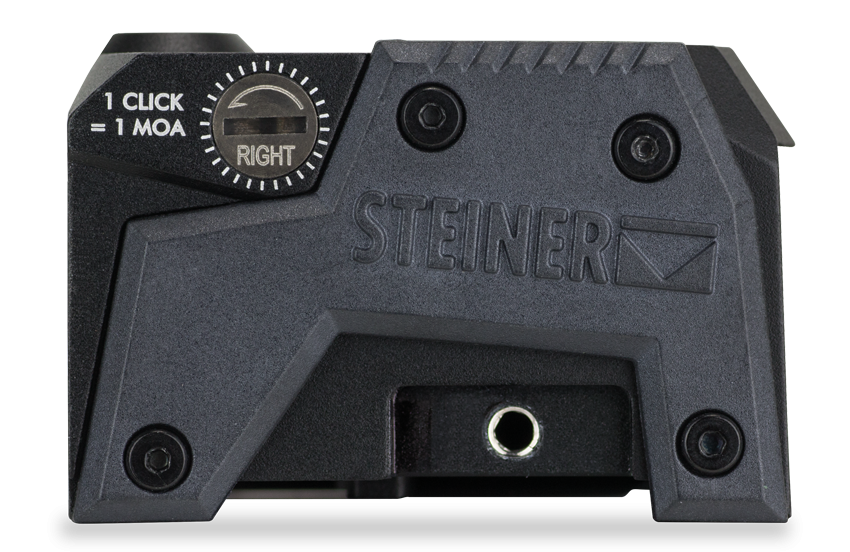
Steiner Optics recently released their Micro Pistol Sight (MPS) Red Dot. They say it’s got 1X magnification offering an undistorted image for both eyes open operation, and it’s compatible with most optic-ready pistols and baseplate adapters on the market.
Micro Pistol Sight Red Dot. (Photo courtesy of Steiner Optics)
More about the new Micro Pistol Red Dot
Steiner brings battle-proven durability and mil-spec ruggedness to pistol red dots with the New MPS (Micro Pistol Sight). All-metal construction and enhanced sidewalls completely seal in the emitter. A recessed window with a metal hood blocks objects from reaching the front lens making this one of the toughest pistol sights ever created.
At 2.05 oz, the MPS is compact and lightweight offering Steiner quality glass and a robust feature set including 8 brightness levels, user-selectable auto-off, and 13,000 hours of battery life.
MPS Micro Pistol Sight. [Photo courtesy of Steiner Optics]
Features
Battle Proven Durability
The MPS boasts an enhanced extra side wall that produces a best-in-class shock rating. The completely enclosed laser emitter is water pressure tight making it reliable in the harshest environments and any weather condition.
Compact Size
Only 58g means the MPS is light and compact. Its short size avoids any “tunnel-vision” while the low weight allows a perfect use
Daylight Bright Dot
8 brightness settings (two night vision) can easily be managed due to the ergonomics of the raised button on the side of the optic. The 3.3 MOA dot allows fast and smooth target acquisition in any condition.
Battery Life
The 13,000 hours of battery life puts the MPS on top of its class and the easily accessible battery compartment allows changing the battery without dismounting the MPS from the gun.
User-Selectable Auto-Off
Users can choose to use the auto-off timer or keep the sight continuously on. If auto off is selected, the sight will automatically shut off after 13 hours.
True 1X
The 1X magnification allows both eyes open operation and complete situational awareness.
Mounting Options
The MPS can be mounted on any gun Docter plate and is compatible with most other manufacturer adaptors available on the market.
For over 70 years, Steiner has made trusted optics for life’s defining moments. The successful pursuit and capture of these moments demand the fast and precise detection, location, and identification of a distant objective. Whether the objective is wildlife, a marine bearing, law enforcement suspects, or military combatant, Steiner products enhance an individual’s most important sense, vision, so that on land or sea –– Nothing Escapes You.
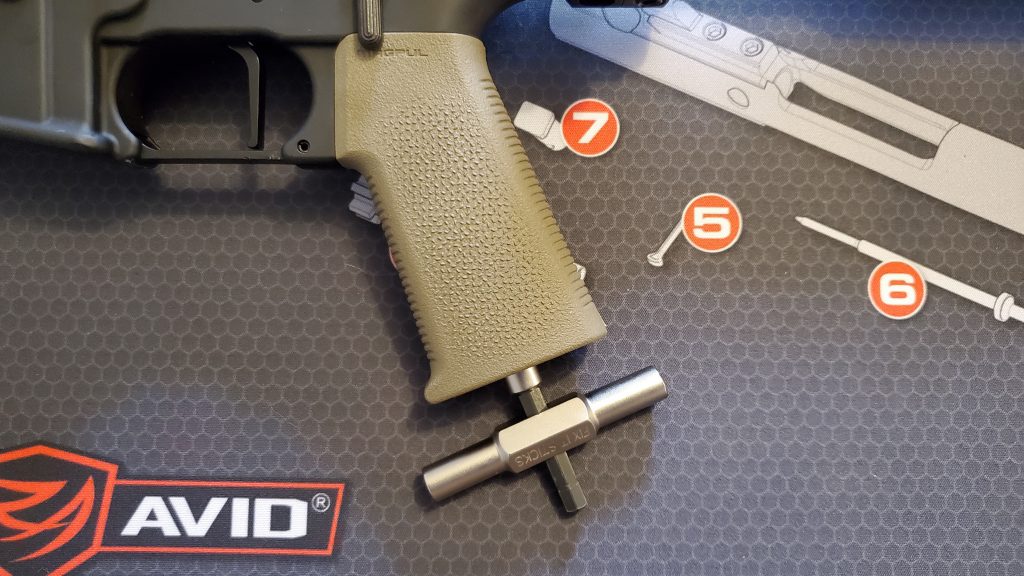
Fix It Sticks have been around for several years now. The company started off in the cycling industry and then branched into firearms. If you are not aware, these two industries typically don’t have much bleed over. They are basically cats and dogs. Once, I asked a question about a product that I was going to purchase for an article in another publication that has guns in it on occasion, and was met with very anti-gun sentiment. So it’s awesome that a company that deals in both industries is flourishing—on both sides. Fix It Sticks has said that the firearms community is their larger customer though, so let’s talk about one of their very useful products.
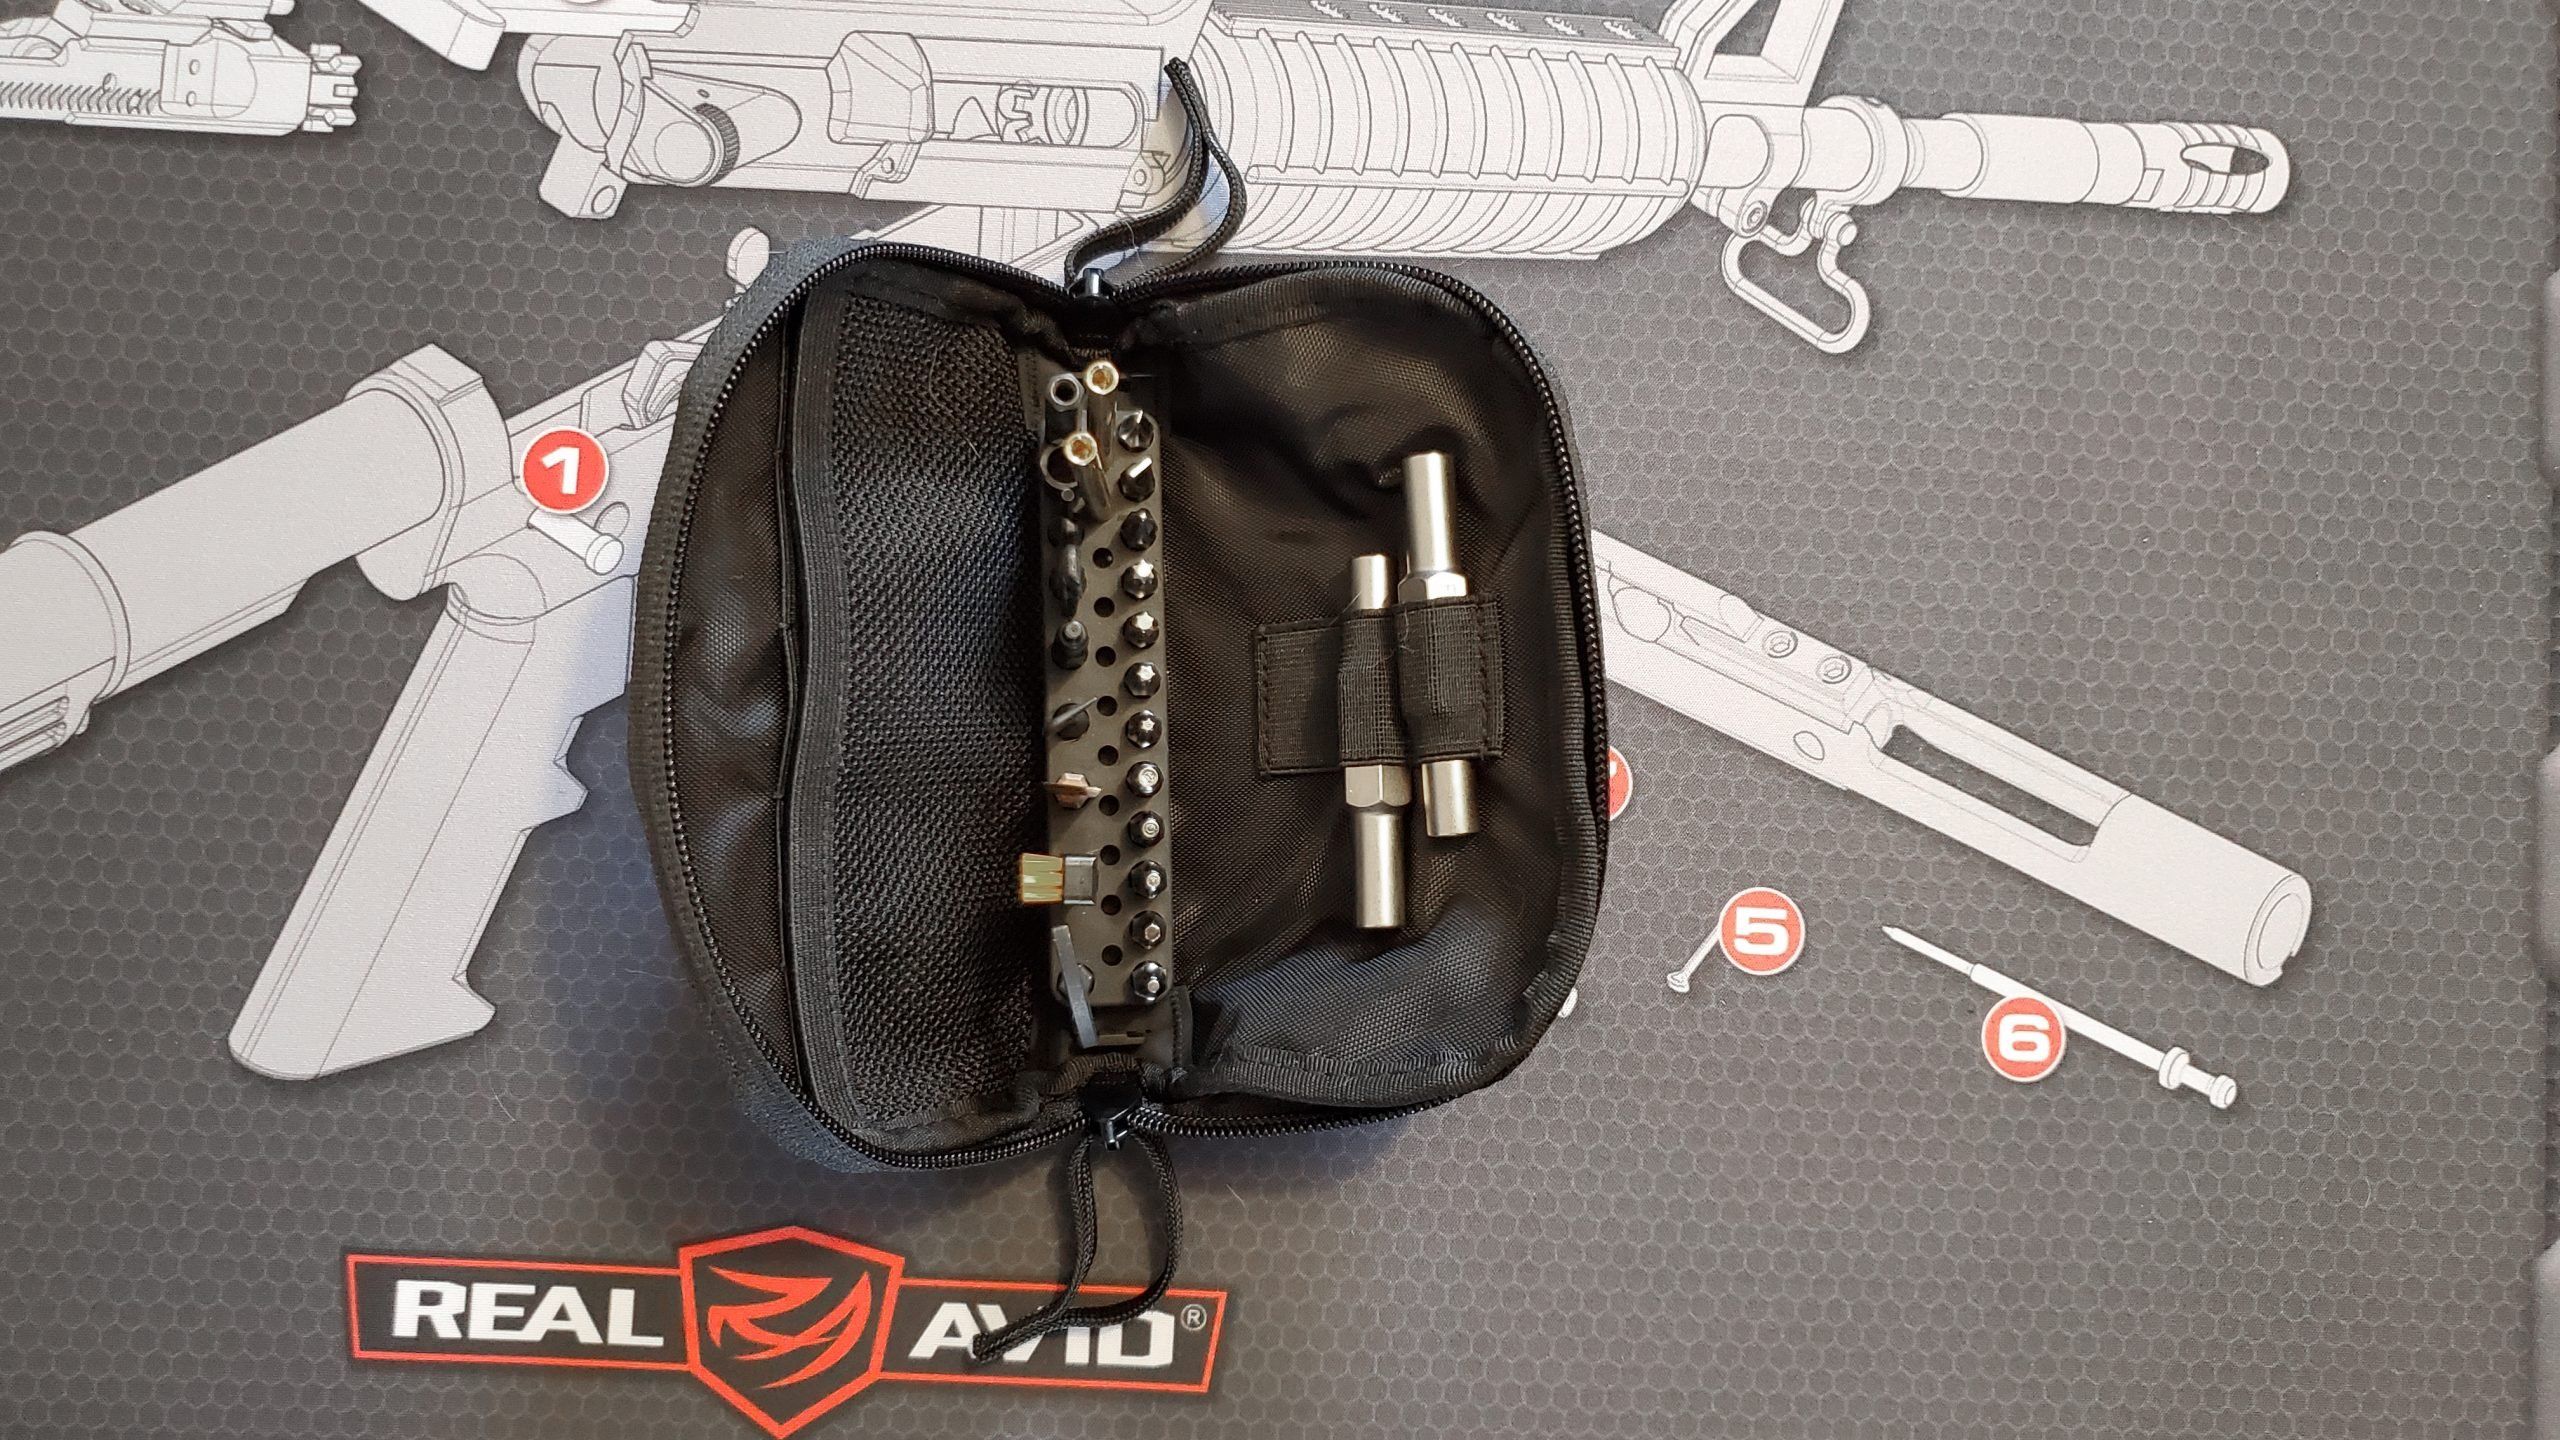
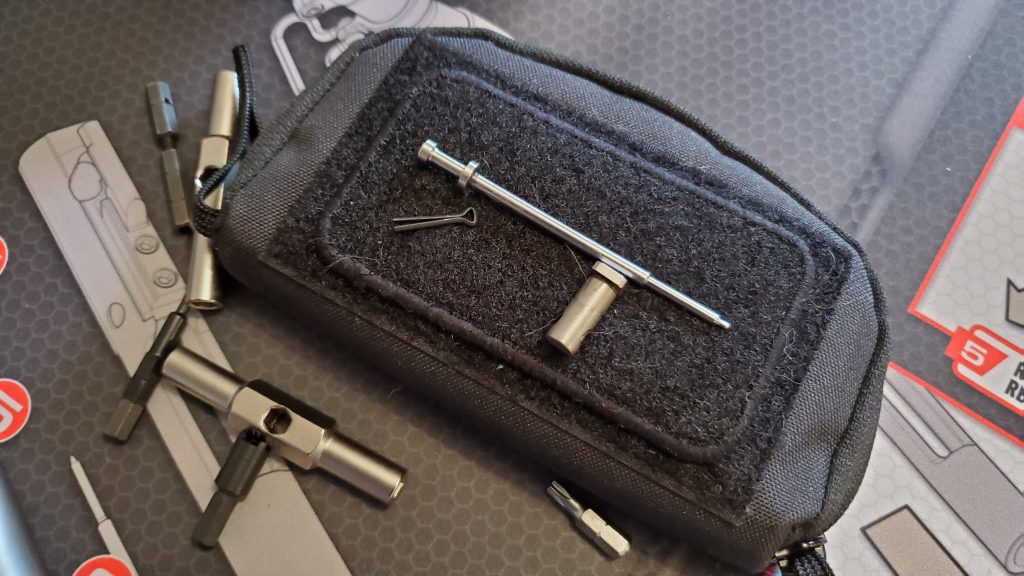
Fix It Sticks AR-15 Maintenance Kit
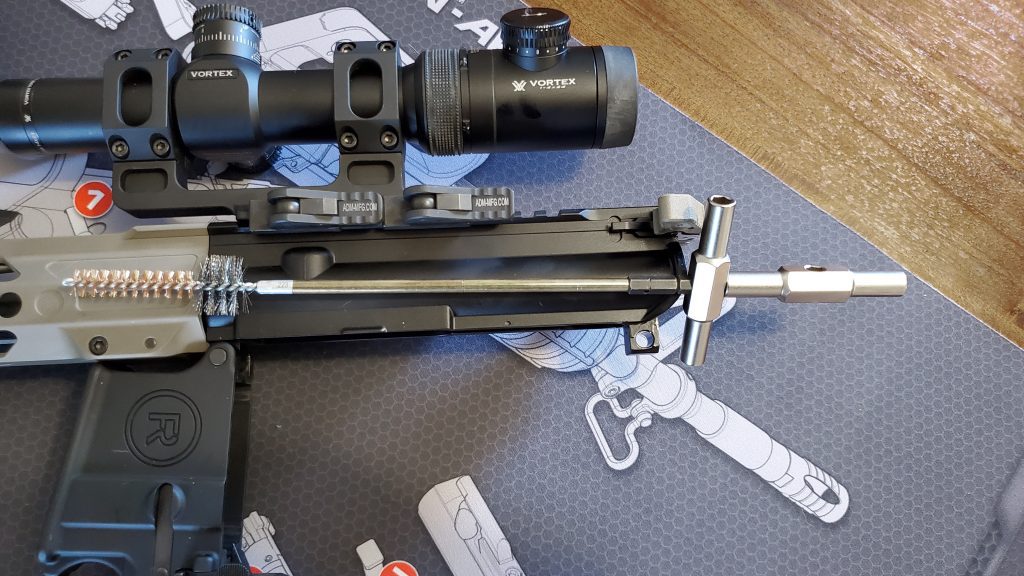
The AR-15 Maintenance Kit consists of a pile of useful tools in a compact case that takes up to no space in your pack. This is not a builders kit, but it has pretty much everything you need to maintain your rifle, and attach or remove accessories.
The case of the Fix It Sticks AR-15 Maintenance Kit has PALS webbing on the back and a Velcro patch on the front. The Fixit Sticks AR-15 Maintenance Kit is a nearly fully-featured maintenance kit that easily fits in your bag.
We say pretty much everything because it is missing a cleaning kit for your chamber and barrel and a torque driver. It does have some pretty handy cleaning bits in it that not all cleaning kits come with that can save you some time and frustration.
The Fix It Sticks Stick has the perfect reach for getting into those annoying areas like inside your grip.
The Cleaning Bits
The two cleaning rod sections that come with the kit attach to the hex bit in the kit allowing you to screw on your favorite cleaning tip.
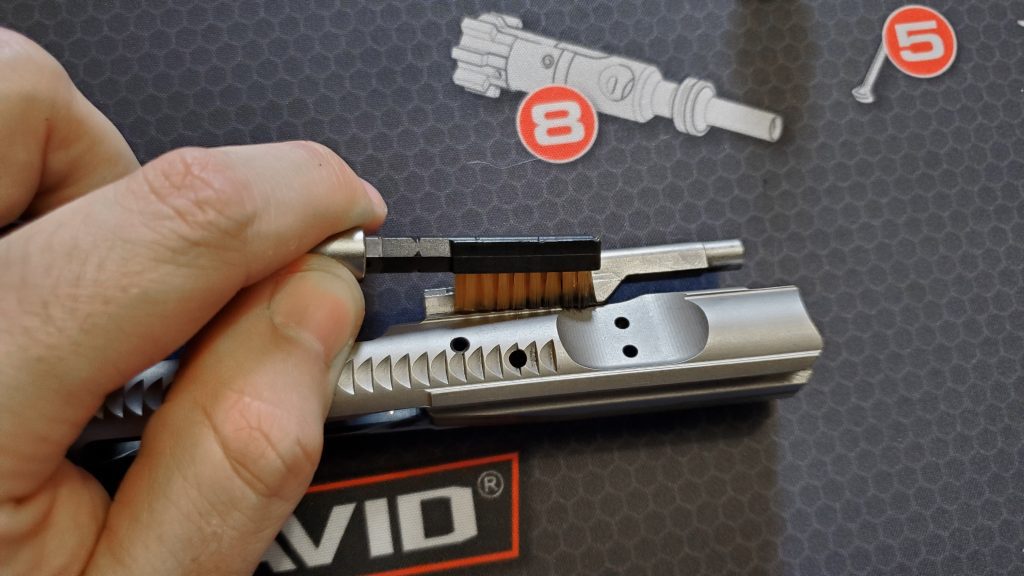
To clean your AR-15 or rifle that has a similar bolt you have a few items in your Maintenance Kit arsenal: two short sections of cleaning rods along with an area to add any screw-on brushes in between all the bits in the kit. You get a nylon brush that you can either use in the Sticks using the magnetic 1/4″ socket or screw it onto the cleaning rods if you really need to scrub.
Everyone should really use a nylon bristle brush instead of steel when working on their rifles. It’s far safer for the finish.
The kit comes with a bronze carbon scraper that, much like the brush, attaches to the cleaning rods.
The bronze scraper is perfect for the hard-to-get carbon and since it is softer than the steel of your bolt shouldn’t do any damage to it.
You can also take apart the 1/4″ bit adapter revealing an 8-32 thread since bronze is not magnetic if you want to attach it to the Sticks. You get a dental pick that much like the others can attach to both and it’s great for getting to the hard-to-reach areas. Last but not least is the bolt carrier group scraper which helps clean off all that nasty baked-on carbon because you never clean your gun your dirty person.
Everyone knows the radius section at the back of the bolt can really collect carbon. This little bit makes cleaning it a breeze.
The Maintenance Stuff
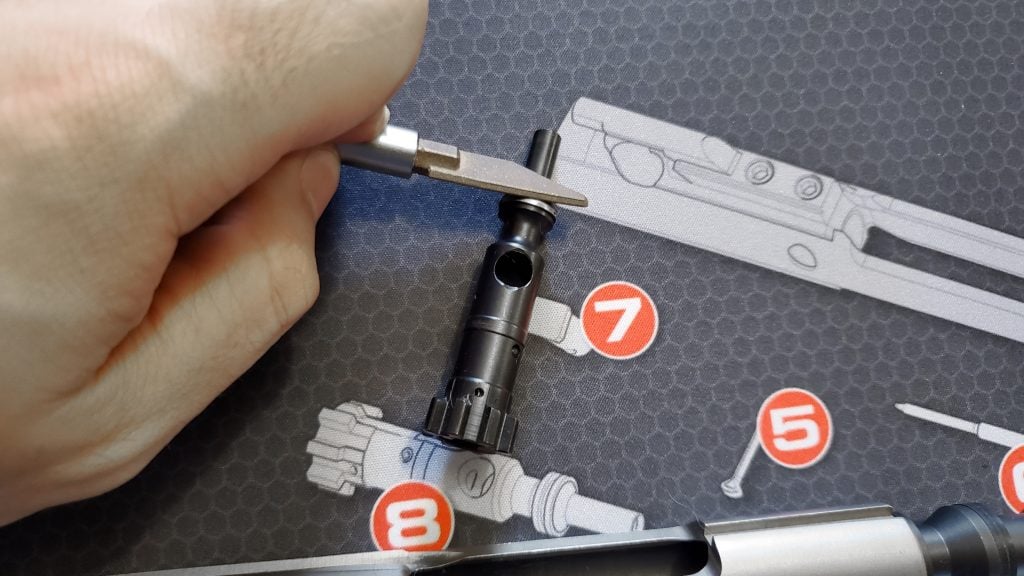
The castle nut wrench in the kit does a great job for most things with a castle nut. You may need a beefier one if things are really stuck but you won’t have that with you out in the woods or at the range.
We build a lot of guns here. We mean, a lot, like some of the guns we have built cost more than the cars we drive. So good tools certainly matter to us.
The Sticks in the AR-15 Kit are the original version of their T-wrench. It consists of two silver Sticks that take a 1/4″ bit at either end and have a slot in the center. The bit adapter we talked about earlier is used to join them together into a T-Wrench or make them one long tool to get a bit of leverage when using the next tool.
The castle nut wrench is something everyone who uses an AR-15 should have on them. A properly staked castle nut should not come loose. When they do it can cause you some issues at the range. Why not have a tool for those just in case scenarios? We actually used it recently on our Maple Ridge Armory Renegade (more on that later) build when swapping from a carbine buffer tube to an A2 one when attaching the Magpul PRS and it easily broke the torque.
The T-Handle of the sticks provides just the right amount of force for pulling screws that you used Loctite on.
If you have an A2-style front sight post it comes with a fancy bit for adjusting it up and down for elevation. The kit comes with two pin punches: a plastic non-marring one and a thin steel punch. Along with all these tools, you get 12x 1/4″ screwdriver bits ranging from hex to Torx, along with Philips and common. These bits should cover just about any situation that comes up when installing parts and accessories.
Some of the random bits along with the Sticks that come in the kit.
The Pouch
The Kit comes with well built MOLLE compatible pouch that comes in a multitude of colors—as long as you’re looking for black. The outside of the pouch has a 5″x3″ velcro section on it to attach patches or a name tag. We used it for the Fix It Sticks Magnetic Patch. There are certain small parts like the firing pin retaining pin that you just don’t want to sacrifice to the floor gods. With the magnetic patch, you can pop these small parts onto it and not worry about them migrating away.
The magnetic patch is perfect for keeping a grip on the small metal parts that you wouldn’t want to lose while doing emergency maintenance.
The pouch has two zippers with zipper pulls on them. If you want to quickly open the pouch put both the zippers on the top with a small gap. You can grasp the front and back and rip the clamshell pouch open.
Inside is a rubber bit holder that, as we said above, holds 1/4″ bits along with cleaning rod items like brushes in the center. The backside of the interior has three elastic loops, two of which hold the Sticks. The front side of the interior has an elastic mesh pouch with five elastic loops behind it for any other loose items you want to toss in the kit.
Fix It Sticks makes a ton of additional accessories.
If there are parts of the kit that you just don’t use and others you would prefer like say a bit for the front sight of a Glock or an Aimpoint sight adjustment tool your good. We will be going through our kit over the next little while and seeing what all we want to swap out as we just don’t need all of those bits in our range bag.
They do make a more generalized kit that would be great for building different firearms and attaching accessories since it includes a bunch of torque limiters. This kit would be great for mounting scopes although we would likely toss in their Scope Jack or an Arisaka Optic Leveler. If you have a Spuhr ISMS Scope Mount though you can just toss the wedge in your kit since it has a built-in leveling wedge.
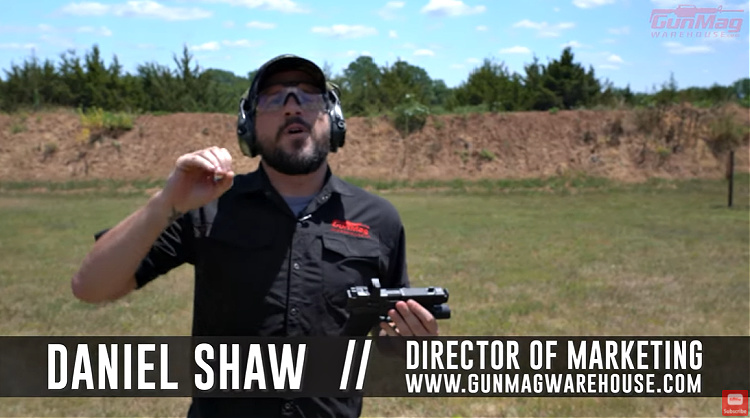
We all need to train. Me, you, everyone. That includes what to do when you expect a “bang,” but get a “click” instead. I readily admit that I don’t work on this enough. Do you? Fortunately, it’s something we can easily train for with dry fire and snap caps. In this video, Daniel Shaw from Gun Mag Warehouse takes us through the simple progression:
Failure to fire (FTF, which can also mean Failure to Feed) can be caused by a number of things:
• Bad ammo • Bad primer • Bad magazine follower • Accidentally hitting the mag release while firing • Perhaps your gun needs to be serviced
These can be addressed using a simple procedure that Daniel demonstrates for us: the Tap Rack Bang drill.
• Tap: Actually, it should be more like “smack the crap out of” to make sure your mag is properly seated in the magazine well.
“Tap” (more like smack the crap of) your mag to seat it properly.
• Rack: Rack the slide to chamber a round and reset the striker or hammer.
“Rack” the slide to load a round and reset your striker or hammer.
• Bang: Fire the gun.
“Bang.” Fire the gun.
Tap Rack Bang will solve most FTF situations.
At the very least, it will help you diagnose your problem. If you have bad ammo, racking the slide will eject the unfired round and chamber another. If it still won’t fire, maybe you have a bad batch with faulty primers or perhaps there is a problem with your gun. If the problem was with your magazine, smacking the bottom may reseat the mag, allowing you to strip off another round when racking the slide. If it still won’t chamber a round, you may have a bad magazine follower. “Bang,” obviously, is the final step and the signal that you’ve most likely solved your problem. This is a great procedure to clear what is often referred to as a “Level 1 Stoppage” or begin to diagnose what your problem is.
If you get the “click” and your gun does not fire, MAKE CERTAIN TO KEEP THE GUN POINTED IN A SAFE DIRECTION WHILE YOU CLEAR IT. I cannot emphasize that enough, which is why I put it in all caps. That should be the case anyway, but people tend to turn around and start fiddling with their guns. This is particularly prominent with new shooters who may be looking for help. I expect most of us have witnessed such things at the range. Don’t be that guy. Keep the gun pointed downrange while clearing the malfunction.
But check your gear, too.
Obviously, part of this can be avoided by purchasing quality ammo, but with things the way they’ve been the last couple of years, we often take what we can get. Just be aware of the potential for problems when shooting old or cheap ammo. Another step you can take to minimize these problems is to buy quality mags. Look, I get it. Mags are often expensive, especially if you buy them from the manufacturer. Life would be a lot simpler if everything took Glock mags, but they don’t.
When I first got into autoloading pistols and modern sporting rifles, I had to learn the hard way that you get what you pay for with mags, just as you do with guns and ammo. Spending a little more on quality mags and keeping your eyes open for good mags on sale will save you some trouble. It will also save you money in the long run since you won’t be spending your dough on crappy mags before having to buy the good ones.
Also, remember that mags are a commodity.
They wear out and have to be replaced. Checking your mags occasionally and rotating them often can extend their life. Nor does it hurt to clean them every once in a while. Personally, I have all my mags numbered and labeled by gun. That helps me keep up with the rotation and lets me easily identify one that may be ready for replacement. I just use a silver paint marker. That also helps me keep up with them if I’m working in a training class and have to go back and pick them up off the ground.
Dry Fire Training
The “Tap, Rack, Bang” drill is easily done with Snap Caps in dry fire exercises. Just watch the quick video above to see how it’s done. It doesn’t take long to get in a bunch of reps, and you may save yourself headaches on the range, and, just maybe, it might save your life in the real world.
If you’re interested in AR-style rifles, you’ve probably heard of Radian Weapons (and if you hadn’t, you have now). Radian is known for producing good-quality firearms with fantastic attention to detail and their Radian Model 1 proves they’re delivering as promised. In this video review, Ivan of Kit Badger runs through a hands-on review of this rifle.
Ivan of Kit Badger covers the general features and performance of the Radian Model 1 rifle so you get an idea of what to expect if you’re considering adding one to your gun collection.
What are the Features of the Radian Model 1?
The rifle Ivan reviews in this video is the Model 1 with a 17.5-inch barrel. Radian markets it as their intermediate-length rifle but it would also be accurate to refer to it as carbine-length since it’s under 18-inches. The rifle is chambered in the popular 5.56 NATO round and has an eye-catching flat dark earth finish. Ivan describes some of his favorite features at some length:
“There is a QD endplate with a stainless steel insert, so it [won’t get] chewed up or come out like some of the aluminum ones. …of course, the castle nut is properly staked, which is a good thing. [It has] super clean billet lines going forward and…you get into their proprietary handguard. The barrel nut is incredibly strong; [it is a] really strong, rigid handguard, which is good…especially if you end up mounting stuff like lasers to it.”
Check out the video below to find out what else Ivan liked about the Radian Model 1 and how it performed on the range:
Specifications
Designed & manufactured in the USA
Upper receiver, lower receiver, and handguard Cerakoted together for perfect color match
Weight: 6.0 – 8.0 lbs depending on configuration
Upper Receiver Specifications
Sub-MOA Accuracy guarantee w/ Black Hills Match Grade ammunition
Proprietary extended aluminum handguard w/ Magpul M-LOK Modular Mounting System and integrated upper/handguard stainless steel anti-rotation pin
Match Grade 416R stainless steel barrel w/ polished crown and feed ramps, chambered in .223 Wylde/5.56 NATO or 300 BLK, threaded ½ x 28 (.223) or 5/8 x 24 (300 BLK)
Getting up close and personal is the best way to review rifles. (Photo credit: Kit Badger)
What’s the Bottom Line?
Overall, the Radian Model 1 17.5-inch in 5.56 NATO looks like a well-made, reliable rifle that’s capable of fantastic accuracy. It’s always nice to see such precise machining and attention to detail on a gun, and who doesn’t love sub-MOA?
Do you have a Radian Weapons rifle? Do you want one? Tell us about it in the comments below.
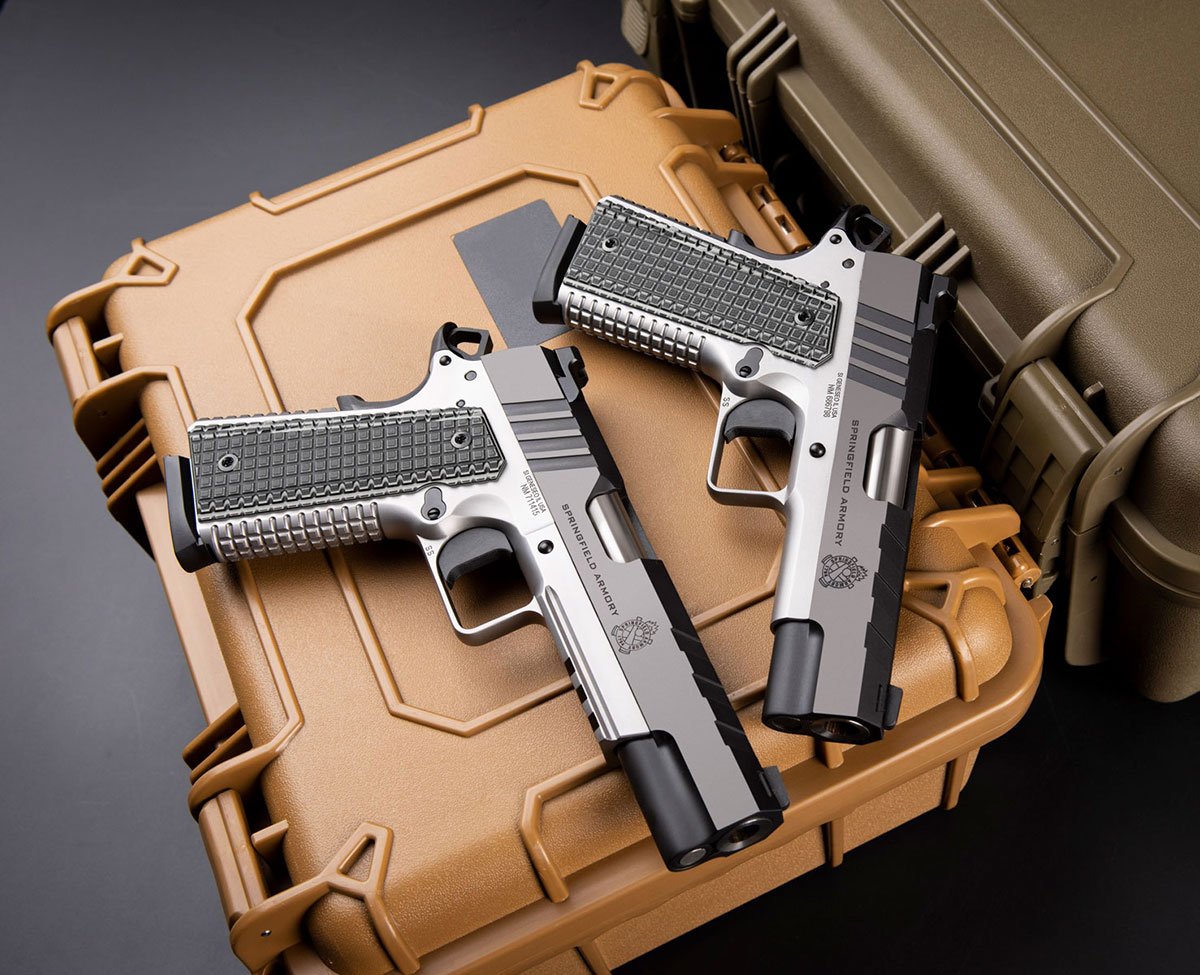
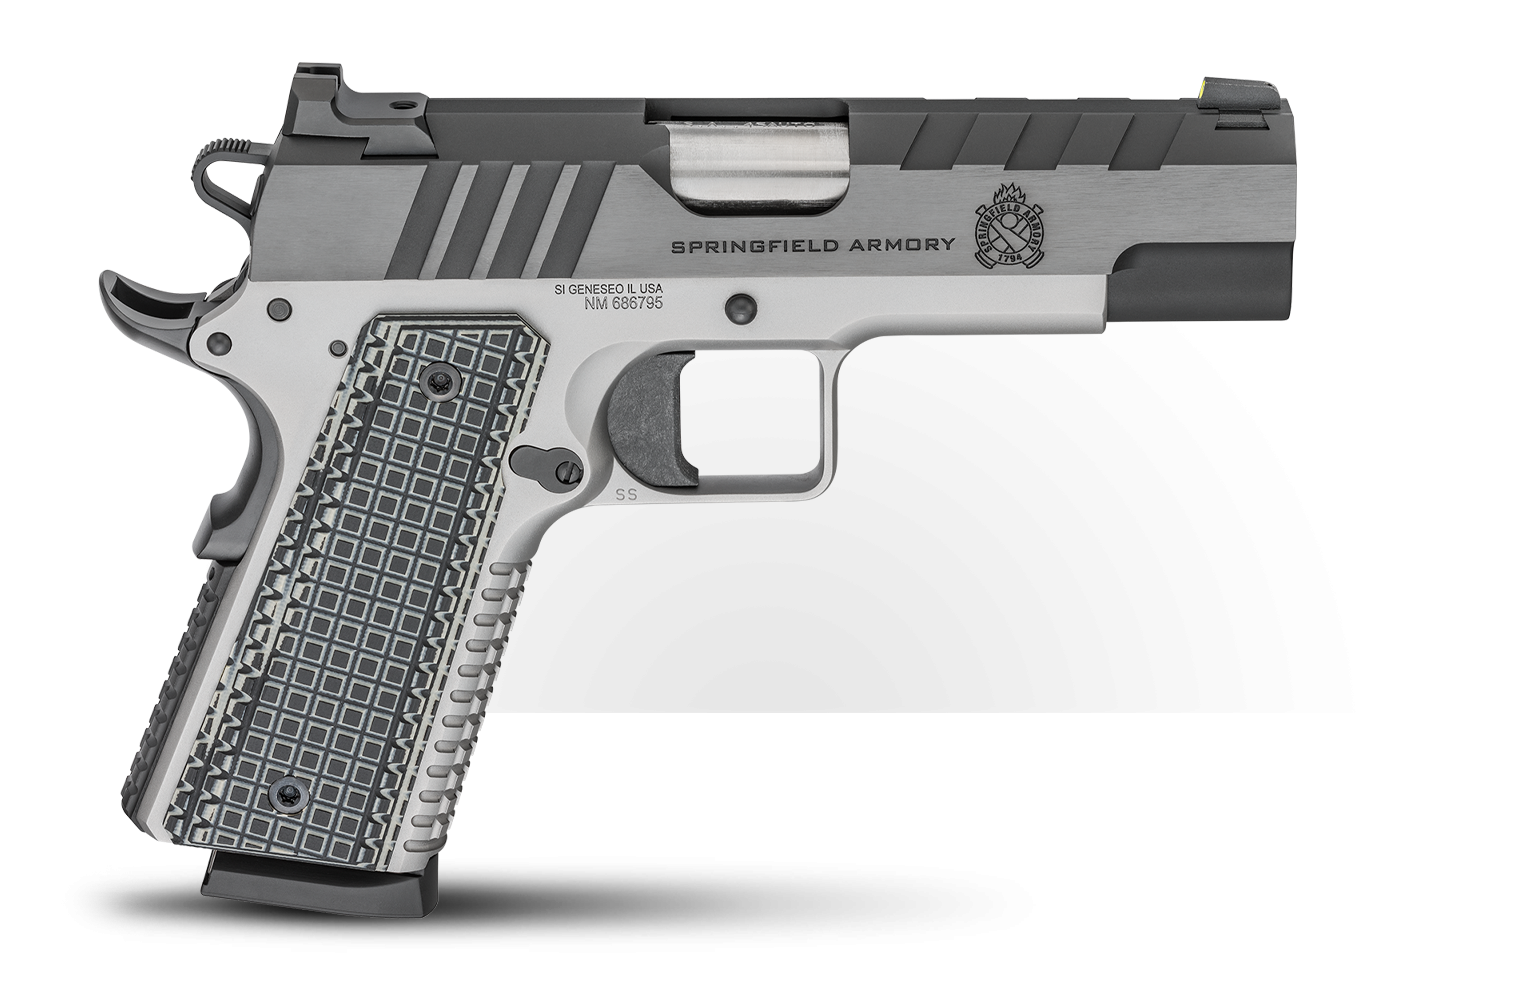
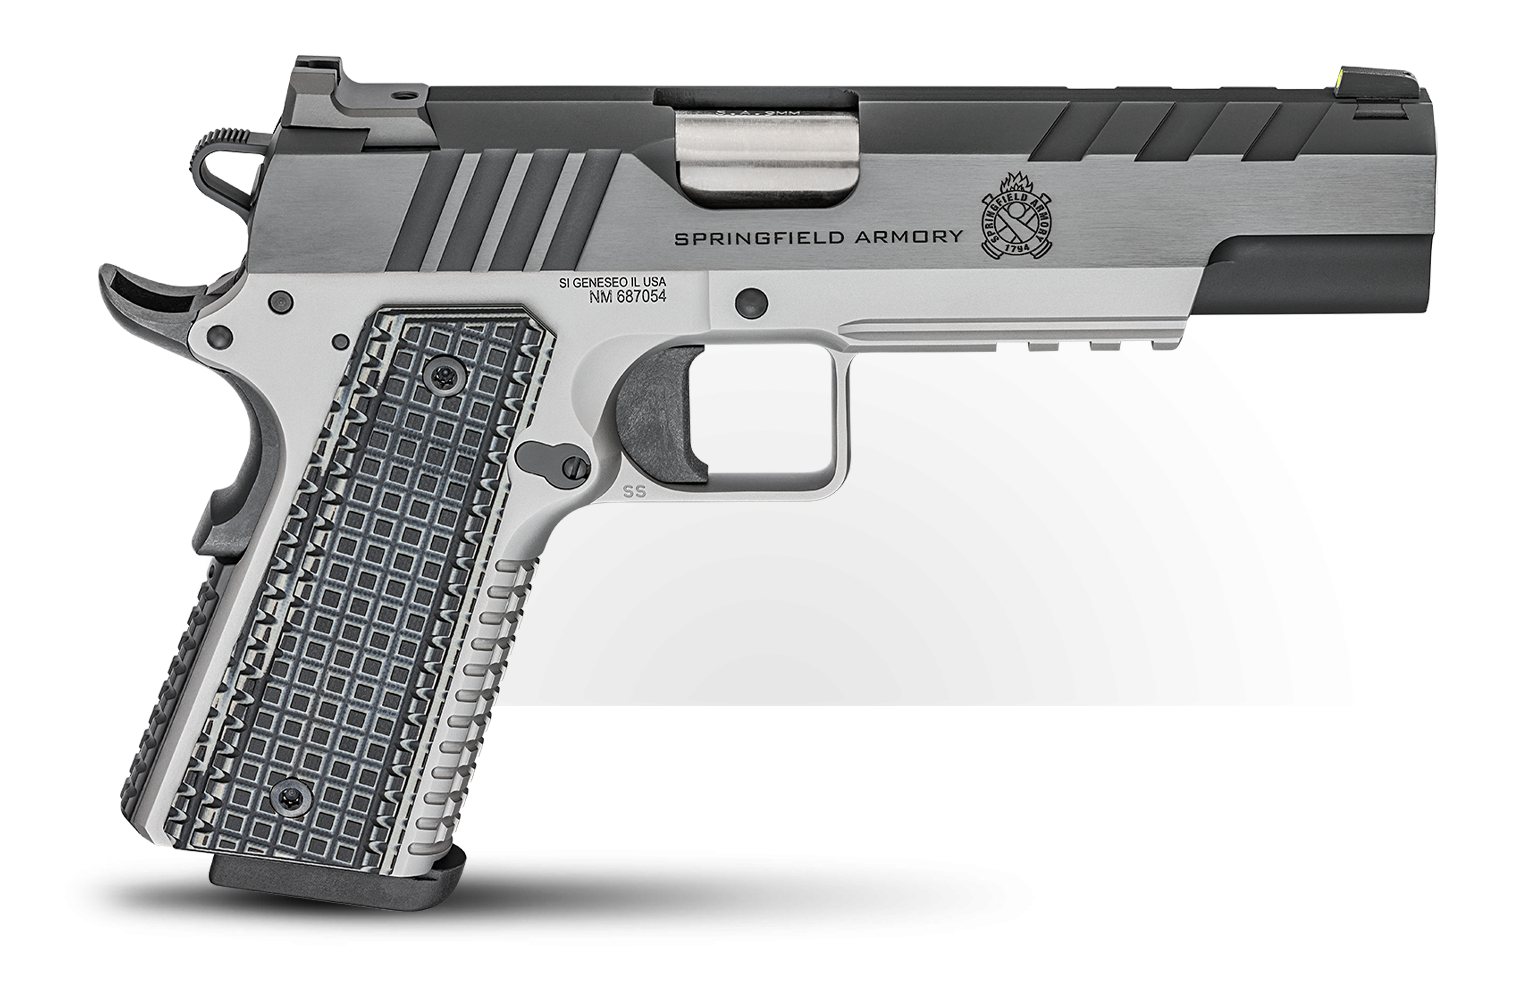
Springfield Armory just announced their new Emissary 1911 pistol variants; the 4.25″ .45 ACP and the 5″ 9mm. They say these bridge the gap between duty and custom handguns.
Emissary 1911 Variants (Photo courtesy of Springfield Armory)
More about the new Springfield 1911 pistol variants
The Emissary blends form and function seamlessly in a firearm built for defense and loaded with custom-grade features. It’s constructed with a forged stainless steel frame and forged carbon steel slide, with a beautiful two-tone finish. The blued carbon steel slide pairs with a stainless steel frame, featuring a distinctive squared triggerguard with additional room for ease of operation with a gloved hand.
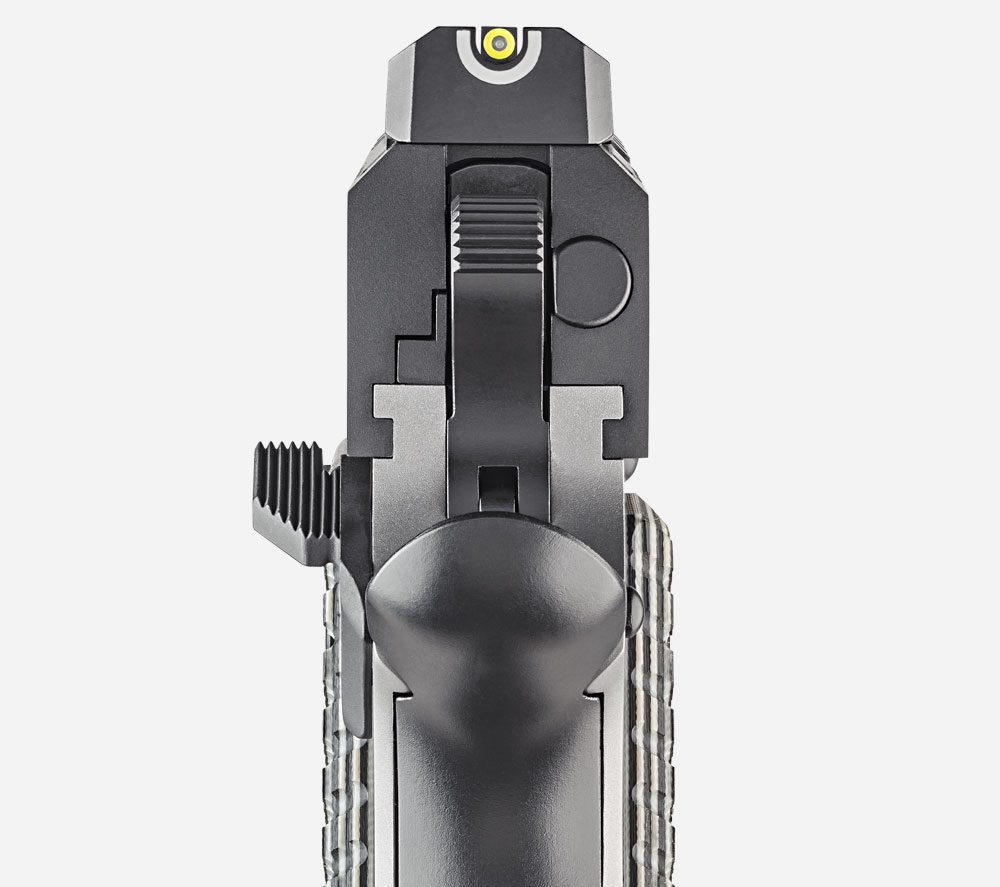
The slide’s “Tri-Top” cut gives the Emissary custom styling, while a flattened top strap is finished with 40 LPI serrations to diffuse light and reduce glare. On top, the tritium and luminescent front sight on the Emissary pairs with a Tactical Rack U-Dot rear sight for easy target acquisition in all lighting conditions.
9mm 1911 Emissary U-Dot Sight [Photo courtesy of Springfield Armory]
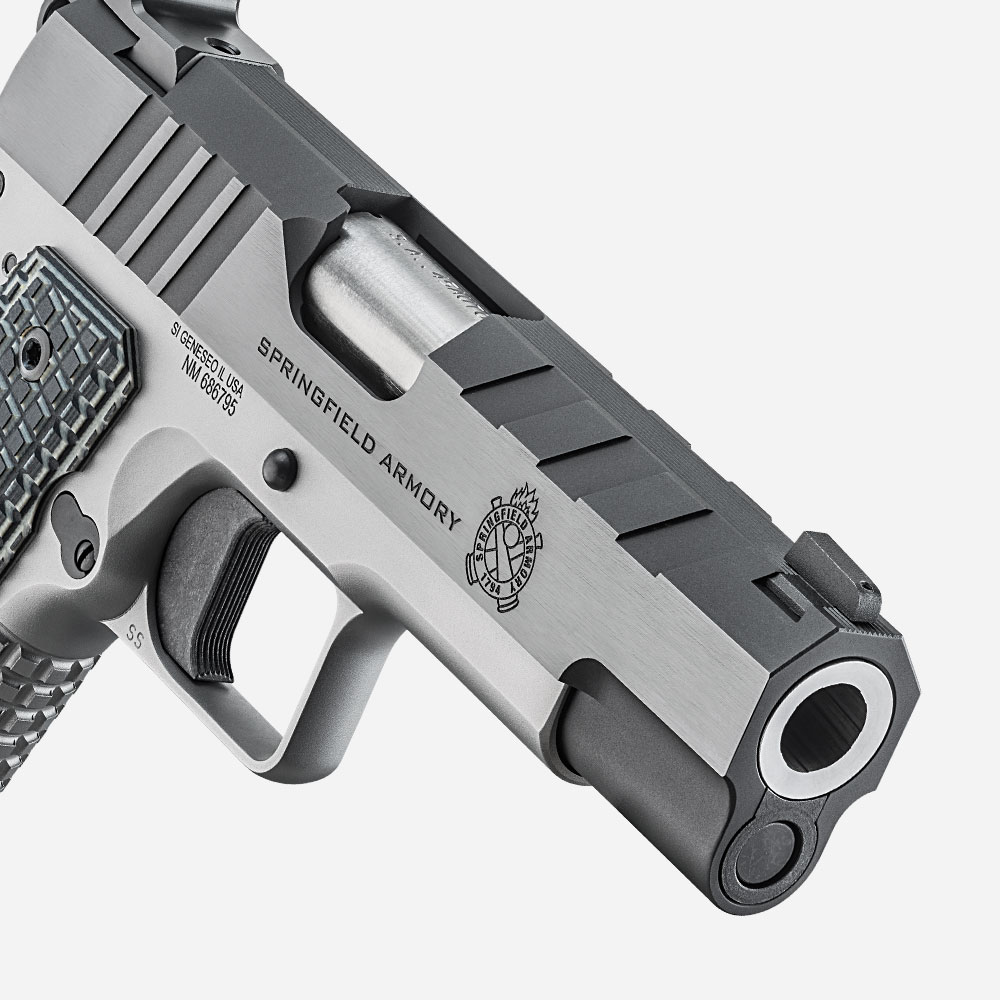
Inside the slide, the bushingless heavy stainless steel 4.25” or 5” bull barrel delivers maximum accuracy while reducing felt recoil and muzzle flip. In addition, the Emissary’s skeletonized hammer delivers ultra-fast lock times and combines with a solid-body, flat-faced trigger for top-end performance.
4.25″ .45 ACP Bull Barrel [Photo courtesy of Springfield Armory]
The forged stainless frame’s front strap and mainspring housing are wrapped in a grenade-pattern texture for firm engagement in adverse conditions. This is matched with slim line grip panels by VZ Grips machined from G10. Each pistol comes with two top-quality 8-round stainless steel magazines with base pads. MSRP for each is $1,279.
1911 Emissary 4.25″ .45 ACP Handgun (Photo courtesy of Springfield Armory)
“These newest additions to the Emissary line provide shooters with great options for a self-defense pistol with an additional measure of refinement,” says Steve Kramer, Vice President of Marketing for Springfield Armory. “With either the more compact 4.25” .45 ACP or the 5” 9mm, these new Emissary pistols are a must-have for 1911 enthusiasts who demand the best.”
1911 Emissary 5″ 9mm Handgun [Photo courtesy of Springfield Armory]
https://youtu.be/dlOhAz7UMZg
About Springfield Armory
In 1794, the original Springfield Armory began manufacturing muskets for the defense of our young, free Republic. The Armory functioned as a firearms supplier for every major American conflict until 1968 when the government sadly closed its doors. In 1974, nearly two centuries after its inception, Springfield Armory Inc. in Geneseo, Ill. revived the iconic heritage of the Armory to carry on its legacy.
We strive to honor this responsibility as guardians of the original Springfield Armory legacy by manufacturing the highest quality firearms to enable responsible citizens to preserve their right to keep and bear arms in the defense of life, liberty and the pursuit of happiness.
With an unmatched emphasis on craftsmanship, performance and exceptional customer service, our mission is to forge superior firearms and provide the tools necessary to defend individual freedoms and equality for those who embrace the rights and principles secured by our Founding Fathers.