If you shoot firearms of any sort you have likely heard of places with magazine capacity restrictions like California, New York, a couple of other states, and of course Canada. Sadly, we all know these restrictions do not stop criminals and only satiate the uninformed. I mean, murder is illegal and that has yet to stop them. Restricted capacity options in AR-15 magazines, for a long time, have been a pinned magazine or a stubby ten rounder. Magwedge out of Canada came out with a coupler for the 10 round magazines years ago but not much has come out to fix the magazine-capacity-challenged amongst us until Cross Industries, (also from Canada), came along with the 10/10 Cross Mag.
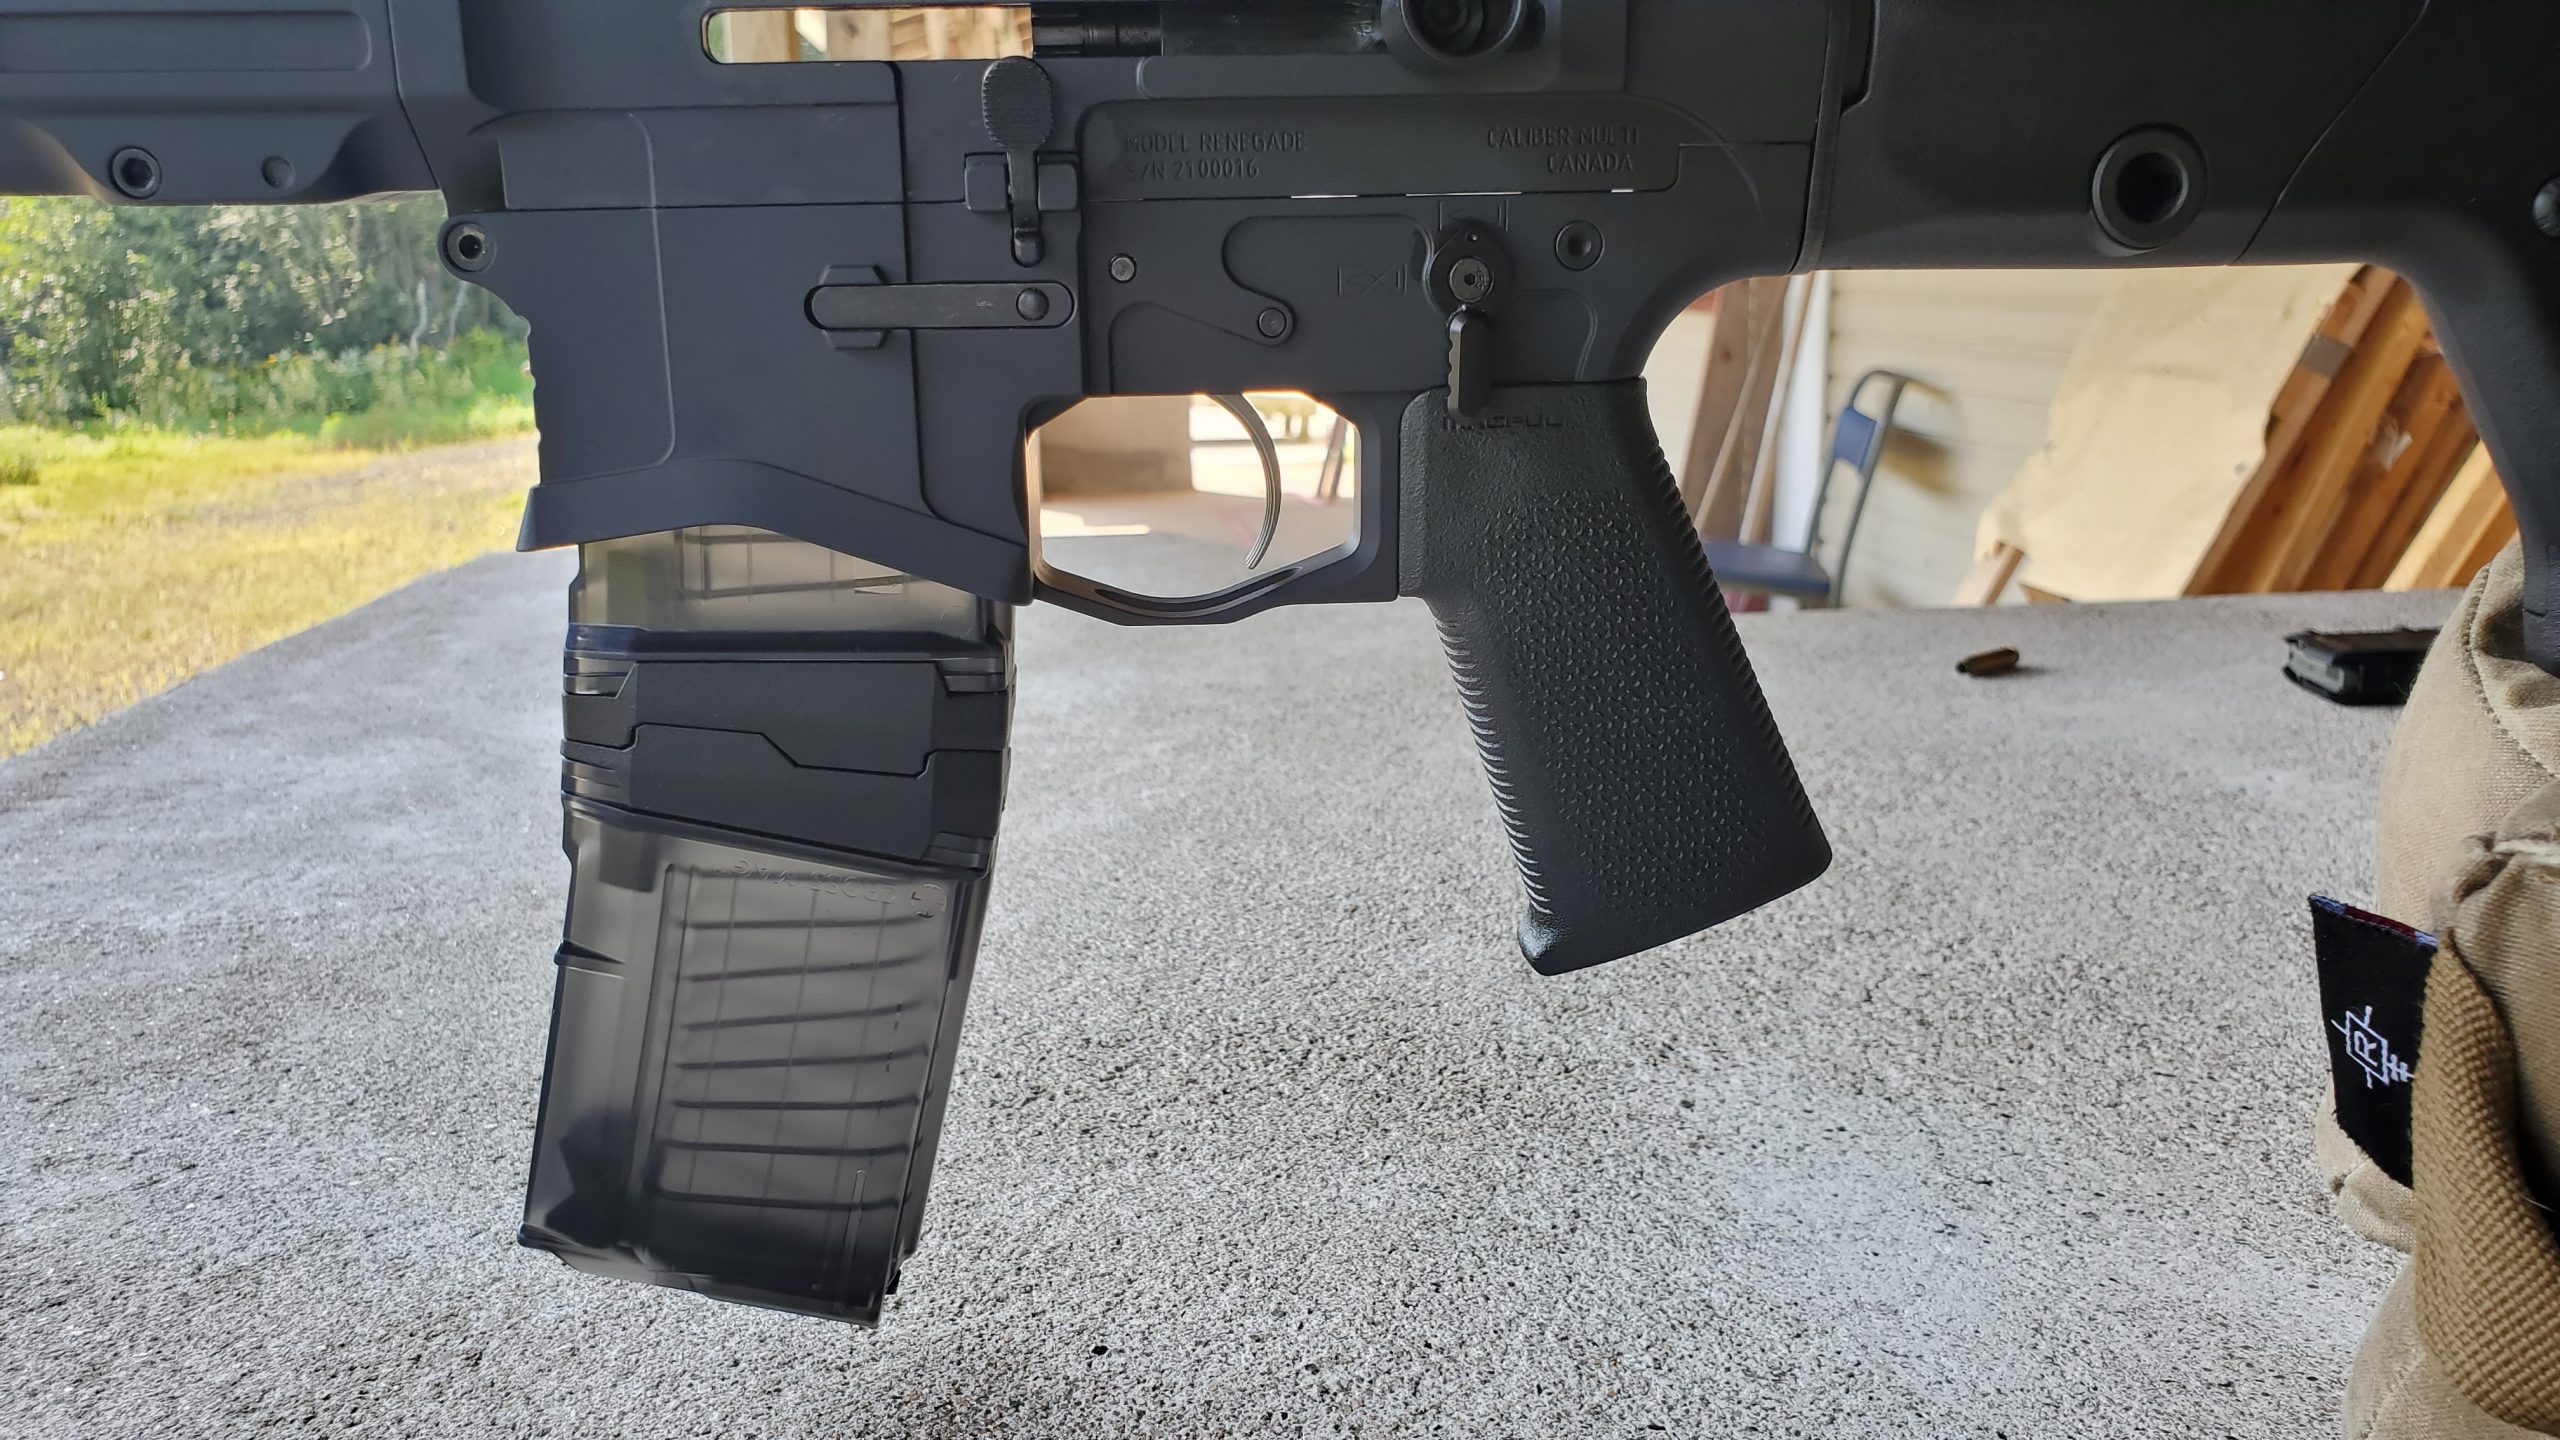
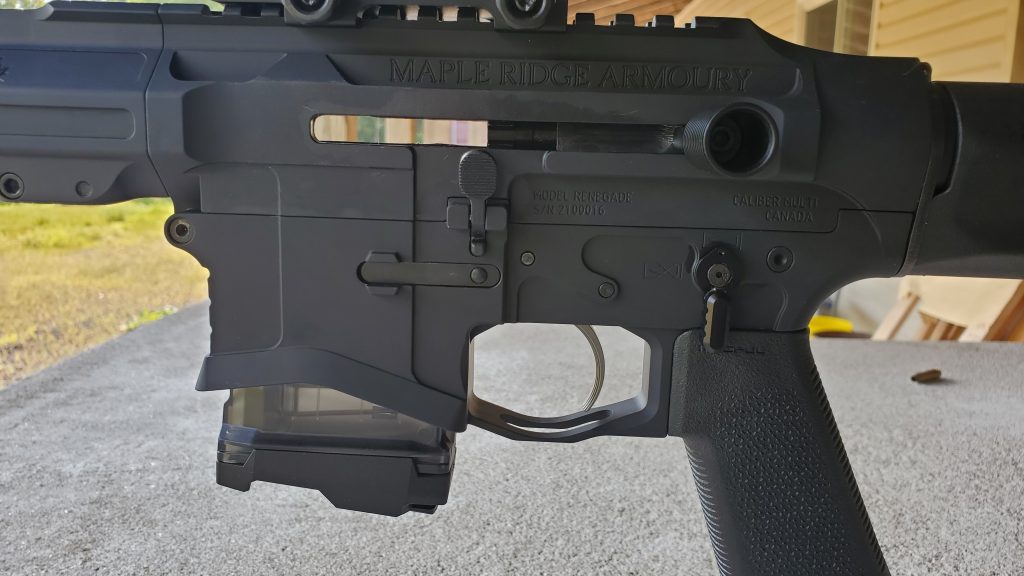
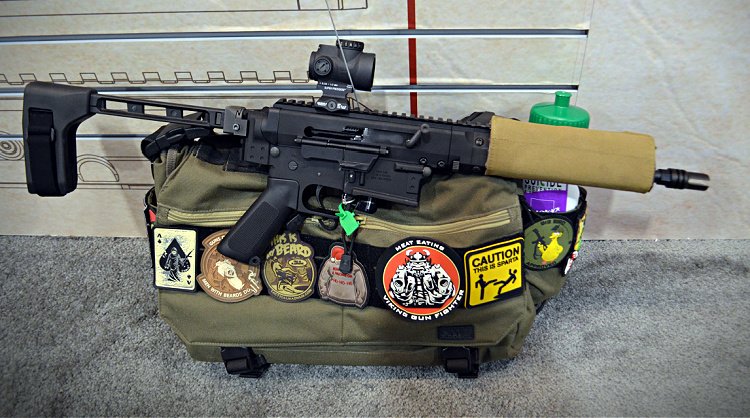
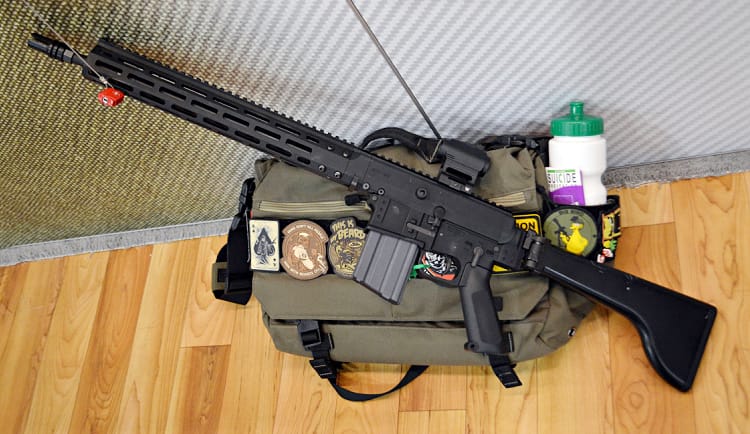
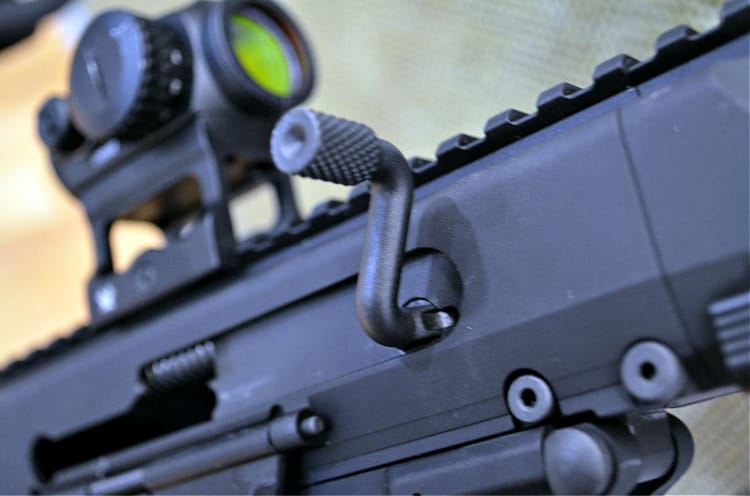
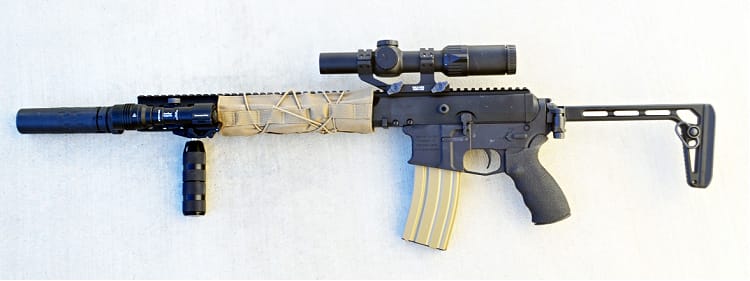
The Cross Industries 10/10 Cross Mag in forward/forward straight configuration sitting in the Maple Ridge Armory’s Renegade straight-pull bolt action rifle.
The 10/10 Cross Mag was certainly not something that was rushed to the market. Cross Industries first started showing off the magazine in 2017 but it was not until several years later that they finally released the magazine to a lot of fanfare.
Short magazines work in some situations however they can be a real pain in your hindquarters when it comes to magazine pouches.
Now, you may be wondering why people were excited about ten-round magazines, but there is a very good reason for that. Have you ever stuck a stubby ten-round AR-15 magazine into a magazine pouch? It swallows it like Kobayashi at a hotdog eating contest. Then you’re stuck fisting a magazine pouch like you are trying to get the last Pringle from the can.
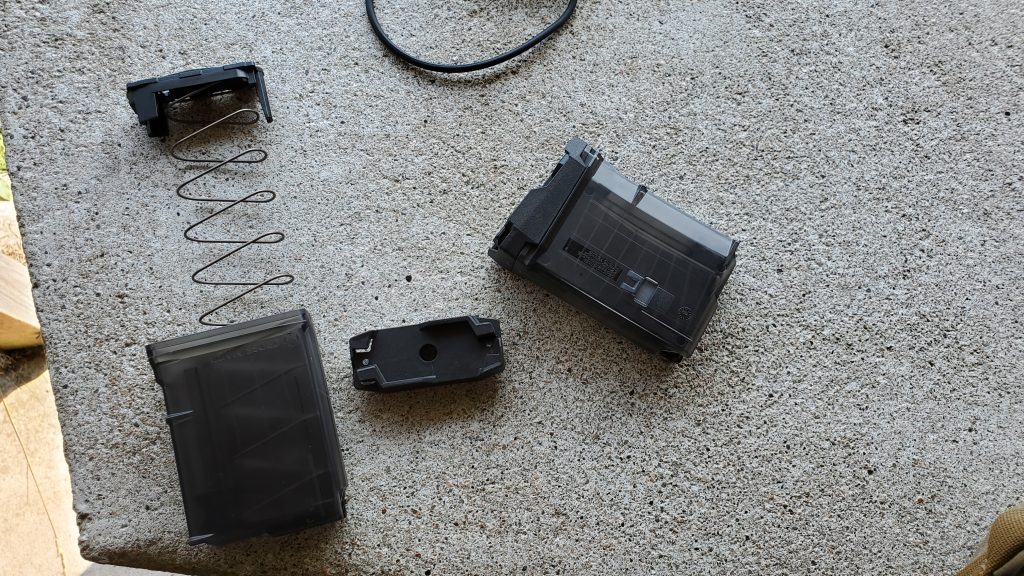
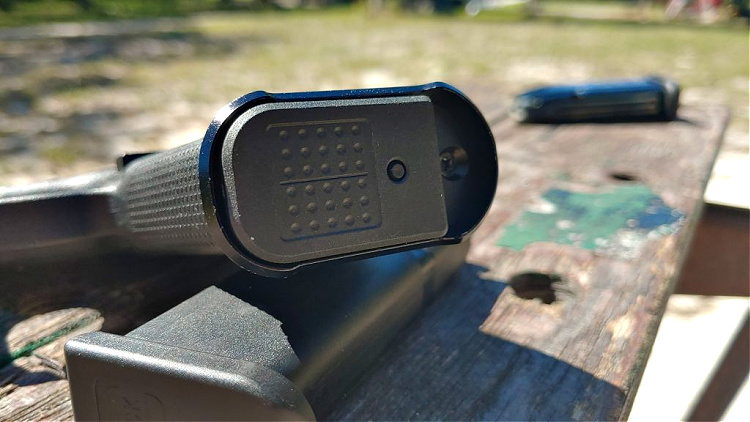
Removing the magazine base plate is as simple as pressing down on the central button and sliding it off. When you do this you can rotate the base pad in order to change the mounting configuration of the magazines.
Flip it.
Now, just coupling two magazines together isn’t the craziest feat of all time. I mean, I have been doing it for ages with a bit of gun tape, but that eventually starts to break down and gets slightly slimy. However, the 10/10 Cross Mag is a polymer magazine that flips the script (or the magazine), in a bit of a different way than others have. The innovative magazine base allows the magazines to be separated into two stubby ten-round magazines. That isn’t all though, it also allows the magazines to be coupled into four separate configurations like this picture on Breach Bang Clear demonstrates. You get two versions of the curved magazine: one with the rounds of both magazines facing forward and one with the magazines facing front and aft.
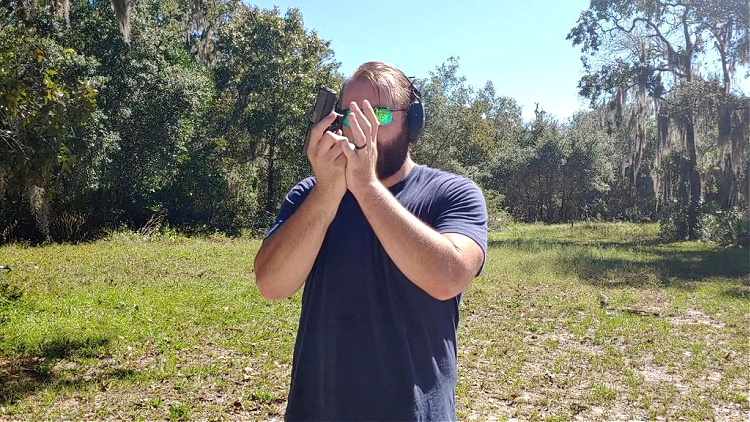
Depending on how you want to reload the bottom magazine into the rifle the 10/10 Cross Mag allows for your rounds to face in different directions to help facilitate this. This is best used with an upside-down grip on the magazine so that when it is released from the magazine well you can cartwheel it 180 degrees forward.
This same thing can be said for the straight magazine configuration giving you both magazines facing forward and one with each facing opposite different directions. To couple or uncouple the magazines you give the magazine a solid twist and it pops apart. If you want to get all four variations of the magazine coupled together you will need to pop the base plate off of one of the magazines and turn it around.
When the magazine is set up so both magazines are facing forward you can grasp the magazine normally and do a 180 degree flip sideways towards your strong side.
How well does it work?
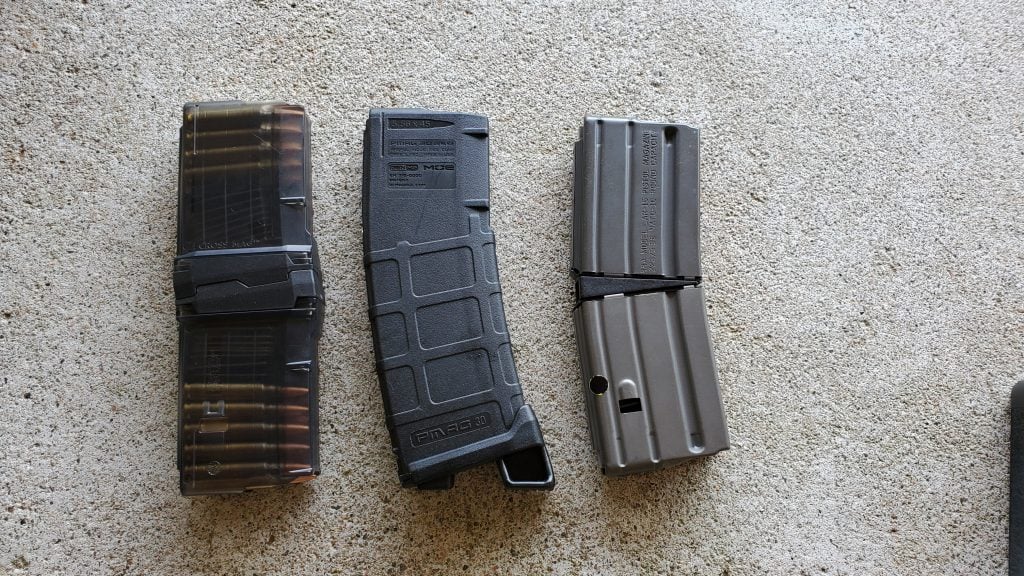
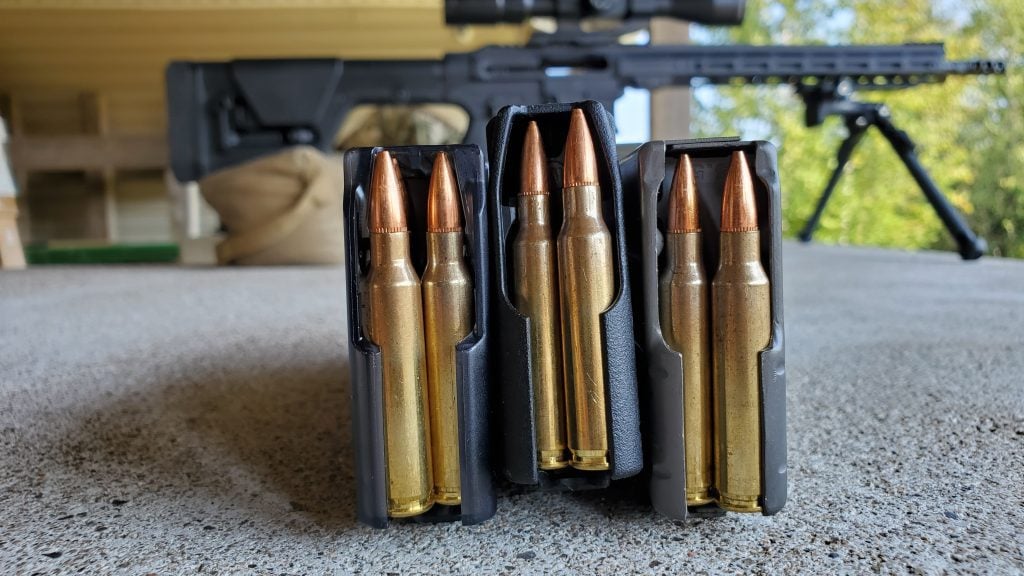
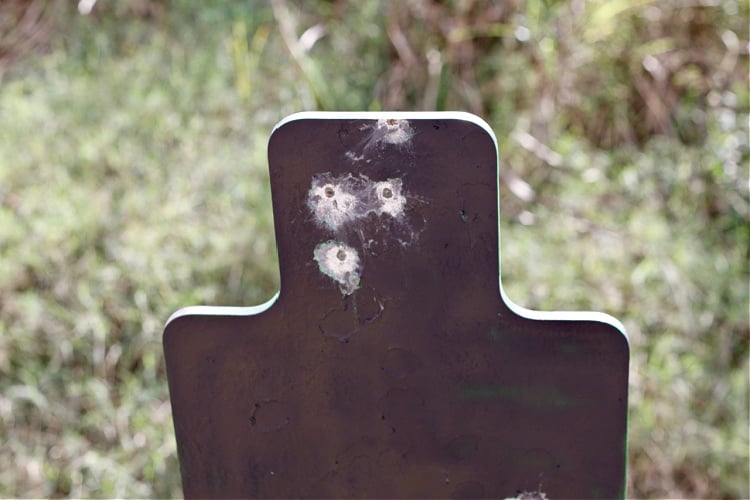
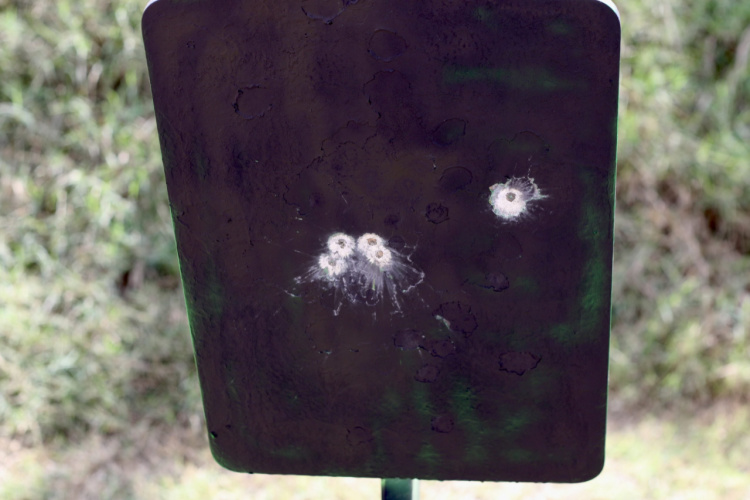
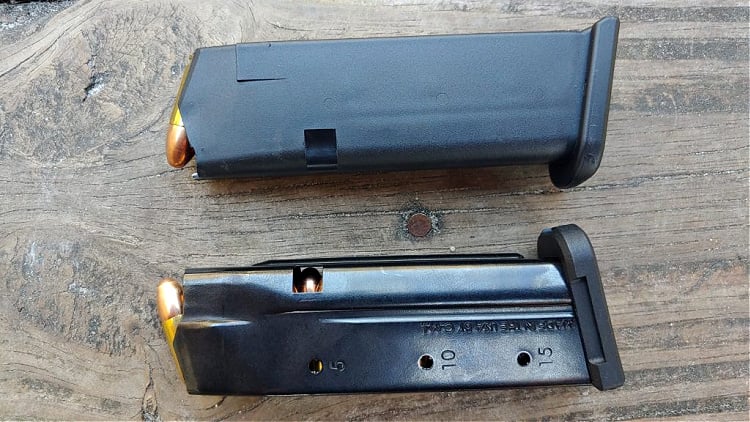
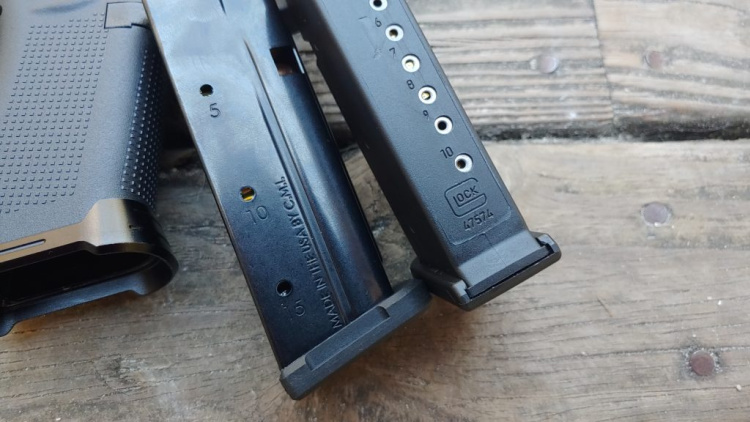
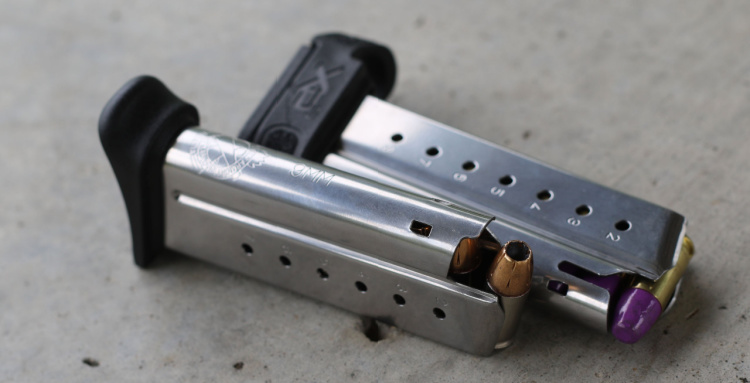
Enough about the magazine and how it looks, let’s move on to how it functions because who cares if it looks good? The Cross Industries 10/10 Cross Mag has been used in our Remington 7615. However, most of the rounds have been fired through our Maple Ridge Armory Renegade. Through my two ten-round magazines they have collectively fired around 800 rounds so far without a hitch. I will mention, however, that the cartridge overall length that these magazines support is a tad shorter than say a Magpul PMAG or a standard Aluminum AR-15 magazine. For instance, my 77gr HPBT Nosler loads gently skim the front inside of the magazine which could potentially cause feeding issues. I have yet to encounter this, however. If you reload on the longer end of rounds you may notice this issue.
You can see that the left-hand magazine being the 10/10 Cross Mag has a bit less available length for the bullet however it does work with SAAMI spec bullets just fine.
The 10/10 Cross Mag is a very competent magazine for the states and countries that like to punish law-abiding gun owners with silly magazine capacity restrictions. We have seen time and time again that needless prohibitions and laws have ended up with the market creating innovative solutions to combat the shortcomings of the uninformed. They apparently even have magazines coming out for the AR-10 style of rifles and ones for 7.62x39mm AR-15’s which I am really excited about. For the price of around $40USD, you get two ten-round magazines with the appropriate base pads to couple them together.
When we think of gun systems that have withheld the test of time, the lever action rifle has to be near the top. These rifles have been around since the Civil War era with only a few times when they weren’t the top choice. Chris Baker over at LuckyGunner has done a series on the lever action rifle and this episode is on why people love it so much. Let’s check it out.
The lever-action rifle origins go back over 150 years, but they are still widely loved. Thanks to new options the rifle is gaining popularity once again. The newer versions are modernized version of their ancestors, but still have the same functionality. But why are they so loved, even today?
The lever-action rifle has stood the test of time. It helped protect the scores of people from the Civil War era to the present but is often seen as the gun that won the West.
Let’s take a walk through lever action history.
A New Cartridge
The lever-action rifle was introduced in the early 1860s thanks to the metallic cartridge. Prior to that, the soldiers during the Civil War used rifled muskets or muzzleloaders and those were seen as cutting edge. The metallic cartridge brought around two very important advancements:
1. The first practical breech-loading single-shot rifles, and 2. The lever repeating action rifle.
The first metallic cartridge breech loaders were pretty basic improvements over the musket. They were known for being accurate and had long-range caliber bullets (similar to a 12ga low recoil shot now as far as range). A good example of this type of rifle is the Remington Rolling Block that shot a .50-70 caliber round.
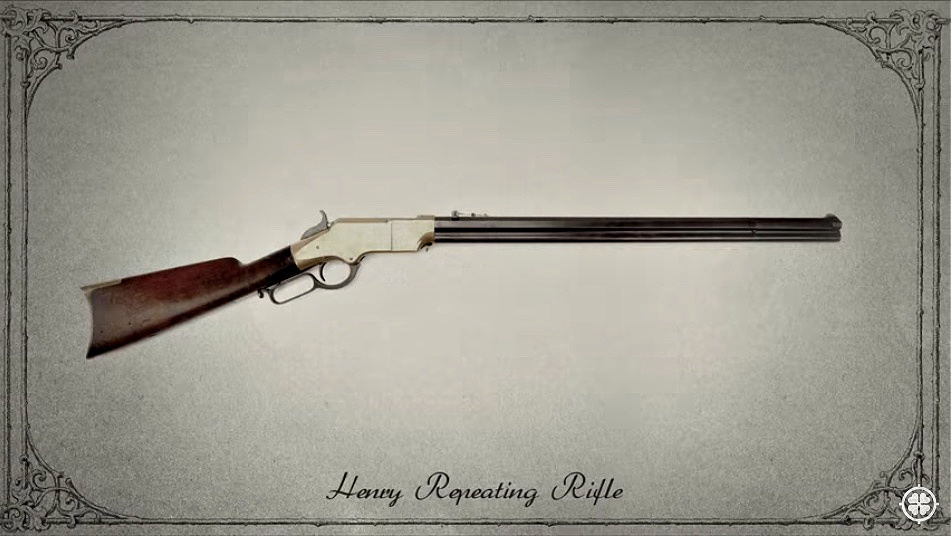
The Henry rifle was one of the original lever action rifles. The company would later be renamed the Winchester Repeating Arms Company.
The lever-action rifle was in direct contrast to the breach loaders in that operators would have to sacrifice the power and range of a round for volume of fire. The rifles shot pistol caliber rounds, similar to what a .44 caliber is today. In the beginning, you could have between seven to 16 shots total without having to stop and reload. Unfortunately, these rifles weren’t embraced by traditionalists, including military leaders.
Was the lever action ever used by the military?
Only a few repeating rifles were ever issued by the Union forces, but that didn’t stop enlisted men from purchasing one with their own money. They didn’t want to be the one to get shot or stabbed while they had to reload their single-shot rifle. Even with their popularity rising, leaders subscribed to the one-shot, one-kill theory of fighting and didn’t believe it was a necessary change. Even post-Civil War, when the army replaced the musket, they went to a bolt action rifle. They never officially adopted the lever action rifle for general issue to soldiers.
The lever action rifle was what Baker says won the west. With its compact size and volume of fire, it was used by scores of people across the country.
It was the gun that won the west!
That didn’t stop the popularity of the rifle. The rifle that would be seen as the conqueror of the West was the Winchester repeating rifle, formally the Henry. Civilians appreciated the lever action as their need for close-quarter fighting and the need for quick follow-up shots. Most predominantly used was the six-round option.
And then there was smokeless ammo.
Near the turn of the century, smokeless powder came along, and with it came new innovations. First to come was the bolt action rifle that worked better with the smokeless powder. But the lever actions didn’t fade away. The Winchester Repeating Arms company came out with a smokeless ammunition for their rifles as well, just hand less power than a bolt action.
The Winchester .30-30, while less powerful than a bolt action counterpart, still was a good rifle and round. It has modest recoil but could still bring down game for hunters. The rifle was smaller and easier to manipulate with smooth sides that wouldn’t catch up on things around it. Baker stated that the people who used their rifles regularly were most likely to be using lever action .30-30.
Lever action culture in the twentieth century.
Next to come to threaten the lever action love was the invention of the semiautomatic rifle, the Remington 8, around 1905. It was compact and chambered in moderately power calibers similar to the Winchester .30-30 but could get rounds off faster than the lever actions. Post-WWII, the gun culture was about hunting and collecting of firearms with models from Marlin, Savage, and Browning all being popular that kept similar aesthetics from the original models.
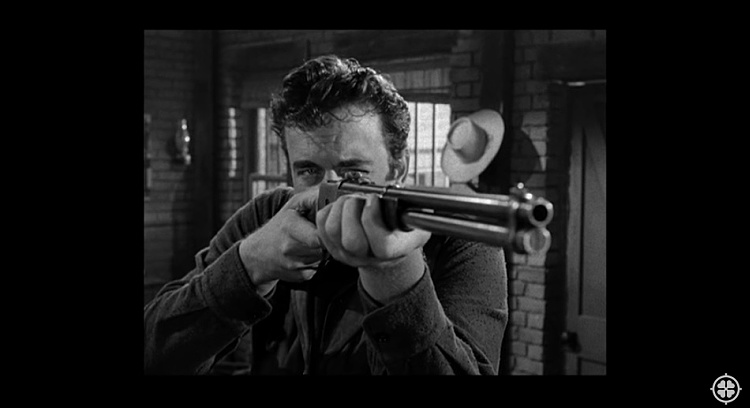
The lever guns in post-World War America were helped in popularity thanks to the number of Westerns in the media, from radio, TV, and movies.
It became a cultural Icon on film.
The lever action rifle was extremely popular well into the 1970s thanks to the prevalence of Westerns in media, including the popular series Gunsmoke that ran for 20 years (and still going in syndication). By the 1980s and 1990s, things started to cool for the lever action, and other firearms due to declining overall popularity in hunting and ownership.
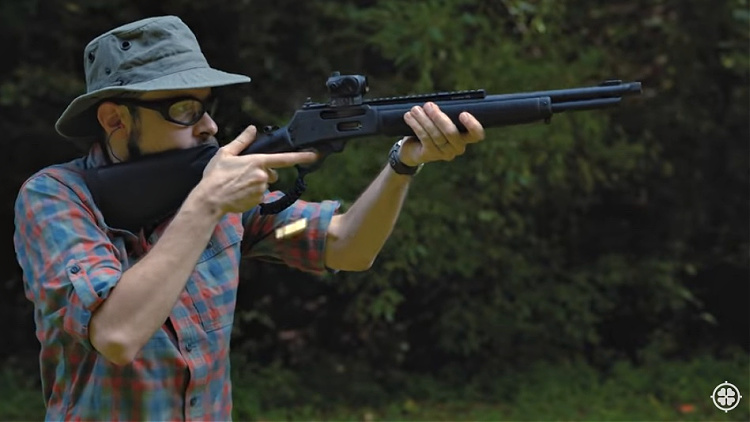
It’s just plain fun!
Lever actions resurged in popularity in the 2000s thanks to a new generation of enthusiasts and the want of personal protection, preparedness, and a fun shooting experience. Baker says it comes down to the fact that people think the lever action is fun to shoot. Not only that, but with the modern versions of these old guns come modern features. For instance, Baker cut the barrel down on his 1980s version and threaded the barrel to accept a suppressor. Check out this link if you want to see what else you can do with a lever action.
With the modern resurgence of popularity, modern versions of the lever action rifle have more options for the modern shooter with optics, lights, and furniture it’s easy to customize the rifle.
Modern versions still hold the love that the original ones once conjured up. They have similar looks, are compact, and chambered in low to moderately powered cartridges with very mild recoil. Besides that, being fun to shoot, especially with a suppressor, makes them even more likable and helps them withstand the test of time.
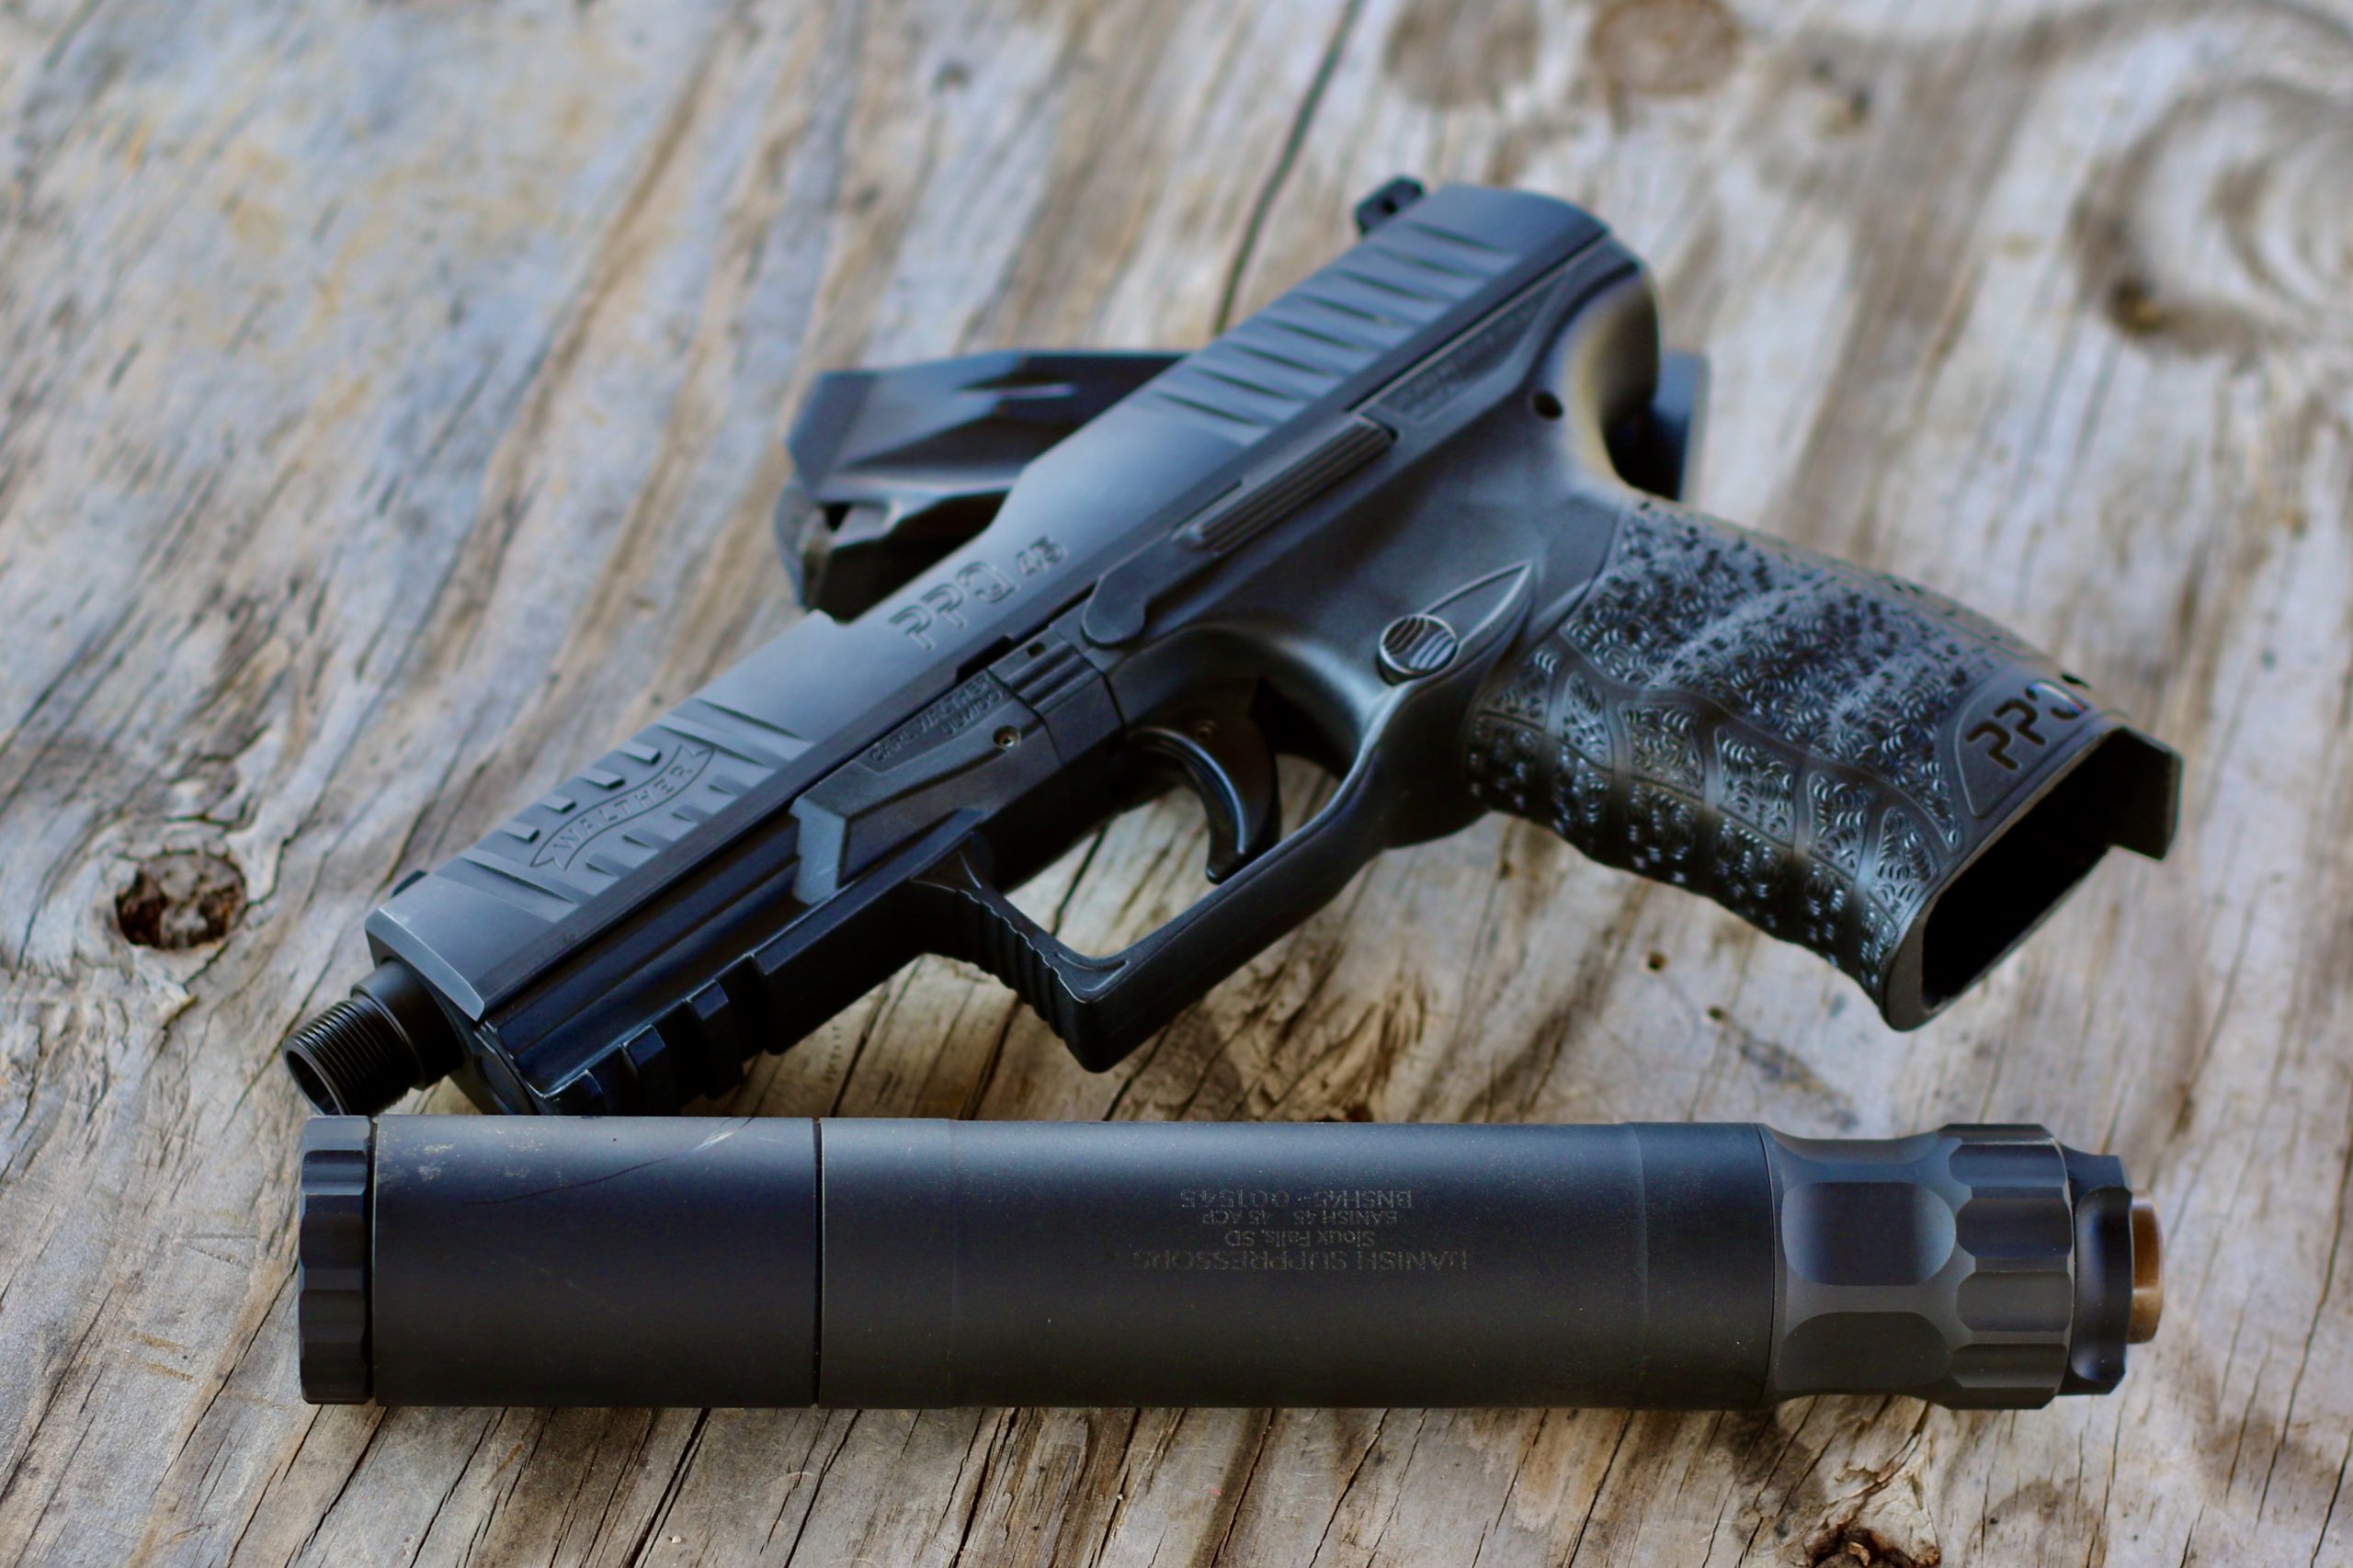
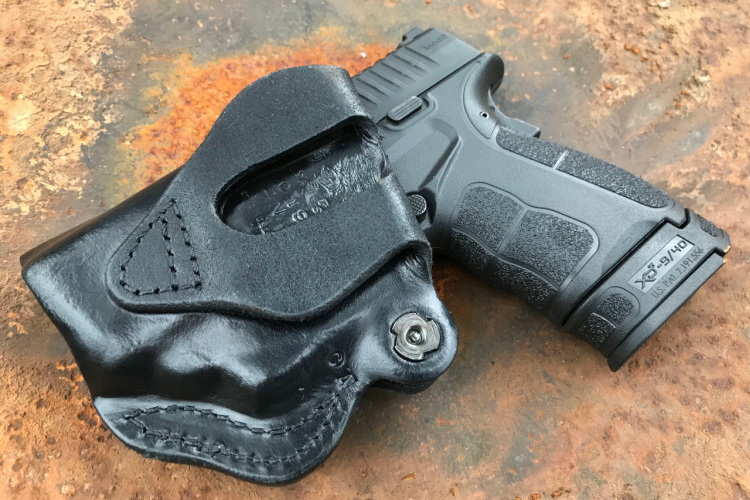
The Walther PPQ was the first handgun I found that stood a chance at unseating the Glock 19 that I’d carried for years. This was a 9mm PPQ M2, not the PPQ 45 here in this review, but the ergonomics of these guns and their performance are both very similar. The gun fits my hand, points exceptionally well, and provides the solid reliability that we should all demand of our EDC guns.
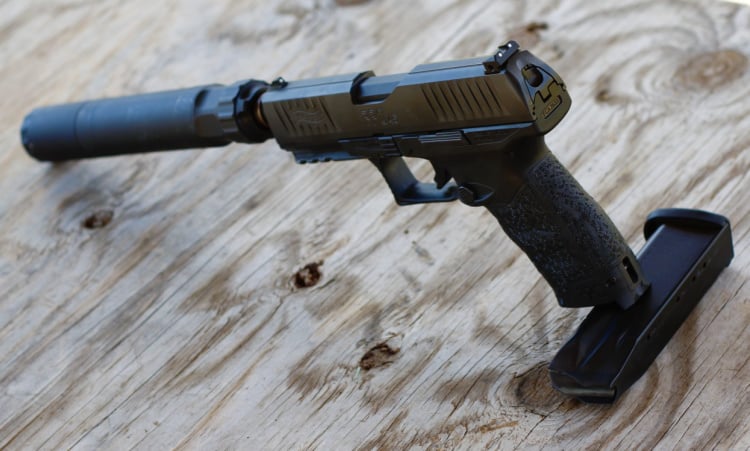
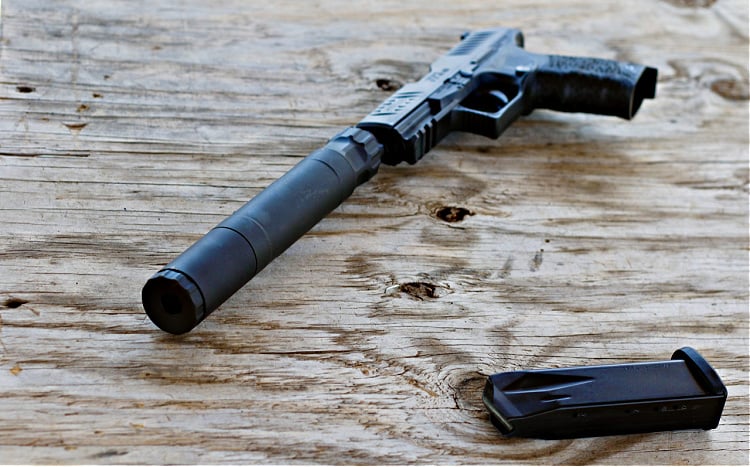
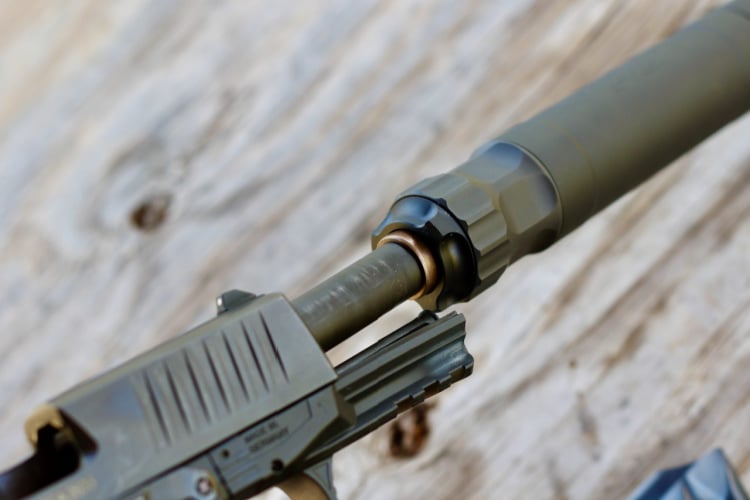
And now, years later, I’m looking at the gun for a different reason: sound suppression. I recently picked up a Banish 45 and had been running it on a couple of 9mm handguns, but hadn’t had a .45 ACP with a threaded barrel. The PPQ 45 doesn’t come with a threaded barrel (at least this one didn’t), but Walther makes a threaded barrel for it, and the combination is ideal.
There is a catalog model (The PPQ 45 SD) that comes with the threaded barrel, if you’re lucky enough to find one in stock.
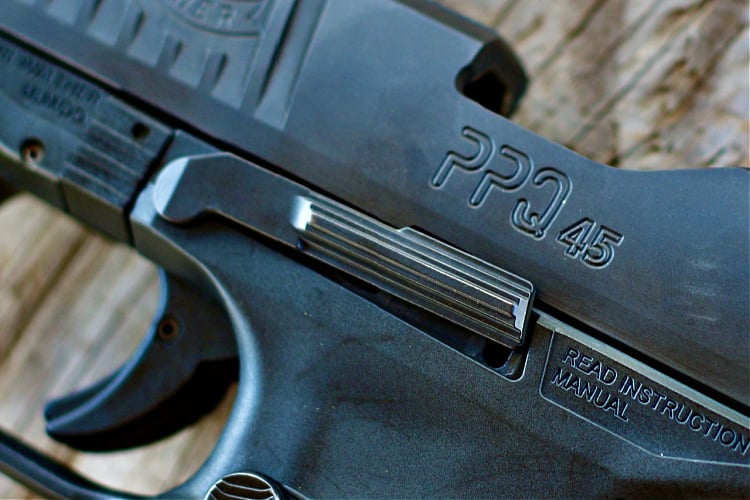
The Walther PPQ is known for its exceptional ergonomics and its short trigger reset.
Walther PPQ 45 M2 Specs
Model: 2807076
Caliber: 45 ACP
Barrel Length: 4.25″
Trigger Pull: 5.6 LBS
Trigger Travel: 0.4″
Capacity: 12 Rds
Overall Length: 7.4″
Height: 5.8″
Safety: 3 Auto
Width: 1.3″
Weight Empty: 28.2 oz
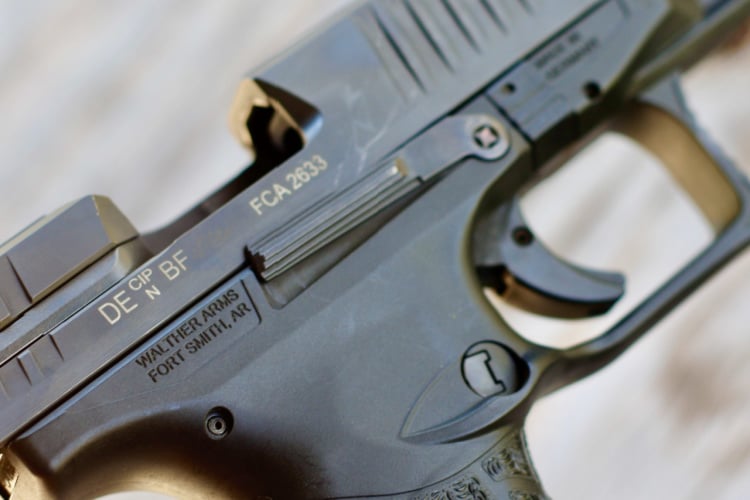
The highlight of the PPQ line is a toss-up. The trigger is truly one of the best factory triggers available. The shoe moves less than half an inch. The reset is even shorter—just one-tenth of an inch. And there’s not a hint of grit or sponge in it. If trigger performance is important to you, this line has to be on your radar.
The slide drop lever allows for a lot of actual leverage. This is one of the easiest slide drops in production today.
The remainder of the controls, though, stand out, too. And these are built into an ergonomic design that has come to define the Walthers of late. These guns have a complex geometry that matches that of the hand.
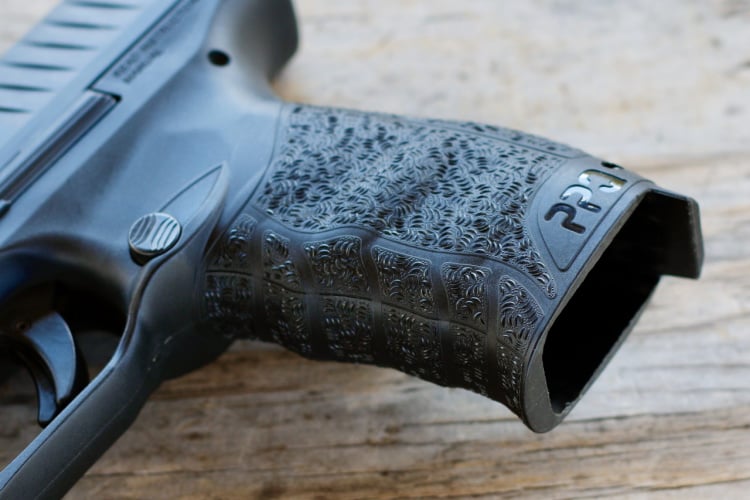
Walther’s grip squiggles compliment the well-defined swells on the grip and make this exceptionally comfortable to shoot.
Check the image above. There are curves within the curves. The PPQ 45 has to accommodate a double-stack magazine, but the grip is still easier to hold than that of a 1911.
The rear of the frame is undercut for a high grip. This is one of the reasons why the gun points so well for so many. The trigger guard is undercut, too.
The grip is covered in small half-moon-shaped protrusions at alternating intervals. As grips go, this is not as tactile as some of the rough sandpaper-like textures that are growing in popularity, but still sticky enough that your hand stays where you put it.
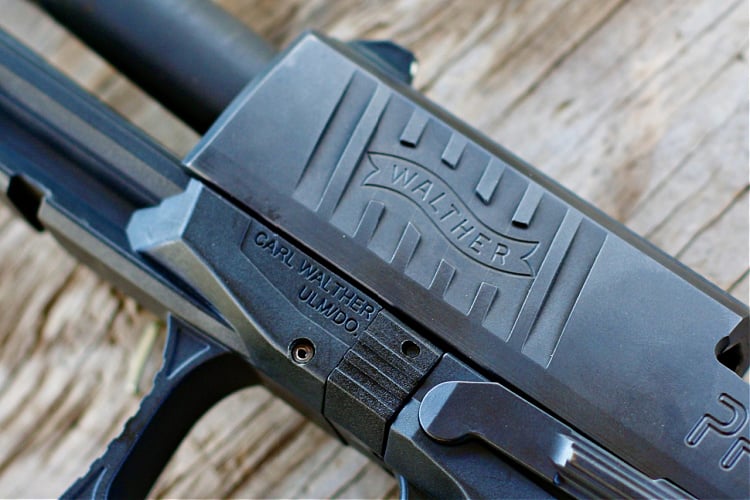
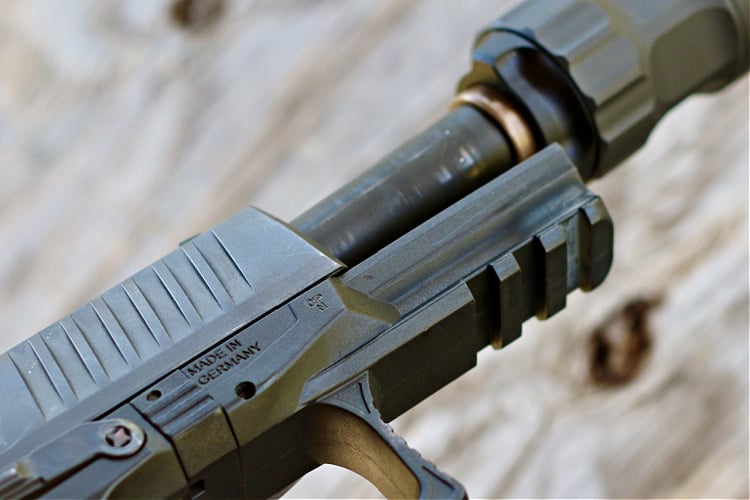
The front slide serrations are interrupted by the Walther banner but are still tactile enough to be useful.
The slide, too, has a variety of textures for easy manipulation. The cuts are deep and wide, and they’re not sharp-edged, but the depth alone is enough to provide for a solid grip. And the PPQ 45 has cuts on the front and the rear.
The Walther PPQ has three slots of rail up front on the frame for attaching lights or lasers.
For those who run lights on their pistols (and everyone should run lights on their pistols), there are three rail slots ahead of the trigger guard. At over seven inches, the PPQ 45 is ideally suited for a full-sized light.
The controls are ambidextrous. The mag release, though, will need to be swapped to the right side for lefties.
The controls are worth talking about, too. The most noticeable will be the slide-drop lever. This is a long bar that protrudes from both sides of the pistol. While most guns offer a little nubbin of steel to thumb down the slide, this one extends far down the frame and requires very little pressure to actuate—that’s physics for you.
The slide has ribs down the top that interrupt glare.
There aren’t any external safeties, other than the lever in the trigger shoe. Inside, there’s a firing pin safety and a disconnector safety. The combination gives the PPQ M2 its drop-safe clearance.
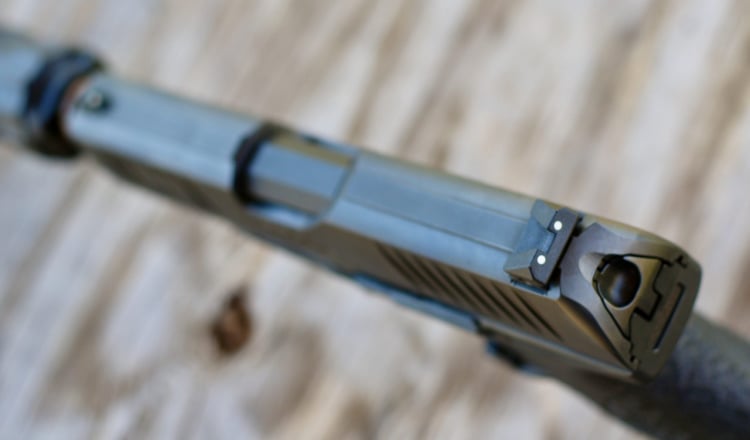
As the threaded barrel is an add-on for the PPQ, the sights are not built especially tall. They are still usable.
Sights on the standard version are a simple three-dot pattern. They’re low and unobtrusive. There’s a version that comes with XS night sights, and those seem like they may be taller.
In the stock configuration, the sights don’t clear a suppressor. This isn’t always bad, though you will need to know what your target looks like with the obstruction of the can itself superimposed between the front sight and the target. In other words, you have to make some allowances when using these sights with a can, but accuracy is still very reliable.
The front sight isn’t as easily seen with a suppressor on, but it is still functional. Though some of the target will be obscured by the width of the Banish 45, which isn’t overly wide, the three-dot set-up on the PPQ will still get allow for precise shot placement.
Shooting the PPQ 45
Running fast on steel, I found I walked up. The fifth shot was high—almost off the plate.
Almost all of the .45 ACP I’ve shot, more than 99% of it, is through a 1911. I’m a sucker for the classics. If my gun is going to be made of plastic, I’d rather have it chambered in 9mm. So this is a crossover of sorts.
But it could change my mind. The 12 round magazine and compact design make this a compelling choice for EDC, especially in winter when I could wear it OWB and still keep it completely covered. And everything about this gun is designed for regular use and carry.
The PPQ has a superb trigger. The break is light, the pull is consistent, and the reset is minuscule: .1″.
I’ve already talked about the insane reset. One-tenth of an inch. This makes follow-up shots crazy easy. When combined with the PPQ M2’s ergonomics, which go a long way in mitigating the recoil and muzzle-rise of the compact .45 ACP, this becomes a seriously fast gun that is easy to keep on target.
In fact, if you are shooting one for the first time, the trigger will likely be the takeaway. It will take a bit of practice to get used to. The image below shows what I mean.
I was working on connecting up a group of shots and didn’t yet have my sights perfectly realigned when I pulled off that flyer. I’m accustomed to triggers that are a bit more forgiving, so I’d already begun to pull back in anticipation of the shot I was about to take when I felt the shot fire.
Did I mention the trigger break? The shot on the right surprised me.
PPQ 45 M2 Magazines
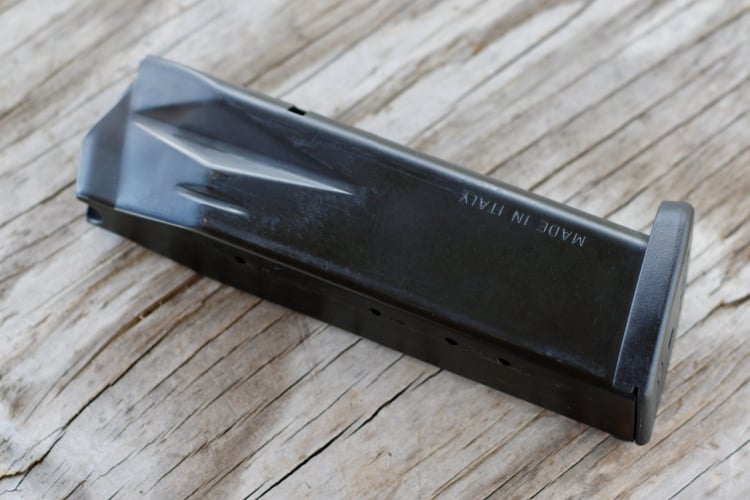
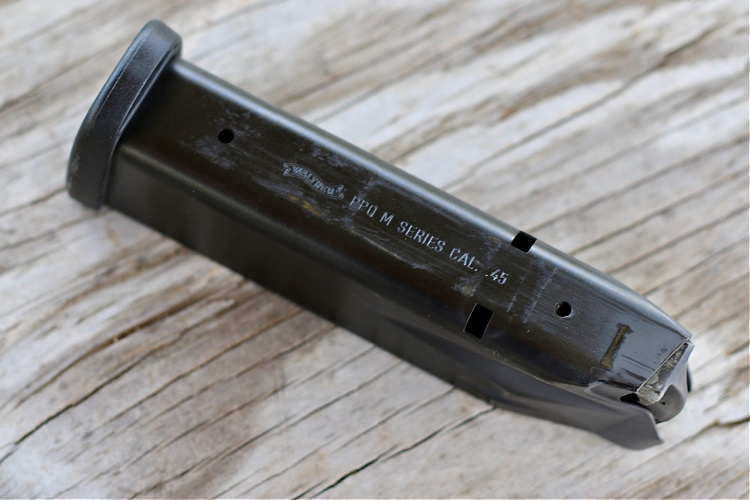
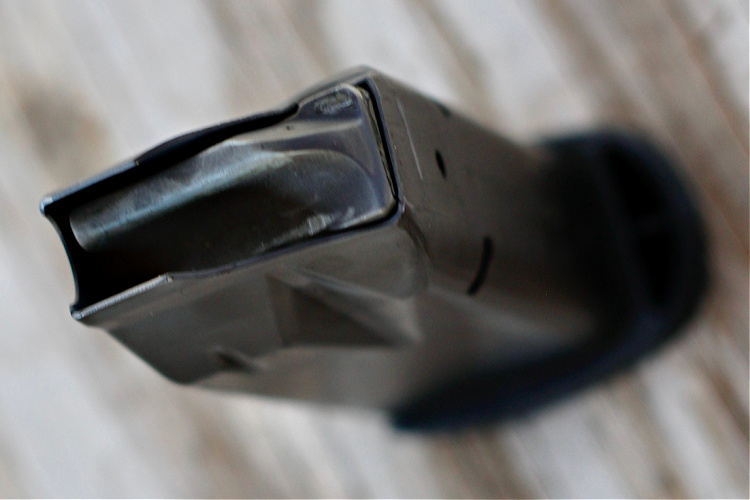
The magazine for the .45 is big and made of stamped steel. Like the other PPQ mags, it functions flawlessly.
With a 12+1 capacity, the PPQ 45 M2 has a solid capacity for a .45. The mags are built of steel and are stamped with several geometric impressions that both provide strength and guide the double-stack of rounds into a single column.
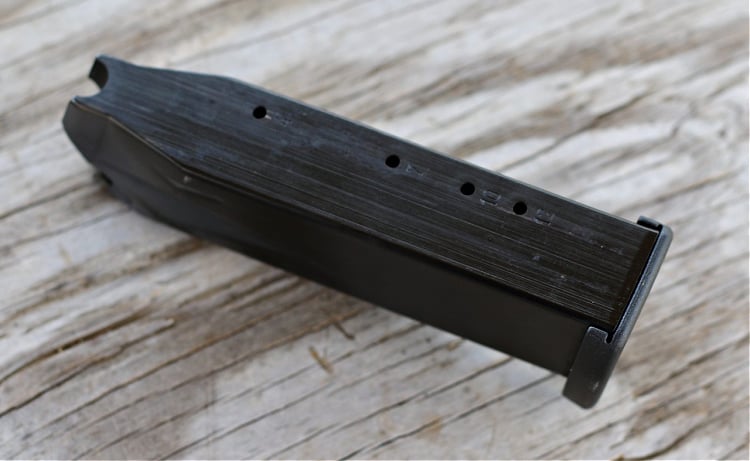
Witness holes allow for decent round counts without letting in too much debris.
The design works and doesn’t need to be babied. The most care one of these mags needs is a good cleaning and light oiling. As the bluing wears, watch for rust. Even then, though, buff it off and oil again and keep going.
The mag catch reflects the ambidextrous nature of the gun.
The body of the mag is labeled with a caliber. This, though, is small. While the size is indicative of its caliber, the mag can get easily confused with others that look similar.
The follower is plastic and sits atop a solid spring. Topping off the mag requires some thumb strength.
This is one of the problems with guns like this, I think. The mags are solid, durable—everything you’d want, really. They’re also not super easy to find. These are running about $40 a piece.
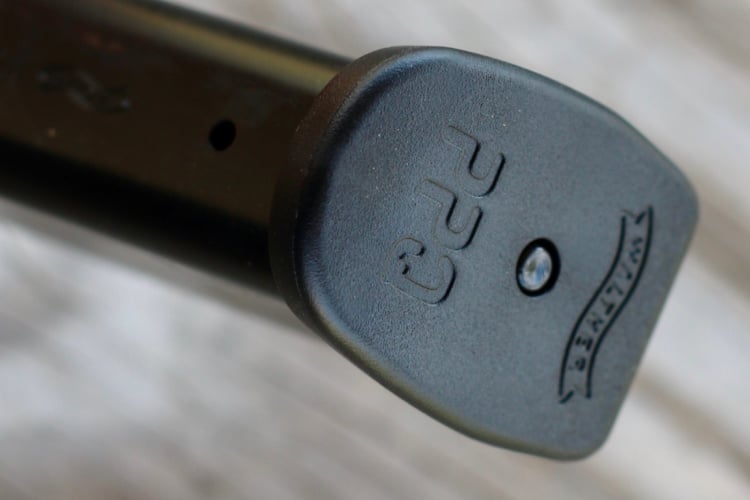
The mags have branded base plates, which will help if you have multiple handguns, though the caliber is not marked, so you may struggle with identification if you have more than one PPQ.
Shooting the PPQ 45 M2 Suppressed
The balance of a suppressed pistol changes, as does the recoil.
Adding a silencer can change your point of impact a bit. The shift isn’t much, but you may need to compensate for surgical shot placement.
A red dot can help with this, as the optic can be sighted in on the true point of impact. Some sights can be adjusted, too, which is a longer-term solution. So long as the silencer tightens down on the barrel in the same position (with the baffles in the same position, really), then the impact shift should be consistent with any given type of ammo.
The recoil is less of a snap up and more of a wave motion. There is still muzzle-flip, but it is not as steep when suppressed.
The Walther PPQ 45 M2 tends to follow a swimming motion during recoil. This is the part of writing that is complicated; I know exactly what I mean, but it is hard to communicate. The gun moves up (less than with unsuppressed fire), but there’s more mass, too, which slows that motion.
Then getting back on target requires that the downward momentum of that extra mass be slowed down so you don’t over correct and dip the muzzle down. This isn’t easy, so there is often a up, down, back up slightly motion that feels like the motion of a wave.
The Banish 45 can mount via direct-thread adapter or like this, with a piston.
The Banish 45 is all titanium, so it isn’t heavy. And the baffles cut the sound of the .45 ACP to hearing safe levels. It is a joy to shoot, really, and the sound of those fat rounds thwacking on the steel is much louder than the muzzle blast itself.
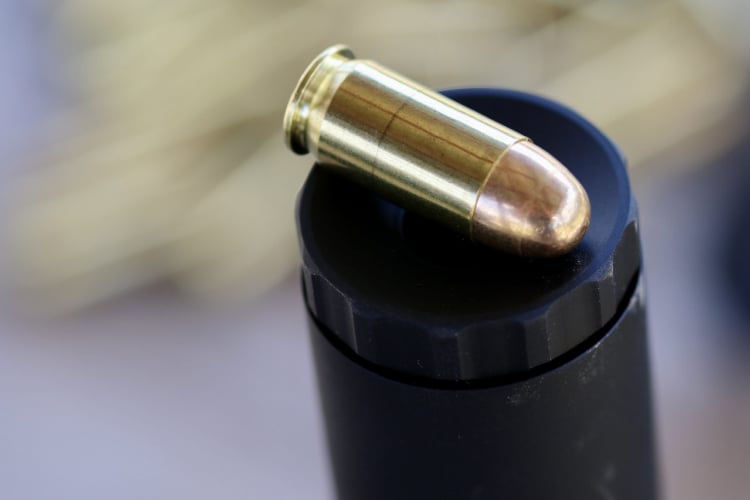
.45 ACP ball can be lethargic. The good news, though, is that lethargy means they’re subsonic. That makes them hearing safe from the Banish 45.
Holstering, though, is problematic. While there are plenty of holsters for the PPQ 45 M2, adding the threaded barrel makes it slightly harder to holster, and the suppressor is really more of a dedicated addition to the gun.For a home-defense gun, though, it is a solid addition. For range work or plinking, this is addictive. The PPQ 45 cycles everything, even when suppressed, and offers more on tap than your bog-standard single-action.
Price? Looks like the selling price would be somewhere on the positive side of $700, but that would be determined greatly by availability (they’re hard to find in the wild).
Joyful. That’s the word I use to describe shooting suppressed. Every time I shoot suppressed, I talk about wanting to get a suppressor. What stops me is a myriad of things. For one, I don’t know which gun to suppress. I feel like a 5.56 suppressor would be the handiest, but I shoot 9mm way more than 5.56. I also hunt with a .308, and I feel, in all reality, the most practical use for the suppressor would be hunting. I don’t want to deal with the NFA process multiple times, so what am I to do? Well, it seems like SilencerCo has heard the cries of shooters like me and addresses it via the SilencerCo Hybrid 46M.
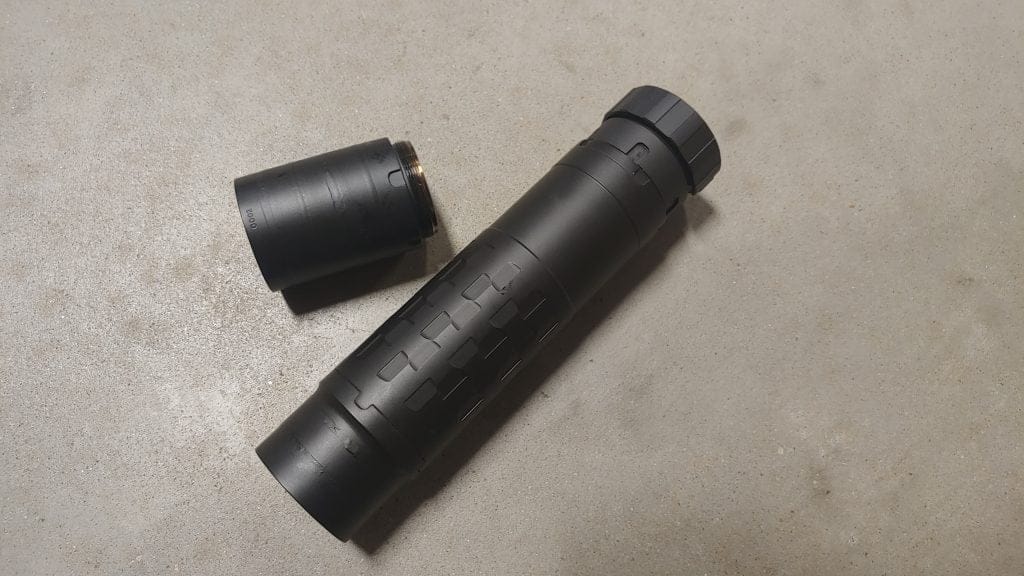
The Hybrid 46M is the world’s first and only truly modular big-bore-suppressor.
SilencerCo graciously sent a model for me to test and review, and I’ve got a fantastic opportunity to spill some lead downrange. More than ever, I’ve found myself wanting a suppressor, and the SilencerCo Hybrid 46M was love at first shot. The more I’ve learned about it, the more I’ve begun to think I’ve found the one suppressor I can use for all those roles.
Diving into the Hybrid 46M
The Hybrid 46M suppressor is a sequel to the original Hybrid 46.
What’s the big difference?
Well, the M in the name, my friend. In reality, it’s a lighter suppressor that’s modular (that’s where the ‘M’ comes in) with two different lengths. The Hybrid 46M’s full-size configuration is nine inches long and weighs 19.9 ounces. In its more compact form, the suppressor is 5.78 inches long and weighs 12.2 ounces total.
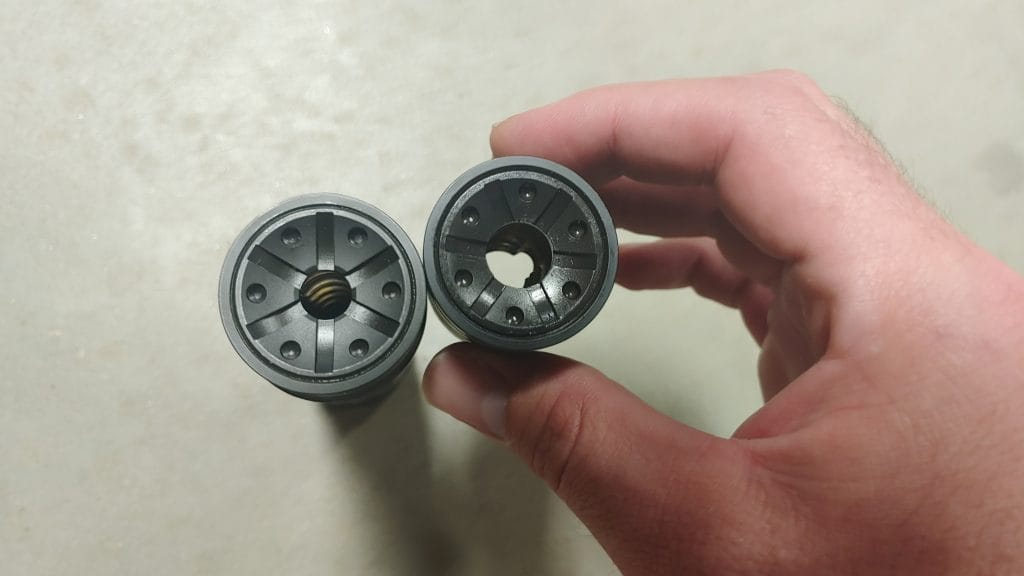
The can comes with a 30 cal and 46 cal cap.
It’s fairly lightweight for its length, and the diameter is 1.57 inches. The reason why I think this could be that one perfect suppressor for guys like me is the fact it’s a 46 caliber can. I can use this thing on my 9mm, my .308, my 5.56 rifle, and beyond. I can go up to .458 Socom and 45 ACP. It’s tough enough to take the hits from a 338 Lapua Magnum and keep on functioning.
You can use the short or long configuration, so this thing puts the M in modular.
Sound suppression works best when a suppressor matches the caliber of the weapon. That is true, but SilencerCo does mitigate this. The front caps of the suppressor can be swapped to accommodate various calibers to help improve suppression. The Hybrid 46M comes with a 46 caliber cap and a 30 caliber cap. You can also purchase a 9mm cap, a 5.56 cap, and a 6.5mm cap.
One Suppressor to Rule Them All
I can snap this thing onto any firearm in my collection and start popping suppressed shots off. Besides just utilizing different caps, the modular capability to reduce the length and weight of the suppressor ensures things stay light and short for weapons that are light and short.
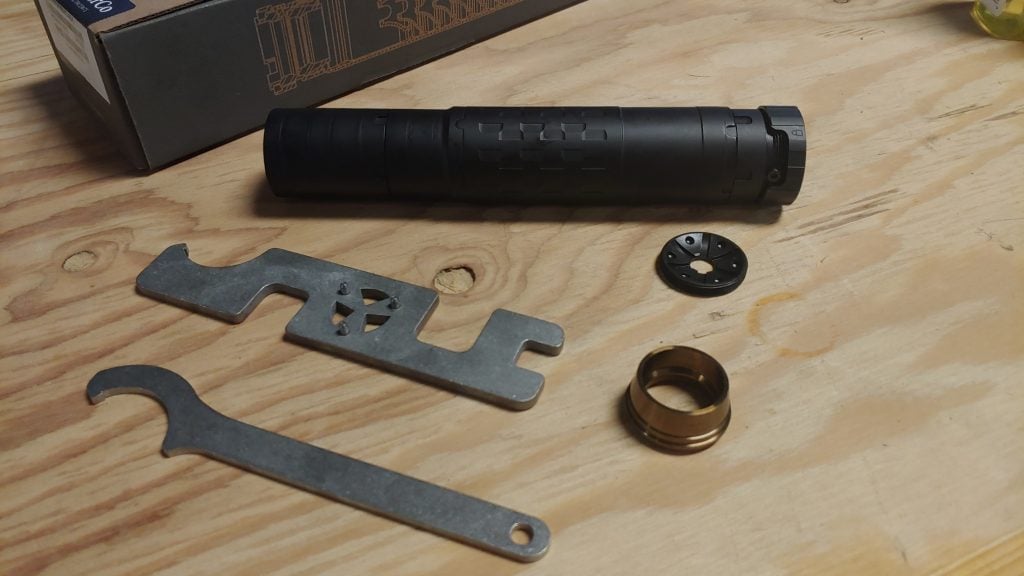
All the goodies that come in the box.
I might toss the Hybrid 46M on my 308 rifle in the long configuration to maximize my suppression. If I’m rocking a 9mm PCC, well, why then I go short and sweet. It’s a good way to mix and match your suppressor to your various firearms while maintaining their overall purpose.
Putting It In Action
Reviewing NFA items can be a hassle. It would take 6 to 9 months or maybe longer to transfer the suppressor legally to me to take it home and give it the old bang bang. Instead, it was sent to my FFL/SOT, who was gracious enough to allow me to use the weapon on his property and under his supervision. Big thanks to Big Bend Outfitters for all their help.
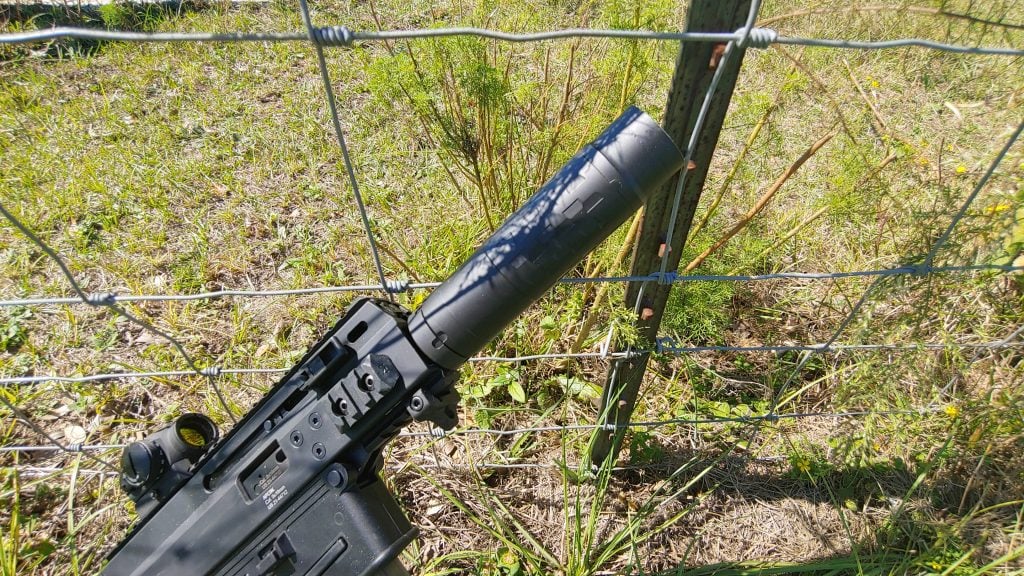
The long configuration keeps things nice and quiet. Without causing the gun to be off-balance.
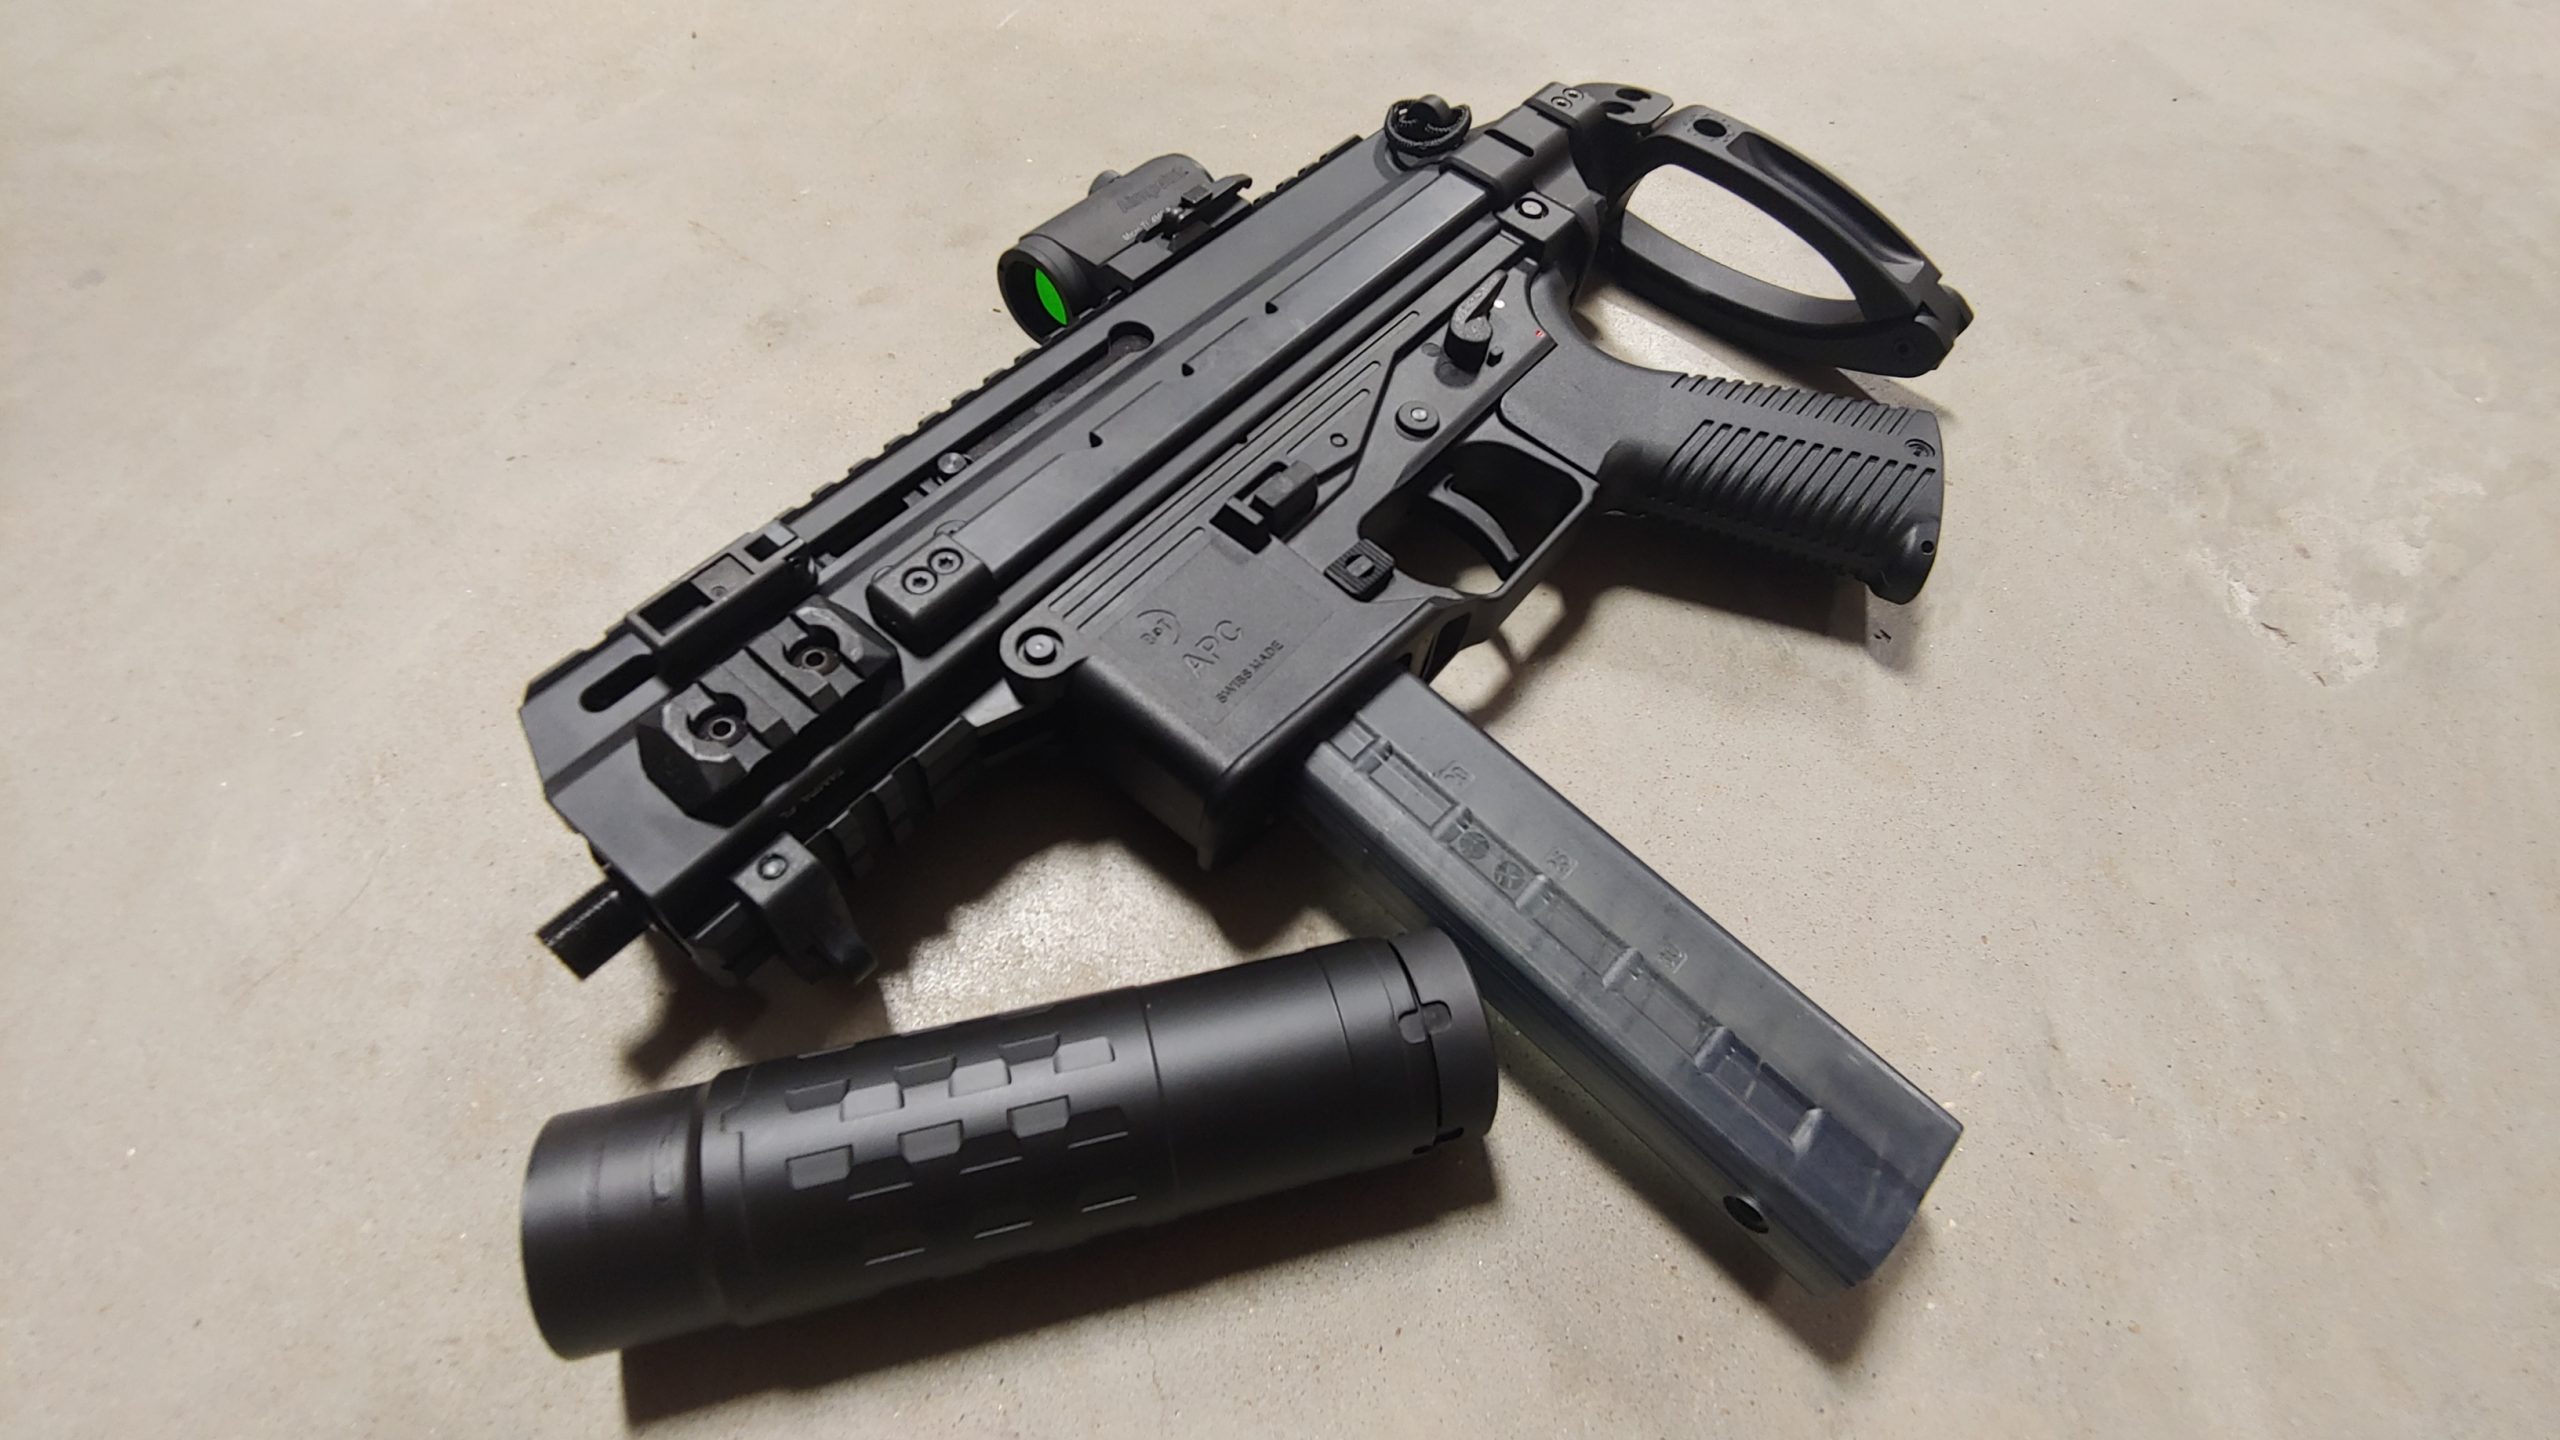
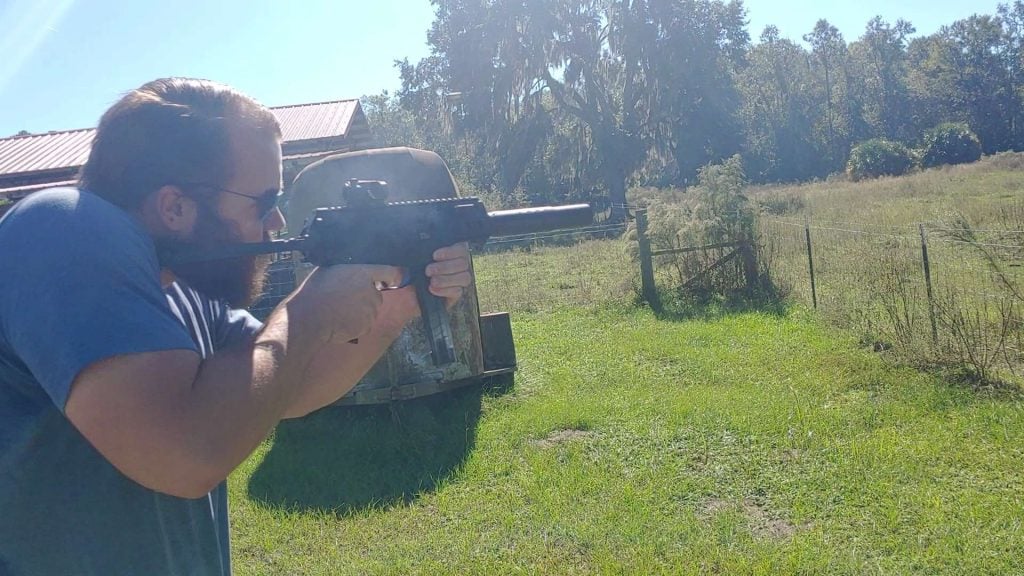
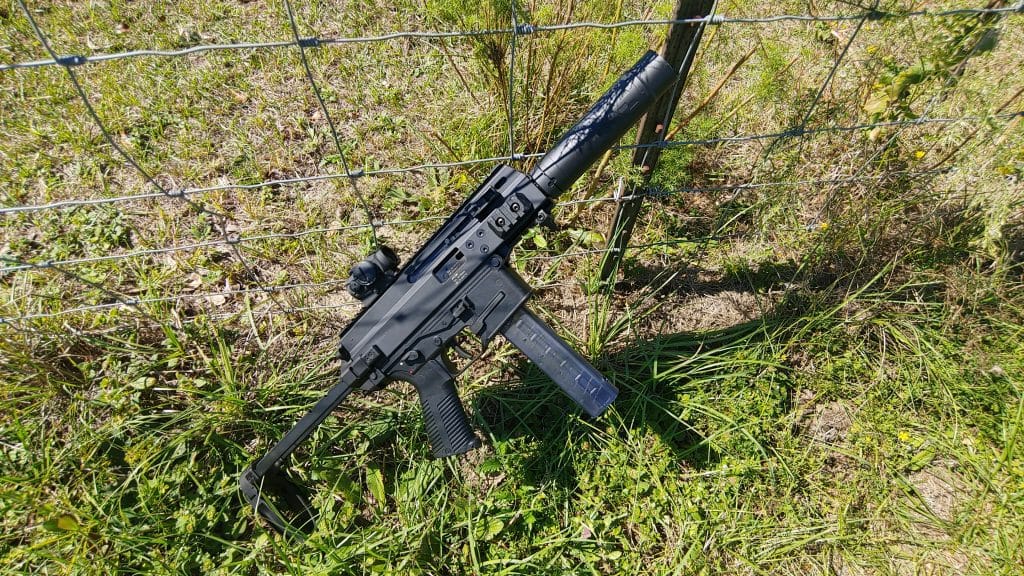
To keep with range restrictions and overall safety, I brought my favorite subgun, the APC9K, a direct thread adapter, and a butt load of subsonic 9mm. I strapped the Hybrid 46M to my APC9K, and it just looked like it was at home. Even in the long configuration, the weight wasn’t so much so to throw the short little fella off balance.
The little gun lost its bark when it was muzzled.
I started in the long configuration and began blasting through 9mm. The first shot was a little snappy but not enough to ring my ears. Follow-up shots were nice and quiet. I blazed through the first mag and me and my friend talked about kids, our favorite steak houses, and why we both wished we had a lever gun with a threaded barrel for this test.
Keep It Down
We talked as we took turns firing. The weapon was quiet enough that we didn’t need ear protection of any kind. The little snap and pop of the 9mm weren’t enough to interrupt us. Keep in mind this wasn’t with the 9mm cap, but with the standard 46 caliber cap.
I’m not the most knowledgeable in regards to suppressors. I get that can-heads love to talk dBs, barrel lengths, loads, and sound reduction, and it is truly fascinating. However, what matters to me is if it can make the gun hearing safe. The Hybrid 46M certainly made my little APC9K hearing safe when mixed with subsonic ammunition.
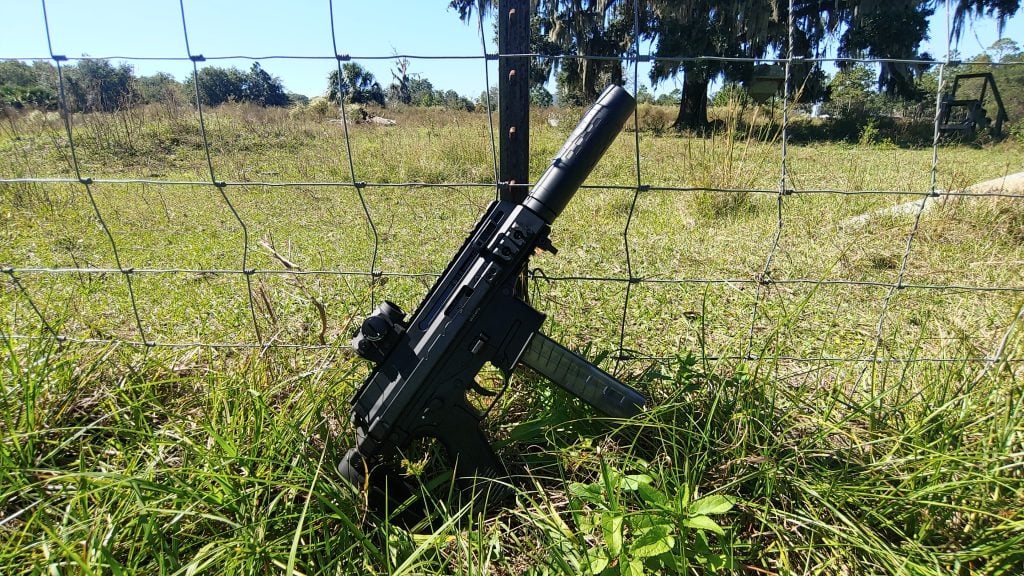
When it’s short it matches the APC9K a bit better.
We took a break, let the suppressor cool, and then broke it down to the short model. SilencerCo includes all the necessary tools to remove the cap, attach and detach the suppressor, and everything you’ll need to do with the little fella. Taking it down to a lighter, short profile made the Hybrid 46M fit the APC9K like a glove. The lighter, shorter suppressor matched the short, light gun very well.
Ain’t she a beaut?
Both sizes reduced muzzle rise and recoil a crazy amount. The Hybrid 46M works better than a standard compensator. The gun barely bucks and moves between shots. It makes it really easy to fire ten rounds with the gun barely moving. It’s full-auto rated, so it’s not like I was going to burn it down.
Back to the Pew
Again, the first shot had a little extra pop, but after that, the gun was plenty quiet. I ditched ear pro after the first two rounds, and we resumed our conversations as we shot. There was a slight difference between the longer can and the short can, but it remained hearing safe.
Some guns just look right suppressed, this is one of those guns.
I’m sure you guys want a little more information than that on how well the gun suppresses other calibers. I mean, it’s easy to see why you’d want that info, so I scoured the net. By that, I emailed SilencerCo and asked what performance they saw from a wide variety of calibers, and they happily provided me the information.
For reference, OSHA states that sudden loud noises up to 140 dB are hearing safe. However, constant repeated exposure can reduce the safety.
The Hybrid 46M In Action
I don’t want to send this thing back. It’s so utterly awesome that it’s making me want to deal with the Federal government.
The 46M from SilencerCo works like a dream. It made my little APC9K incredibly quiet and perfect for home defense. It’s also modular enough for me to attach it to a wide variety of guns, and it fits everything in my current crop of firearms if you’re like me and wants to truly buy once and cry once the Hybrid 46M is for you.
Make your pow into pew.
If you are also a beginner with cans, SilencerCo is the way to go as well. They make tons of accessories, parts, and pieces to match the suppressor to whatever task you put upon it. Check it out at SilencerCo, and let me know what you think below.
Was I blown away when the Glock 43X and the Glock 48 premiered? No, not really. The Sig P365 had already been out for a year and offered a smaller gun with equal to or greater capacity. I found the 43X and 48 to be a bit underwhelming. Now I would have felt a helluva lot different if Glock kept the thin dimensions of the gun and packed 15 rounds into its flush-fitting magazines. Well, Glock might not have done it, but a little company called Shield Arms did it with the S-15 magazines.
The S-15 magazines are now in their second generation, and they have been in constant demand since they unveiled the first generation. People love Glock pistols, and the G43X and G48 are both very reliable, easy shooting guns primed to be thin and easy to carry. The 10 round OEM magazines kind of suck in a day and age where Micro-Compacts rule the concealed carry stage.
The Glock 43X is slightly smaller than the G48. (Photo credit: Kat Ainsworth Stevens)
Shield Arms produced the S-15 2nd Gen to make a few improvements they saw necessary. First, they did ambidextrous magazine release cuts so lefties could be accommodated. The mag catch windows are smaller, which helps reduce the up and down movement of the magazine in the magwell. They also improved the tube and baseplate geometry for a more reliable magazine.
How Did Shield Arms Do This?
Well, they stripped the plastic off the magazines. The Glock OEM magazines utilize a polymer coating like all Glock mags. As we know, for a polymer to be as durable as metal, it has to be a bit thicker. If you trim that polymer coating off of the Glock magazines and make them metal, they are suddenly a little wider on the inside and can accommodate those five extra rounds.
Bam, now you got 50% more ammunition in a flush-fitting magazine. For me, it’s tough to give a crap about the OEM magazines when these are available. Shield Arms made their name producing magazine extensions, of which I have and think are excellent.
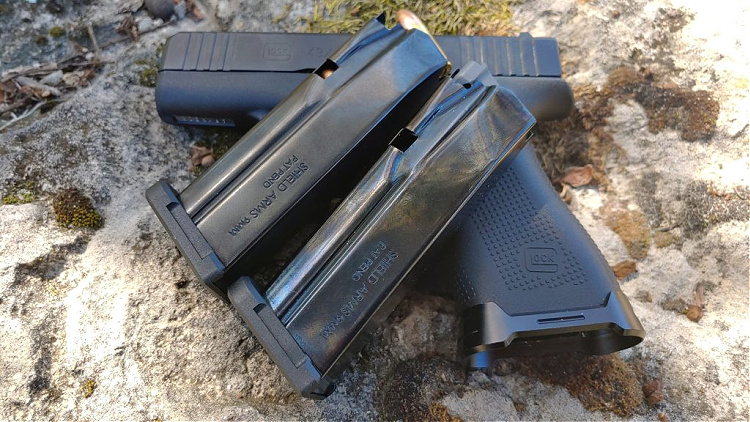
The mags are the same size, but one holds 15 and one holds 10. Also, check out that aggressive baseplate.
Shield Arms even produces +5 magazine extensions for your S-15, so if you want to step it up to 20 rounds, you can. Especially if you carry a spare pocket magazine and want a little more ammunition on the very rare occasion, you’d have to reload.
I approached loading the S-15 magazines with some caution. After loading the Hellcat and P365 15 round magazines, I expected it to be a workout past round 12. I was pleasantly surprised that the S-15 mags were easy to load the whole way through. I never craved a magazine loader to spare my poor hands from the work.
Do the Shield S15 Magazines Work?
Here’s the big question, right? If the S-15 magazines challenge the reliability of the gun, then they are nothing but paperweights. I brought a healthy dose of Winchester White Box and two S-15 magazines to the range over the never several days. With the S-15’s fully loaded, I began playing the song of my people.
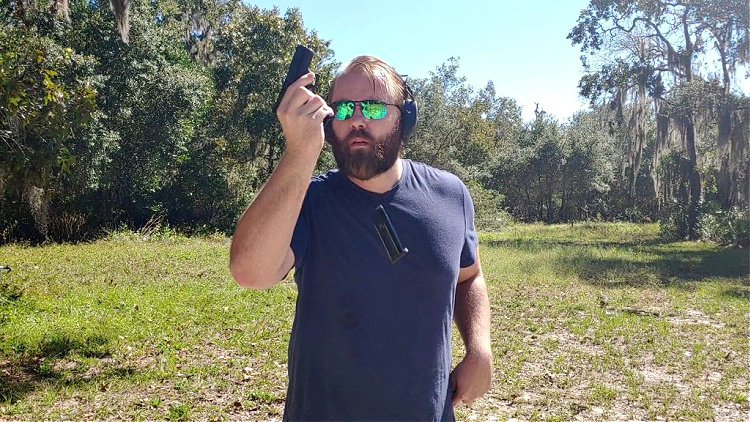
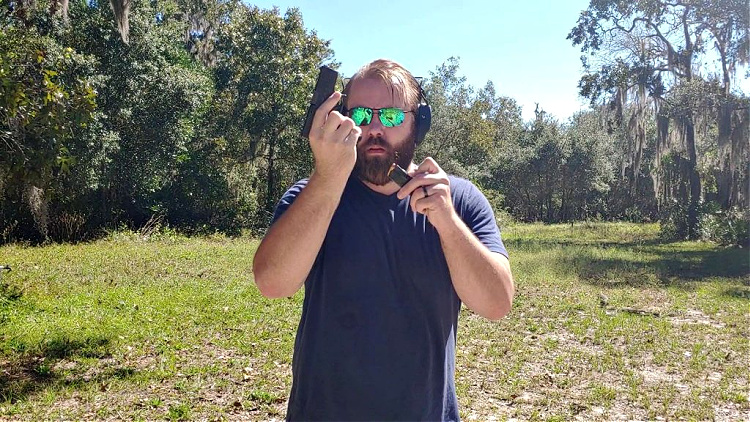
I ran through a round of good old-fashioned Dot torture, which tests shooters, guns, and gear in a variety of ways. This drill utilizes reloads, drawing, non-dominant shooting, and single-hand shooting. I bulldozed my way through Dot torture without an issue.
With 50% more ammunition it’s tough to go back to OEM magazines.
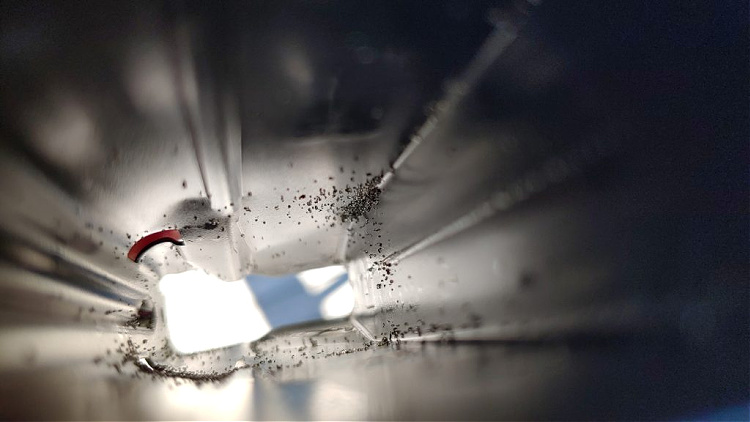
How do you test a magazine other than just shooting it? Well, reload drills, of course. I live on a Florida sandhill, and the white sand will test the hell out of anything related to guns. I dropped the magazines into that white sand over and over again. The S-15 dived into the sand at all angles and ate up a healthy amount of it.
By the end of the first few reloads, the follower gritted along as I loaded round after round into the S-15. Yet, it didn’t stop or fail. I loaded the rounds one by one and unloaded them the fun way one by one. The sand didn’t create any feeding issues.
See all that sand? Mags still worked.
In terms of durability, I did dry reloads on my hardwood deck every evening for a week as part of my dry fire practice. They hit and bounced off the ground for what must have been hundreds of reloads as the sun set, and they still function completely fine. No dents, no follower issues, no base plate problems, and no detectable issues that I can find.
Speaking of Reloads
The S-15 mags drop free.
Throughout all these reloads, I came to appreciate the base plates on the S-15 mags. They provide a more aggressive lip than the Glock OEM magazines. To me, this makes reloading easier and more intuitive. It helps me lock onto the magazine and draw it from my pocket clip mag pouch. That baseplate also has a dot matrix that allows you to mark it easily.
The big lip makes them easy to reload.
Even after the sand, the on-the-deck reloads, and the hundreds of rounds through the magazines, I’ve yet to experience a failure with them through my Glock 43X. They run and run and run without issue. I heard of problems with the initial Gen 1 S-15 magazines, so I did approach with caution and wanted to ensure my testing was thorough. It seems whatever kinks the Gen 1 mags had have been worked out.
They insert easily on a closed slide.
The S-15 Downsides
Surely there is no such thing as a free lunch. As metal magazines, these things will start eating up your Glock OEM mag catch. I’ve used them for hundreds of reloads and only see minimal wear, but I’ve already ordered the Shield Arms metal mag catch to replace the OEM model.
Once you go S-15 you don’t go back.
Not a big big deal, right? Well, sadly, you get Uno reverse carded, and the metal mag catch will wear away at the polymer of the OEM mags. If you choose to use the Shield S-15 magazines, then you will be stuck using just them. To me, it was a worthwhile decision to increase my carry capacity.
The dot matrix makes it easy to mark your mags.
Another issue is it might be tougher to find a mag pouch that accommodates the S-15 magazines. Shield Arms makes one, and I use the Neo Mag, which works perfectly with the S-15.
Shield Arms and Glock Magazines
I hope Shield Arms keeps developing this idea of metal magazines in Glock firearms. What if we can get 20 rounds in a Glock 17 flush-fitting magazine? Or 17 in a flush-fitting Glock 19 mag? It might be a worthwhile future for Glock magazines. I think the S-15 magazines for the Glock 43X and Glock 48 are game-changers.
I have a very small and easy-to-carry gun packing a Glock 19’s worth of capacity. What’s not to love? Check ‘em out if you want to up your Glock’s firepower.
It’s a fight as old as time: is the AK47 or the M16 better? Paul Harrell takes on the AK-47 vs M16 question in the video below and tries to demonstrate which is more powerful. The main problem is that one is 5.56 and the other is 7.62 but he tries his best to get to an answer for us.
Paul admits that this subject has been done so many times, but people still want to hear about it from different sources. To take on the subject, he decided to focus on one aspect only — power or energy foot-pounds. He also admits that ballistic charts don’t always give the best view of the topic because there are too many variables in play. Variables such as weather, ammunition brand, bullet weight, and barrel length, just to name a few, can really affect your test results.
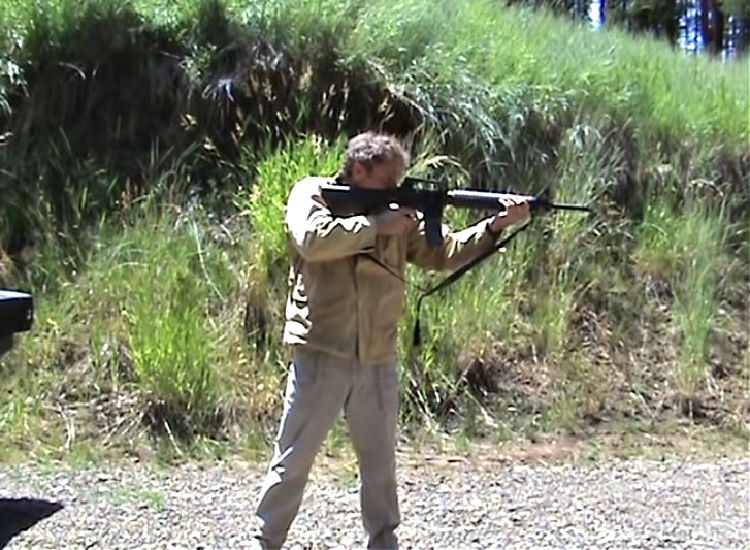
Paul Harrell takes on the age-old topic of whether the AK47 or the M16 is the better rifle. He focuses on the aspect of power for his testing video.
Here’s some quick background in case you need it.
A typical 5.56 or 223 round has a velocity anywhere from 500-800 feet per second more than a 7.62 or 308 round. On the flip side, a 7.62×39 round has a heavier bullet that will give total energy foot-pounds higher than a typical 5.56 round. That information gives a good example of how just quoting numbers from a chart can give a one-sided view. Paul gives the great example of a bumblebee that on paper is not aerodynamic and shouldn’t be able to fly but yet can and does fly.
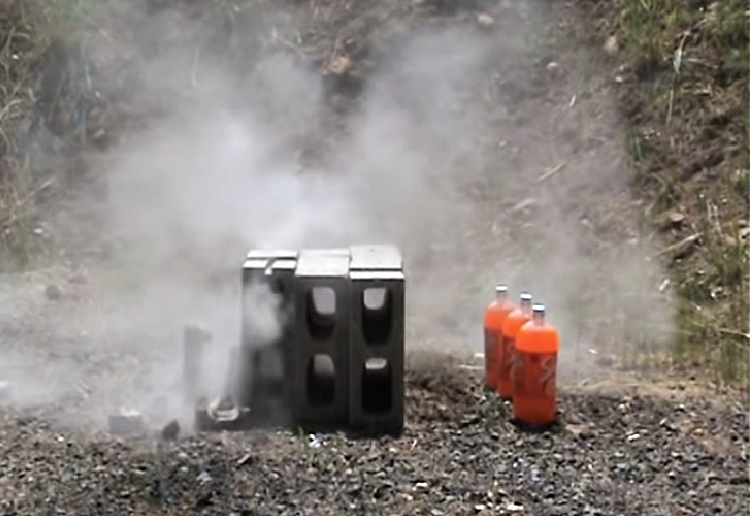
For the AK-47 vs M16 test, he shoots four mediums:
1. Log cabin wall 2. Cinder blocks 3. Gallon water jugs 4. Car doors
To help keep things constant for the test, he wants to show both rifles head-to-head at the same target. Paul decides to keep with the same ammunition for each test, except for one. For the M16 he uses Federal XM193 ammunition, a true 5.56 NATO round with a 55 grain jacketed spearpoint bullet. For the 7.62×39, Paul chooses Wolf 7.62×39, a 123-grain spearpoint jacketed bullet.
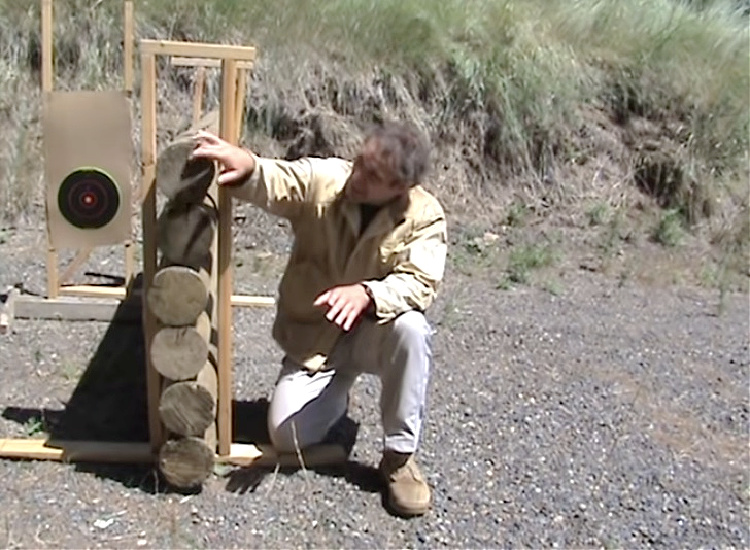
First up for the test is the log cabin wall.
He uses 6” poles stacked on each other. With the curve to the poles, he is aiming for the center of the logs, placing a target behind the wall, and shooting from 25 yards.
Paul stacks 6” poles similar to a log cabin wall. The AK-47 has better penetration for this test with no tumbling of bullets. The AK-47 has better penetration for this test with no tumbling of bullets.
He shoots the M16 first and all rounds went through. The target is peppered with secondary projectiles, such as splinters, and just about every bullet hole is sideways indicating a tumbling bullet. For the AK, all shots go through with no tumbling or splinters. He believes that the AK-47 is better at accurate penetration through this medium.
Next up is the cinder block test.
Paul arranges ten blocks like bowling pins with three filled soda bottles behind them. It takes the M16 31 shots before the bullets finally penetrate to the soda bottles.
The second test Paul does is against 10 cinder blocks stacked up. The AK47 round chews through the blocks faster than the M16 rounds. However, the AK round doesn’t actually puncture the soda bottles; they were knocked over by debris from the blocks.
With the AK-47, it takes around 20 shots to penetrate the blocks, but the rounds never actually hit the bottles, knocking them over instead. Paul concludes that the AK47 rounds ate through the blocks faster than the M16 rounds.
The third test is with water-filled gallon jugs to demonstrate hydrostatic shock.
For this test, he actually switches up the ammunition to something he would hunt with. For the M16 he shoots 223 Remington 55 grain soft point. This round is the same bullet weight as the 7.62 bullet, and it does a fair job at blowing apart the jugs. For the AK-47, he shoots Silver Bear 125-grain soft point bullets that also do a fair job of blowing the jugs apart.
To replicate soft tissue, Paul uses gallon water jugs. In this test, the M16 round edges out the AK47 rounds thanks to the round velocity. But both eat through the jugs pretty well.
In a side-by-side comparison of the jugs after the test, they all look roughly the same as far as damage, with a slight advantage going to the M16 due to the higher velocity.
The final AK-47 vs M16 test is shooting into a 1995 Isuzu Rodeo.
Typically, when vehicles are used as targets, they use the front doors for one gun and the back doors for another weapon. This is a problem because the physical make-up of the doors is drastically different as well as the placement of internal mechanisms. So, for this test he shoots 15 rounds through open doors, front and back, with a three-sheet thickness of plywood placed behind the doors.
The M16 test has bullet fragments, lots of fragments, and tumbling into the second door. The plywood has eight impact holes with seven exit holes. For the AK, there are lots of secondary fragments as well as a broken window. The plywood has nine impact holes with only six exit holes. Paul concludes that there is no clear winner for this test thanks to all the variables in the car door.
In the final AK-47 vs M16 test, rounds are shot through open car doors. Neither round does very well, partially due to the internal components in the doors. Regardless, Paul stresses that a car door is not a good cover location in a shoot-out.
AK-47 vs M16 — Which one wins?
In conclusion, Paul says that the log cabin and the cinder tests go to the AK. The water jugs test iss a win for the M16, but with the car, there is no clear winner. He says it comes down to two things. One, no matter the conclusion, the debate will continue to rage on. And Two, there is no solid winner from the power test. He suggests that you take the results and make the choice for yourself.
My personal experience with the AR-180 started about 30-years ago. I saw one on a wall in my local gun shop and was intrigued. I knew its price was probably a little out of my reach but I asked about it anyway. The clerk quoted me the wrong (as in much lower) price and I walked out the door with my new-to-me rifle.
It was a decent rifle that was like a combination between the AK-47 and the M16/AR platform and had a side-folding stock.
Originally, it was designed as a select-fire military weapon known as the AR-18 intended for countries that could not afford to forge M16 receivers because folded and welded sheet metal receivers were cheaper to produce. Interestingly enough, the AR-18 was never adopted by any military throughout the world. It would go on to influence other designs and its civilian semiautomatic-only version known as the AR-180 would be more familiar to most shooters.
If the original AR-180 or AR-18, if you prefer, was manufactured like the BN-180 it might have made actual inroads with regard to military service beyond a handful of third world countries.
The AR-180 was made by Armalite of Costa Mesa, California, and under license by Howa of Japan and Sterling of England. Its greatest claim to fame would be its use in the 1984 movie, The Terminator, wielded on-screen by Arnold Schwarzenegger.
The Terminator carries his AR-18 at the ready. (Credit: imfdb.org)
While I liked the light recoil, available carrier, and side-folding stock, the rifle was not as accurate as my AR. The main problem I had with it was the proprietary magazines. I only had one and as the rifle was out of production, factory magazines were non-existent. Ram-Line (aka Jam-Line) offered a magazine that was compatible with the AR-180, AR-15, and Ruger Mini-14 and it was abysmal in all 3 with regard to reliability.
I sold the rifle off during the period in which US citizens lived under an oppressive and noxious piece of legislation known as the Federal Assault Weapon Ban for nearly 4X what I paid for it. I liked it enough that it would stay somewhat on my radar. That is, if I were to find another at a reasonable price with a stash of magazines, or if someone would improve the rifle by allowing it to use standard STANAG AR-15 type magazines.
Roughly 25 years later, my prayers would be answered by Brownells when they rolled out their AR-180. To be fair the company which took on the name Armalite (Eagle Arms) did produce aversion known as the AR-180B between 2001 and 2007. It used a molded polymer lower receiver and the rifle took standard AR-15 magazines. Unfortunately, it did not prove to be a popular seller.
Brownells makes good guns better
If there was any company that could pull off a correct redesign of the AR-180, it was Brownells with their BRN-180 design. The original Armalite version had crude sights and a wonky scope with a mount. Brownells solved this issue by adding a Picatinny rail to the top of the upper receiver so the shooter could add whatever sight or scope option they preferred.
I have no idea who made this stock, but it is similar to the original AR-180’s albeit better plastic/polymer.
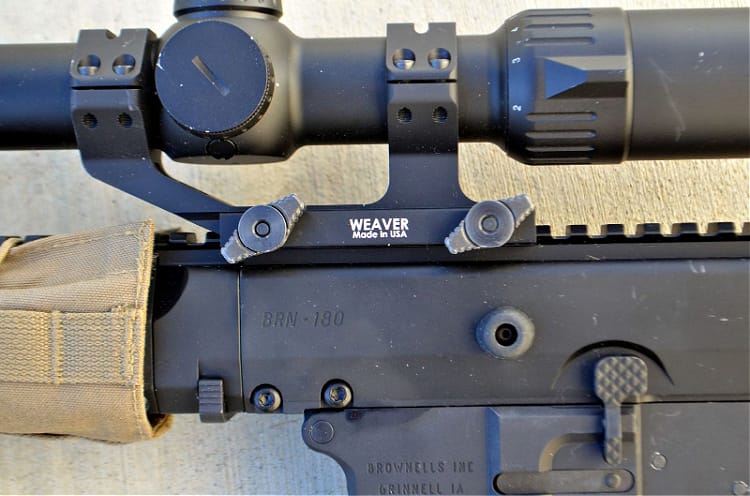
Like the original, the charging handle is side-mounted and reciprocating. As it extends from the right side of the receiver, shooters should not have the locking hardware on that side for their mount as it could be problematic. The rear of the upper receiver is sealed and there is no way for the gas to vent or bleed through the upper as it would on an AR-15. This makes the BRN-180 a good candidate for suppression without the use of an automotive silicone sealant, oversized charging handle, etc.
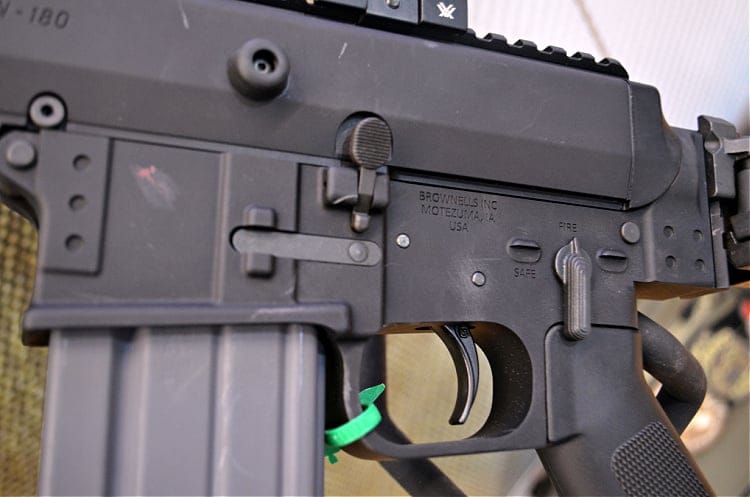
The BRN-180 features a reciprocating charging handle stays up and out of the way like the original. Controls on the BRN-180 are very similar to the AR-15.
The barrel on this build is a standard 16” version made from 4150 carbon steel with a 1:8 twist to the rifling. It is chambered in 223 Wylde, allowing the use of both 5.56 NATO and 223 Remington ammunition safely. The barrel is threaded ½ x 28 and features a three-prong flash suppressor like the original.
If you want to remove the factory muzzle device, it is secured with a jam nut. You will need to rotate this nut counter-clockwise (toward the receiver) and then the flash suppressor will turn off correctly.
Should you want to add a silencer, there is another important step. On the 16” and 18” versions, the piston cup will need to be swapped out to run the rifle suppressed. The10.5” version is equipped with an adjustable gas block and the rifle-length versions may be shipping that way as of this writing, but this version needed the change.
Detailed instructions are given for this procedure, but you will most likely need a solid rubber mallet to beat the handguard off the rifle because it did not move easily at all for me. Once removed I mounted a SilencerCo Saker in order to run this rifle suppressed.
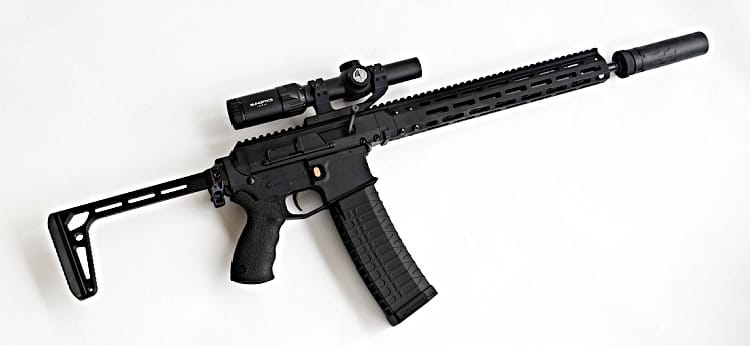
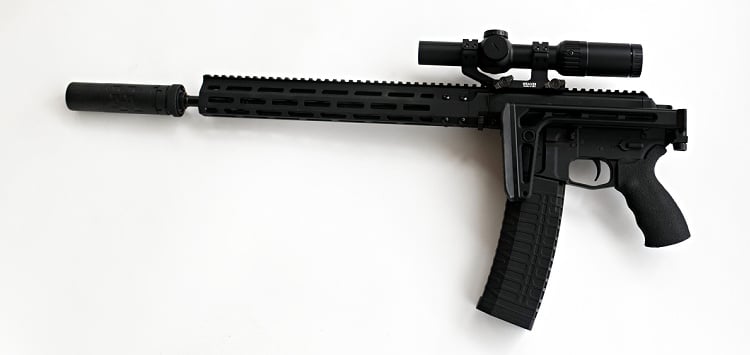
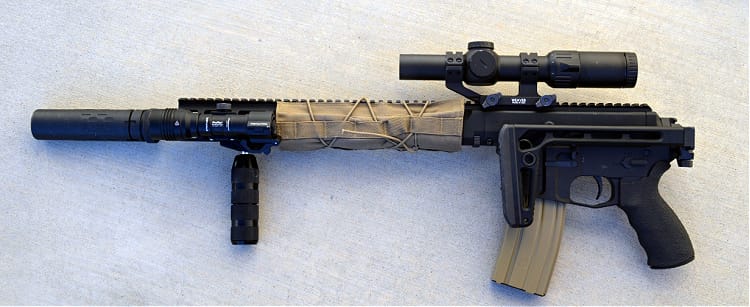
Scoped and suppressed with the ability to fold the stock into a compact size makes the BRN-180 one hell of a weapon.
Brownells initially offered the upper receiver of the BRN-180 as being able to be mounted on any mil-spec AR lower receiver. The only problem with that is the cost of adapters if you want to take advantage of using a side-folding stock. A Sig Sauer MCX lower should host the BRN-180 upper but as of this writing, that has never been available from Sig as a stand-alone item.
Unlike an AR-15 with a LAW adapter, you can fire the BRN-180 with the stock folded. Like an AK-47, you can shoot the BRN-180 with the stock folded.
Fortunately, Brownells came to the rescue by releasing a BRN-180 lower receiver a while back. Completing one is on par with assembling an AR lower, with two notable exceptions: the threaded pin for the bolt catch and no need to install the buffer tube/receiver extension, etc.
I used a standard lower parts kit with a few upgrades including a Geissele Maritime bolt catch, Blackhawk Industries pistol grip, a tan Seekins Precision magazine release, and a CMC trigger.
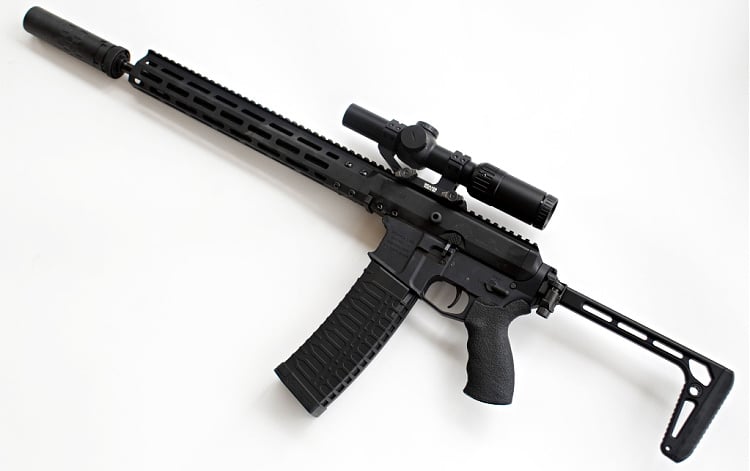
The rear of the lower receiver has an M1913 Picatinny rail to attach a stock or brace and I went with Sig’s excellent aluminum side folder. Unlike an AR, you can fire this rifle with the stock folded if you choose.
With the BRN-180 completed to this point, I marveled at how much better the new version was. The look of the forgings was superior to the old stamped sheet metal of the original. The aluminum stock and forend were light years ahead of the old plastic furniture developed in the 1960s and most importantly, there is a near-endless supply of magazines out there.
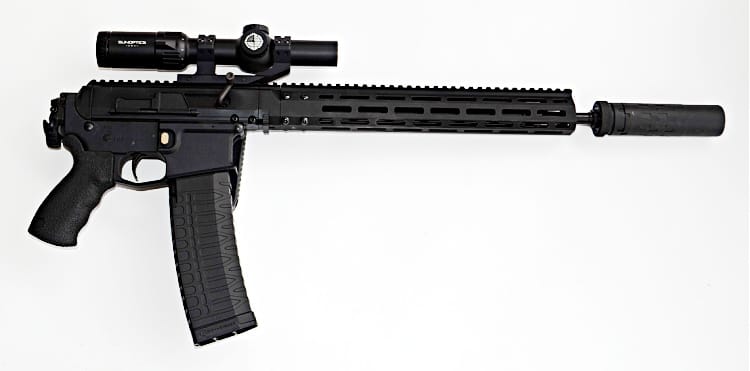
The 10.5” bbl version of the BRN-180 makes for a good braced pistol or SBR.
BRN-180 Accessories
I decided on a Sun Optics USA low-powered variable optic for this build. The Mantis is a 1-6X24 LPVO with an illuminated reticle and a Weaver tactical cantilever mount with wing nut mounting screws on the left-hand side. There are several illumination settings and the reticle resembles a horseshoe with a rangefinder off to the side.
If you have extended scope mounting screws, be sure to place them on the left side of the rifle so they do not interfere with the charging handle.
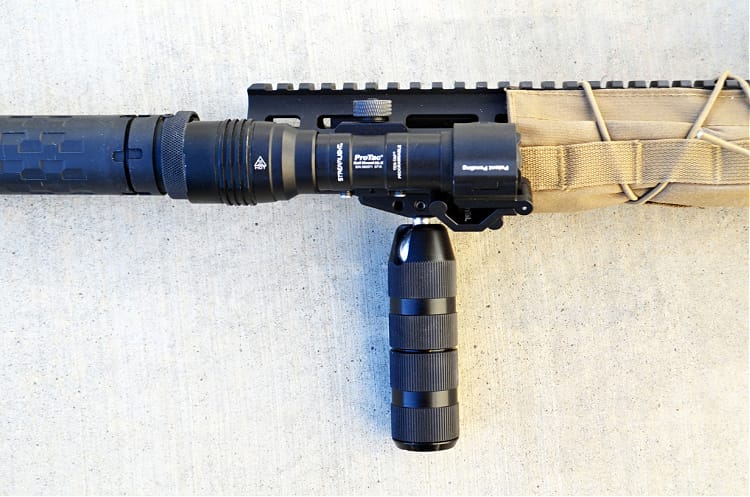
Additional accessories included a nylon suppressor cover to wrap the rear of the handguard and a Mid-Evil Industries 360 degree vertical foregrip. Off to the 6 o’clock position I mounted a Streamlight equipped with a Fire-Tail.
The Fire-Tail flashlight attachment is a quick, clean and effective solution to the tape switch problem.
The Fire-Tail attaches to the body of a handheld 1” diameter flashlight with a push-button tail cap. The activation arm rests against the push button itself. It is especially useful for mounting lights on rifles on the opposite side of your support hand without having to use a remote switch.
At the range
Being that we are still in the midst of an ammunition shortage, I did not have the opportunity to do a 1,000+ round torture test but was able to shoot 200 rounds in one session with a later session of 300 rounds.
I found a cheap suppressor cover makes for an excellent way to deal with a hot metal hand guard for extended shooting sessions.
The rifle functioned flawlessly with a variety of magazines between GI and PMAGs. Felt recoil is about on par with a typical AR-15. The twin carrier springs are more than sufficient.
As far as suppression with the SilencerCo Saker goes: the can meters at about 136 decibels. The SilencerCo crew chose Stellite for the baffles and stainless steel for the body of this unique can. Even though small in stature, its durability is never a question, and its 14.2-ounce weight and 5.5” length simply screams maneuverability. The sealed rear of the upper receiver made it downright pleasant from a gas perspective.
With regard to accuracy, the first session was ringing steel at various distances and the report from the steel was louder than the actual shots fired it seemed. Flat range time in the second session was devoted to accuracy and 1.5 to 2.2” at 100 yards seemed to be the average from the bench using range bags. A bipod or tripod might have helped improve this.
Brownells now offers the BRN-180 in 300 Blackout and if you want a piston-driven rifle in either 300 Blackout or 5.56 NATO caliber this is a good way to achieve that without going the typical AR route.
The BRN-180 is an effective and capable rifle.
The AR-180 may have seen like a niche firearm when black rifles were more of a novelty act in the 1980s, but Brownells managed to bring this one back to life with some very much needed improvements.
Ask yourself: if a life-threatening injury occurs, will you know what to do? Will you have the skills and trauma care equipment necessary to render aid to yourself, your family, and innocent bystanders until medical personnel arrives? Your answer to this question can spell the difference between life and death, so it’s a topic you should take seriously.
When Seconds Count
From the moment a traumatic injury occurs, the clock is ticking. Uncontrolled blood loss from a broken limb or gunshot wound can lead to death in as little as five minutes. But, according to a 2017 study published by the Journal of the American Medical Association, “Emergency medical service units average 7 minutes from the time of a 911 call to arrival on scene.” The report continues, “That median time increases to more than 14 minutes in rural settings, with nearly 1 of 10 encounters waiting almost a half-hour for the arrival of EMS personnel.”
You should learn how to quickly apply a tourniquet to your own limb and to someone else’s. Repeat it enough to make this action automatic, and practice one-handed as well.
It’s not difficult to learn how to pack a wound, wrap it in a compression dressing, and apply a tourniquet — even kids can be taught these basic skills. Organizations such as Stop the Bleed offer free virtual and in-person classes throughout the United States. We highly recommend taking one of these courses, or a more advanced wilderness first aid class, and periodically taking refresher courses to keep your skills sharp.
Trauma Care Tools
Training is critical, but it must be paired with the right tools. Now is the time to prepare a trauma care kit — often known as an individual first aid kit, or IFAK — that contains the essential resources for a life-threatening bleed. At a bare minimum, your kit should include the following:
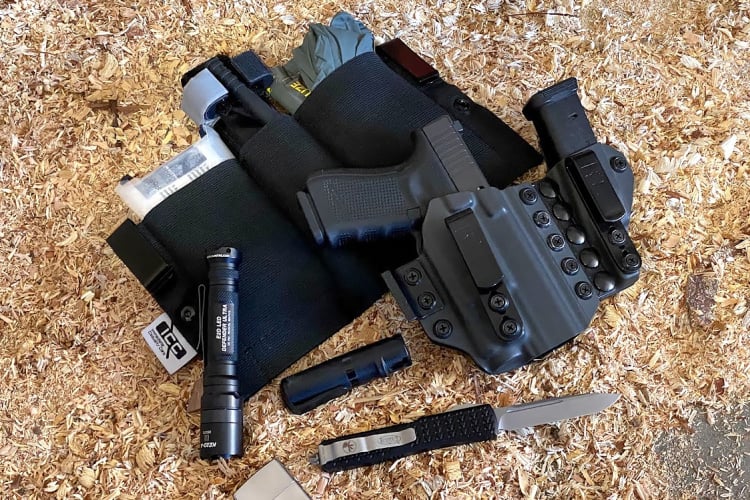
Medical gear is only one element of an every-day carry loadout, but it’s all too often overlooked.
There are plenty of other tools that could be added to your kit — for example, chest seals are highly recommended. You may also include helpful accessories such as nitrile gloves, medical tape, and a permanent marker. Once you’ve started to train with your IFAK, you’ll be able to customize it to match your experience level.
Staging & Every-Day Carry Considerations
Immediate accessibility is essential for any first-aid kit, especially one focused on major trauma. It’s wise to stage larger kits in your home, office, car, and range bag, but it’s even wiser to have the key components on your person at all times.
Although it’s perfectly legal to carry basic medical gear most places, including airports, openly carrying these items may lead to some uncomfortable questions from family or coworkers. Sadly, there are those who will assume your preparation is a sign of paranoia. For this reason, you may want to conceal your medical gear.
There are many ways to do this, including pocket IFAKs, ankle IFAKs, and inside-the-waistband IFAKs. Today, we’ll take a look at a good example of the latter — the IWB-Flat medical kit from Immediate Casualty Care (ICC).
About Immediate Casualty Care
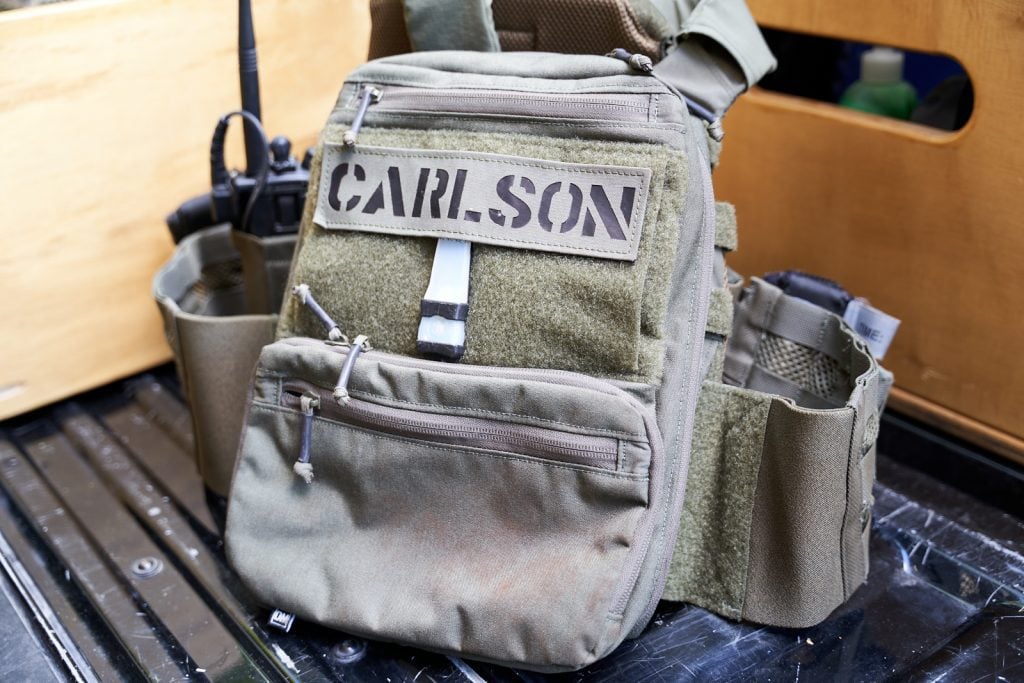
Immediate Casualty Care is a veteran- and a first-responder-owned company that builds covert personal trauma kit carriers. All of the materials and hardware are sourced from the USA, and the kits are built in the USA.
ICC standalone TQ pouch pictured with an SOF-TT tourniquet.
Several configurations are available, ranging from a standalone tourniquet pouch (pictured above) to various complete IFAK carriers. Each kit is built from strong latex-free elastic with stitched seams. The standard stainless-steel clips can be worn over a belt or the hem of a pair of pants. For an additional fee, buyers can upgrade to sturdy Discreet Carry Concepts belt clips, tuckable UltiClip 3+ clips, or non-metallic clips and hardware that won’t set off metal detectors.
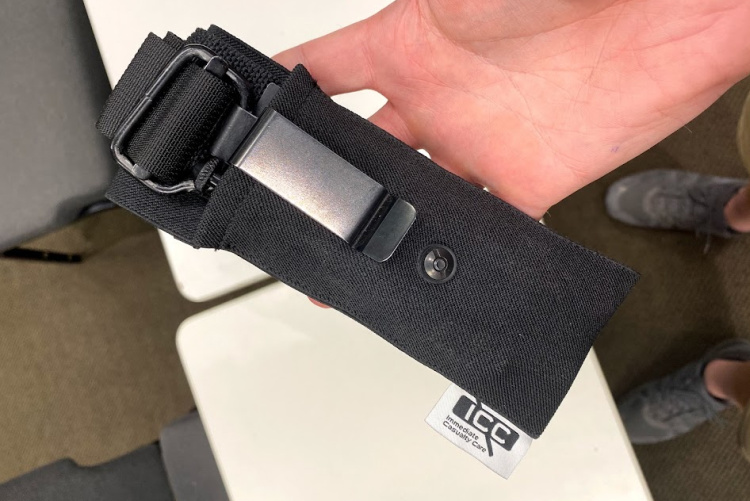
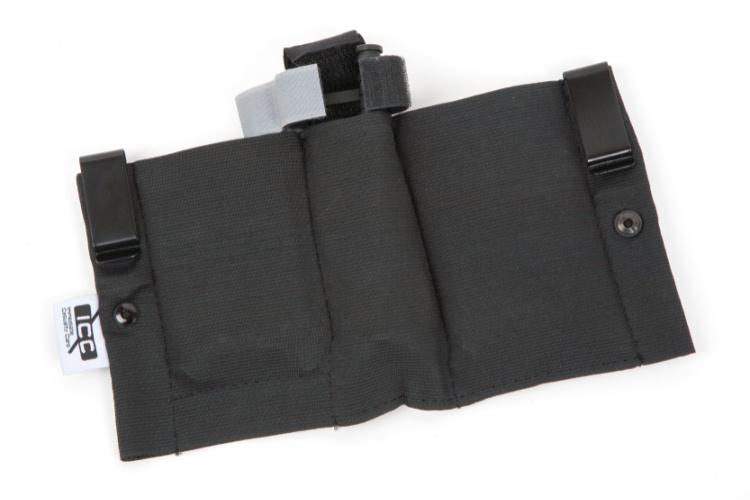
ICC IWB-Flat Medical Kit Review
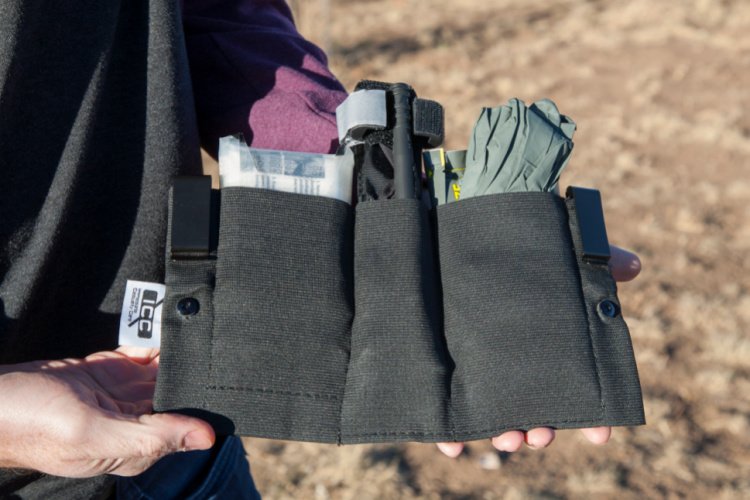
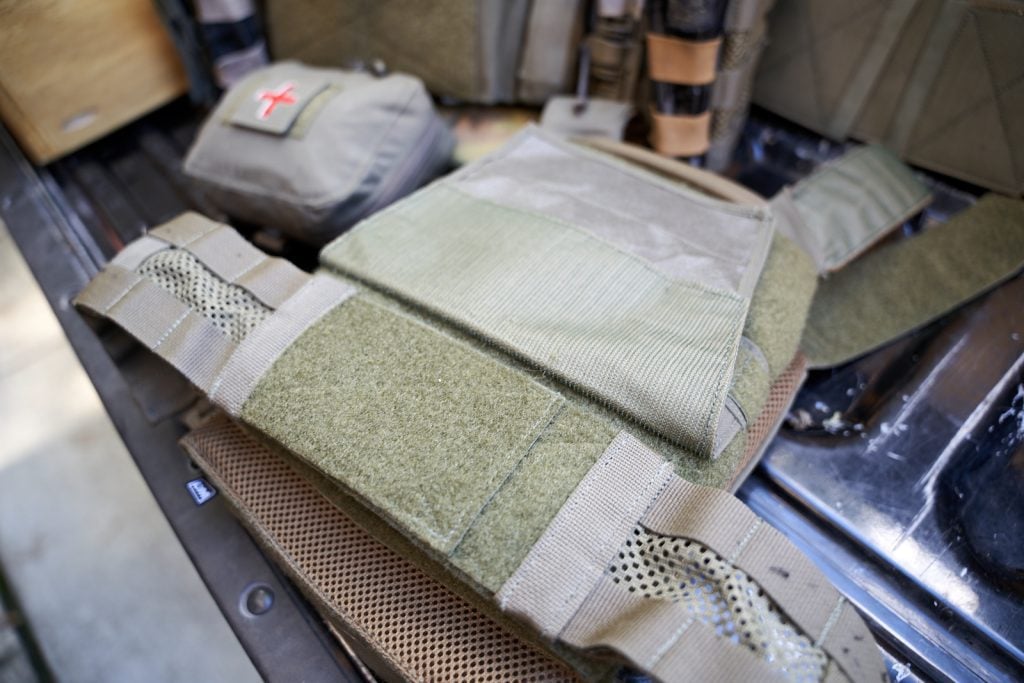
Immediate Casualty Care IWB Flat Medical Kit.
I tested the Immediate Casualty Care IWB-Flat, which offers storage for IFAK components in a wide, slim configuration. At 12 inches wide by 8 inches tall, it wraps around the waistline with a single layer of pockets. Other ICC kits place these pockets in a two-layer configuration, producing a smaller but thicker shape. I prefer the single layer to avoid any visible bulge underneath my shirt.
Since I carry my Glock and spare magazine in the appendix position, there’s plenty of space for the IWB-Flat IFAK anywhere on the back half of my waistline. If you carry strong side, you may need to shift the medical gear to the opposite side of your waist.
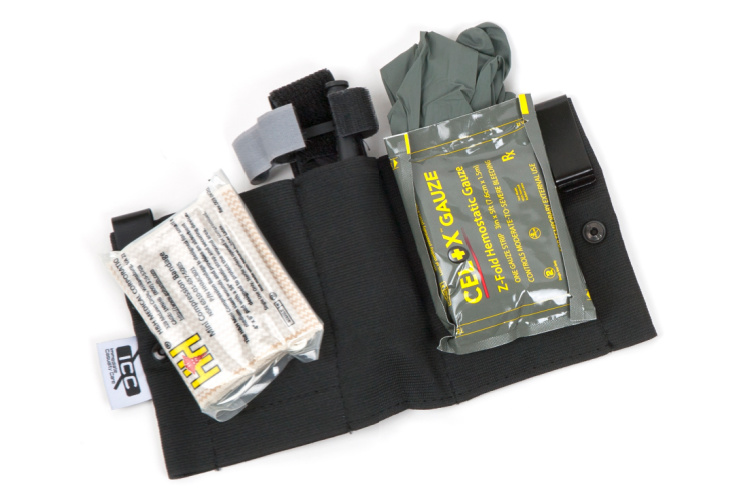
Kit Contents
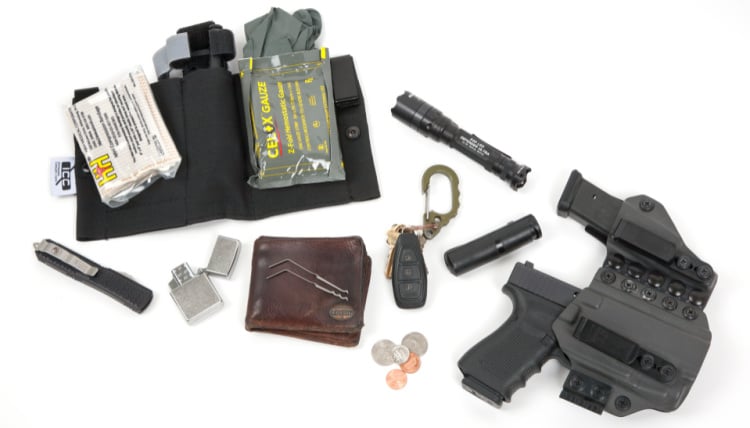
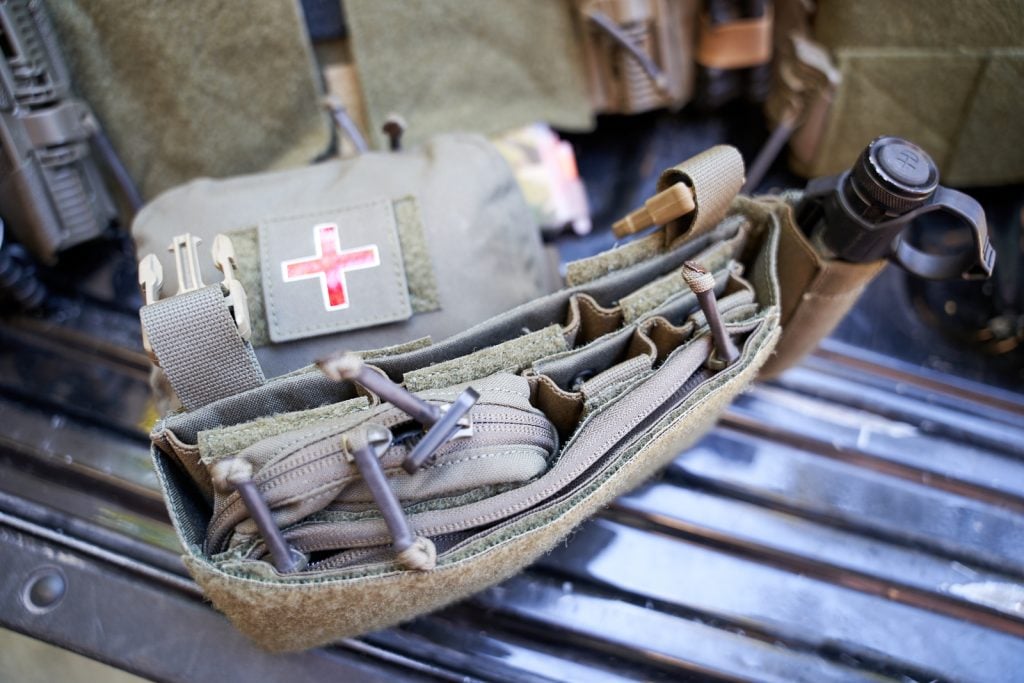
Immediate Casualty Care IWB Flat Medical Kit Contents.
Each kit comes unloaded, so it’s up to you to choose the contents. I loaded my kit with the following items:
C-A-T Gen 7 tourniquet
Celox hemostatic gauze
H&H Medical mini compression bandage
Hyfin Vent chest seal twin pack (not pictured)
Grey nitrile gloves*
*Note: Black gloves are not recommended. Light-colored material contrasts with blood, and makes it possible to detect injuries quickly with a “blood sweep.”
While this is advertised as a medical kit, there’s no reason it couldn’t be used to carry other EDC items. Pistol and rifle mags, pepper spray, fixed-blade knife, passport, emergency cash — the sky’s the limit.
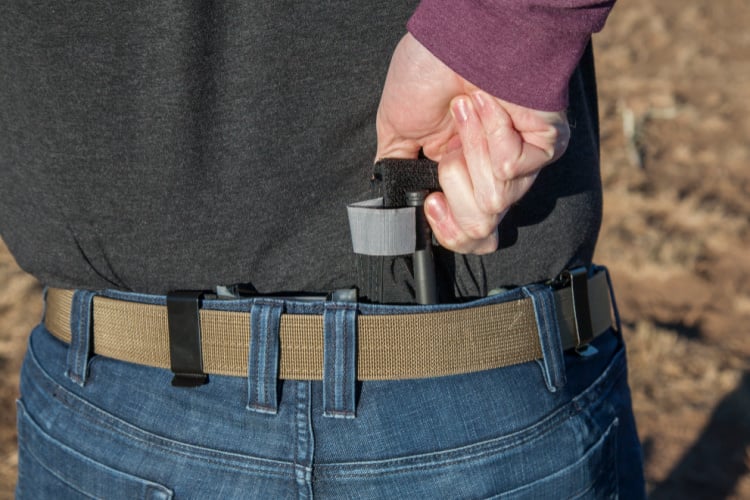
Wearing the Kit
I slid this gear into the IWB-Flat medical kit, clipped the IFAK into my waistband, and went about my day. For the most part, I was able to forget I was even wearing it. The elastic material is comfortable, and the standard belt clips held it firmly in place. Personally, I find this more comfortable than an ankle kit, and I’m able to keep it concealed while wearing shorts (a necessity in the desert).
After a few days, I noticed that one of the clip screws had worked its way loose and fallen down my pant leg, never to be seen again. Lesson learned: always use thread locker on all the hardware for your EDC gear. Thankfully, I scavenged a compatible screw from an old knife sheath and was able to replace the missing part immediately. No problem.
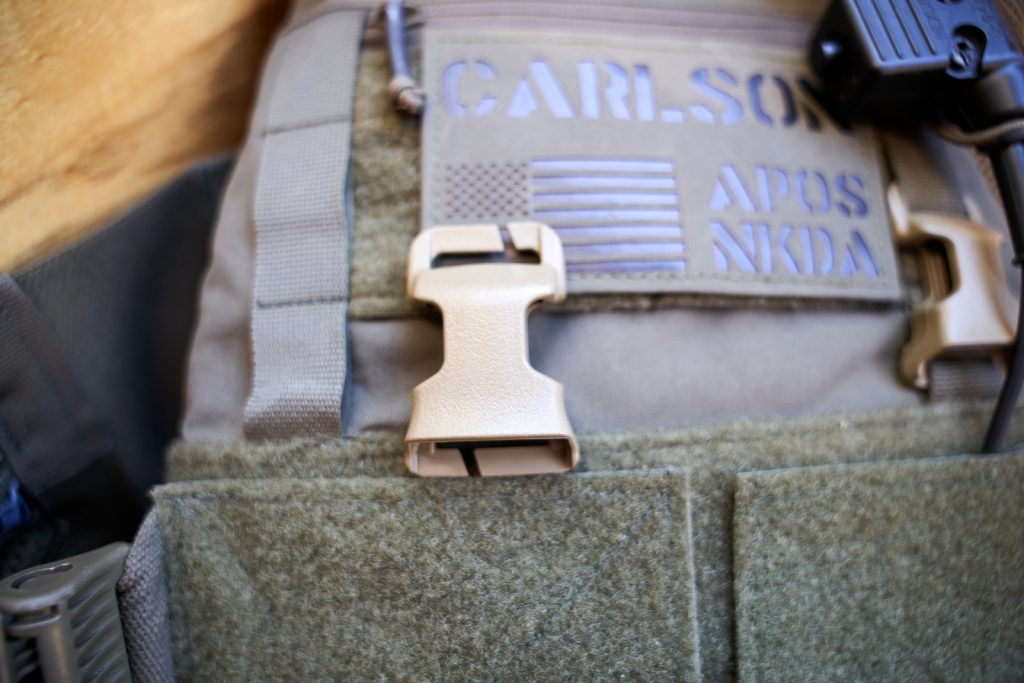
There’s only one critique I have for the ICC IWB-Flat medical kit, and it’s mostly a byproduct of the contents. C-A-T tourniquets are covered in hook Velcro, both on the windlass retention band (when staged as seen in these photos) and the TQ strap. This exposed Velcro tends to snag on shirt hems, eventually pulling loose threads and leading to frayed areas. If you prefer the SOF-TT tourniquet, you won’t have these issues thanks to its Velcro-free design.
Recently, ICC released a “2.0” version of the kit with a high-back design that prevents contents from rubbing against the wearer’s skin. This is an improvement, but I’d like to see a version with an elastic cover that slips over the Velcro, similar to North American Rescue’s outside-the-waistband TQ carrier.
Conclusion
The ICC IWB-Flat has become my go-to EDC medical gear carrier. Its contents are supplemented by additional gear in my car and range bag, but it feels good to know I always have these basic trauma care items inside my waistband.
The Springfield XD-S is a kickass compact single-stack. That sentence may read, to some, like an oxymoron. I’m finding it harder and harder to justify carrying a single-stack, what with the absolute ubiquitous dominance of so many guns that are almost exactly the same size, but with bigger gas tanks.
Are we to the point where we can call all single-stack 9mms obsolete? I’m not ready for that. They are marginally lighter. They are marginally smaller, sometimes. Surely that still counts for something.
One thing the single-stack design has going for it is a thin mag. The guns are easy to conceal, and so are the mags.
And they’re marginally thinner. In a world that fights for absolutes—the world’s thinnest this, or the world’s lightest that—single-stacks still give those of us in marketing an edge. But what about the practical distinctions?
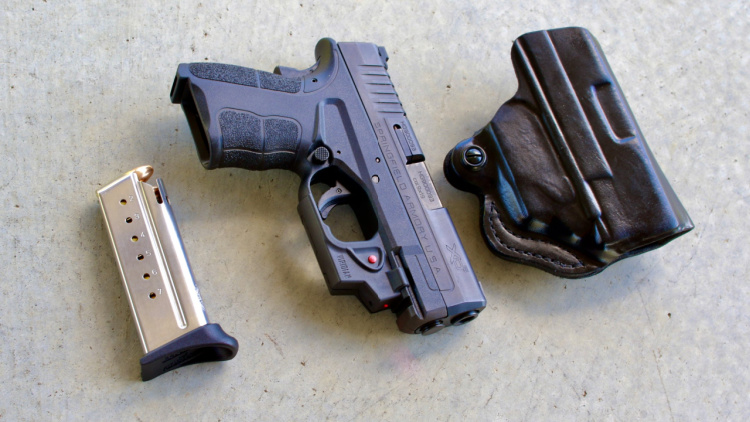
Even with the short barrels, these handguns run respectable concealed carry calibers. A small gun that can deliver on the promise of the .45 ACP was instantly appealing.
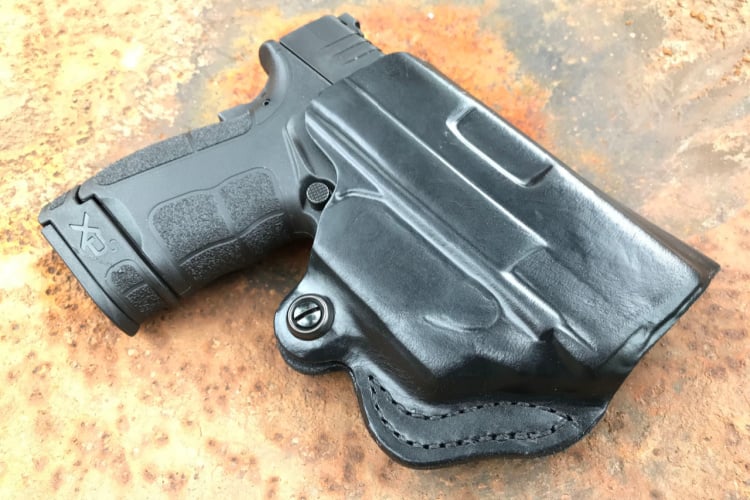
They’re small enough to fit in a coat pocket without drawing any attention. The Springfield XD-S is big enough to carry in a traditional OWB holster and small enough to carry in any of the traditional concealed carry positions (though it is likely too large for ankle carry on some).
The XD-S made waves because it was thin but still big enough to control.
The XD-S is small enough for EDC, but still large enough for effective ergonomics. When I picked up my first XD-S (one of the earliest .45s), I was cautiously optimistic about close-quarters accuracy. I shot with the aid of the sights—no problems. I ran all manner of drills—no problems. In short, it worked.
Even in its original .45 ACP configuration, the gun was relatively easy to control. There was much more muzzle-flip than you’d find on a 5″ 1911, but that was to be expected in a gun this light and small.
The sacrifices you make for size, no matter what gun we’re talking about, are real. And the Springfield XD-S provided an easily concealed .45 ACP, so long as you were willing to accept slighter slower split times.
The same could be said for the 9mm version, really. It is easy to conceal, though.
The Springfield XD-S at long range
It wasn’t until I began shooting at distance that I realized the compact design would allow the XD-S to perform the tasks of a larger pistol. There’s enough working surface on the gun to get a solid grip and the sights, even in the first iterations, were good enough to hit a 12” plate at 100 yards—and easily.
Not that you’d ever need to make a 100 yard shot with an XD-S. That’s not the point. You can, though.
Breaking down the Mod 2
No discussion of the XD-S would be complete without a nod to the Grip Zone. When I have substantive conversations with gun companies about design elements, I warn against adding elements that will ultimately date a firearm design. The first XD-S guns had what I’d call a tire-tread-like texture to the grips and that didn’t age well.
But then Springfield Armory redesigned the grips. The texture was 100% better, but they did write Grip Zone on the grips. I wasn’t a fan of the nomenclature, but I liked the texture.
Much of the Mod 2, though, was familiar to fans of the XD-S. They jumped in and addressed the texture, which was the only thing many XD-S owners seemed to grouse about.
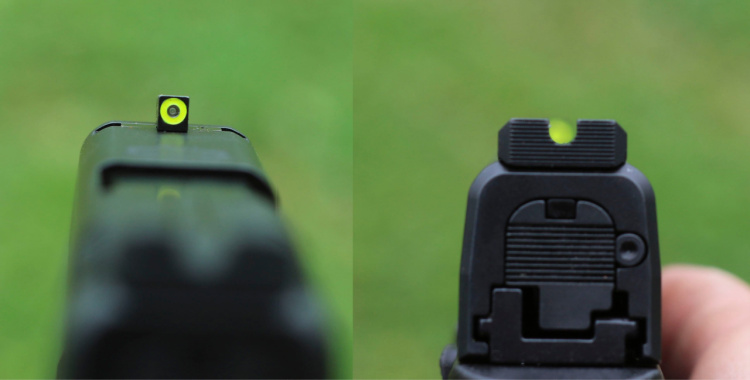
The new sights on the Mod-2 XD-S. Very easy to see.
They also changed up the sights.
Something about fiber-optic sights has always felt fragile to me, but I carried an original XD-S off and on for ages, and I didn’t baby the gun. I never damaged a sight. They seem to hold up to the throw-it-in-a-bag kind of treatment.
Still, Springfield replaced that fiber-optic sight with a traditional front post on the new versions. The rear sight is also a step up. The muzzle side of the rear sight has a nice flat shelf.
Where most EDC sights are sloped down to the frame (including those on the original XD-S), these provide an extra working surface for one-handed manipulation. You can rack on a boot heel, or a table, or even the edge of a sturdy belt—all by catching that sight on something hard and pushing down.
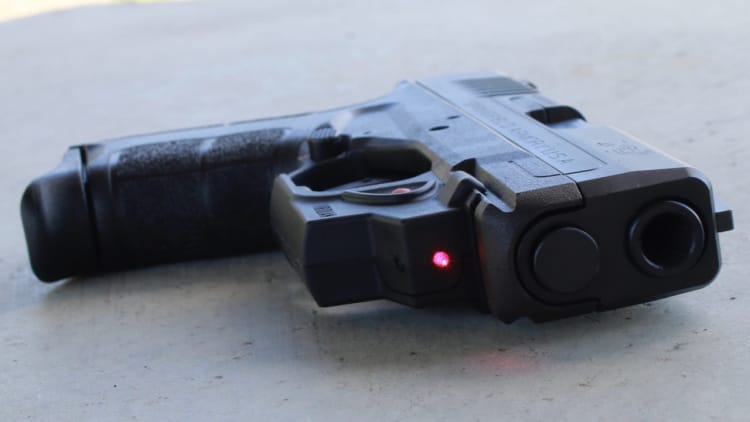
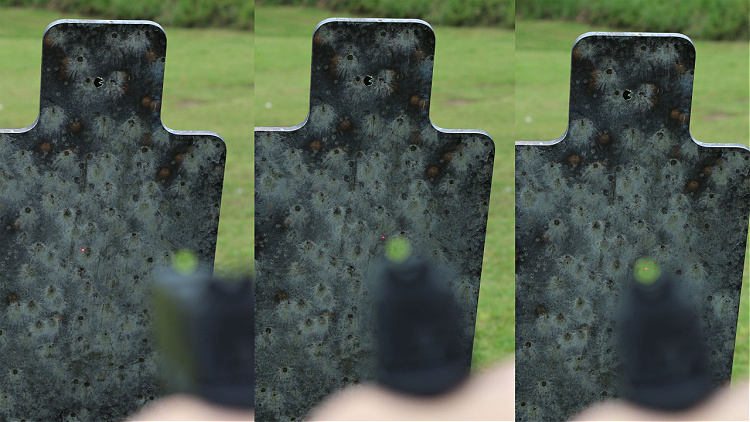
The glowing green front sight is easy to see, even when moving fast. Having the red dot of the Viridian laser makes it that much faster.
While you could argue about which set of sights might be faster for target acquisition, it would be splitting hairs. Both sights are reasonably fast. Both types of sights are easy to draw from a holster in concealment (as in they’re not so high that they drag). So it all comes down to personal preference.
Springfield has finished the Mod 2 line with Melonite. This aids in that knock-about ruggedness.
The extras
For those looking for something extra, Springfield has you covered. The newest versions are red dot-ready. With the right holster, an XD-S with a red dot would be even better for EDC.
DeSantis makes a Mini Slide for the XD-S with a Viridian E-Series laser.
The DeSantis is an OWB, but it is still concealable with the tail of a shirt.
It’s still a single stack
Capacity is always an issue. I’ve never carried an XD-S without carrying a spare mag. You shouldn’t, either. The 9mm holds 7 rounds in its standard mag, and 9 rounds in the extended version. The .45 holds 6 and 7 rounds, respectively.
For many, this is game-over. While better than a slim 5-shot revolver, it still can’t compare to some of the other guns out there.
And for those who want to get into the weeds about how thin the XD-S is, I’d challenge them to test, side by side, a 9mm XD-S and a Hellcat. I’ve yet to meet anyone who can claim, legitimately (and by this I mean practically, in a real-world sort of scenario) that the Hellcat is harder to conceal.
The XD-S is just barely big enough for OWB carry, but many still think of it as a backup option only.
What is the XD-S really good for?
When the XD-S first hit the EDC scene, it was popular with just about everyone. Remember—this was way before the Hellcat or P365. It was years before the G43, even. There were other prominent concealable single stacks–going all the way back to the PPK, if not before, but nothing quite like the XD-S (especially in .45 ACP).
The sight radius on the XD-S is respectable. No milled channels here.
As guns have improved, there’s still a loyal fan base for the Springfield XD-S. I’d guess it is still dominated by those who carry it alone. Many others, myself included, really see this in more of a backup role. The XD-S is a reasonable one-gun type of gun. It is a better second gun.
The XD-S can go from the nightstand to the pickup to the small of the back. If your spouse, for example, keeps a close watch on the number of guns you own, the XD-S may be ideal. Or you may want to take a look at the smallest of the XD line, or the Hellcat (assuming you’re brand loyal).
Other versions?
The XD-S started something. The Mod 2 lineup now includes standard 3.3” guns, optics ready versions, 3.3” guns with external hammers, and 3.8” guns, and even a 4.5” version.
So long as the Springfield XD-S continues to perform and people keep carrying it, I can’t say it is obsolete.
But the XD-S still has a devoted following. I think this is easy enough to explain with the way the gun works. If you want more capacity in your magazine, the XD-S isn’t going to be your top choice.
Lately, I’m carrying the Springfield Armory Hellcat. It is a hell-of-a-gun and has even taken the starting spot from my old G19 for EDC. If there is an argument to be made for the classic status of the XD-S, I’d blame it on the Hellcat.
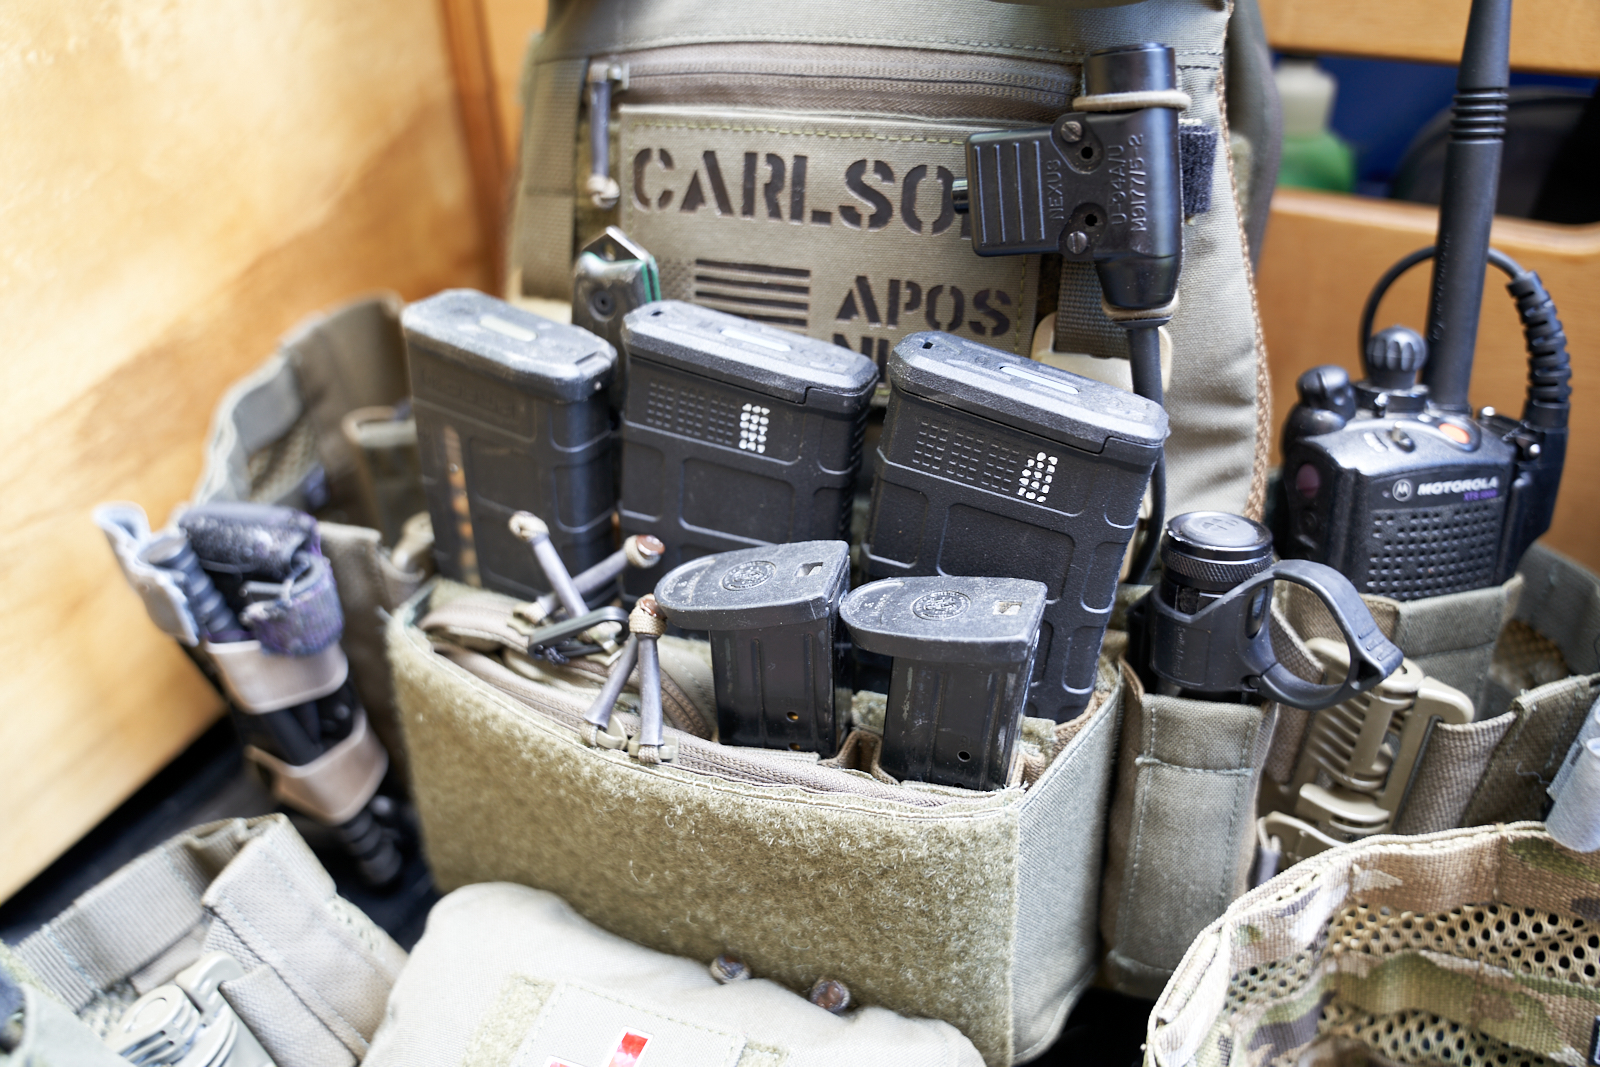
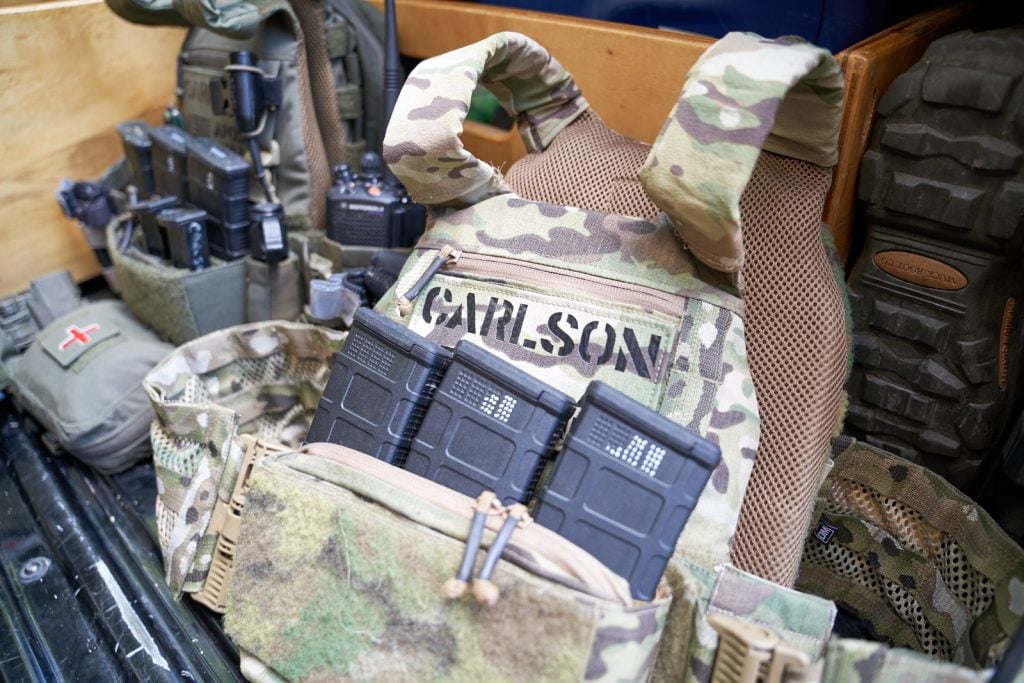
I spend a good deal of time wearing body armor. I train at Alliance Police Training Facility a lot. So far, in 2021 alone, I have accumulated more than 400 hours of serious training time at Alliance. Some as a student. Other times as a “helper.” Some time as an assistant instructor. Many of those courses require rifle-rated body armor as standard PPE. Others require the use of a plate carrier to help carry the gear needed for successful completion of the course. Many times I’m wearing my PC and plates, a Defense Mechanisms Mission Essential Plate Carrier and ShotStop plates to be specific – for both reasons.
That’s why I’m talking about plate carriers and body armor…
The bottom line for me is that I have spent a lot of time wearing body armor and as a result, I’ve formed some opinions about what I like and what I don’t.
You can set up your MEPC however you need to. Flexibility is the key.
You might be actively shopping for a plate carrier and plates for a variety of reasons. Maybe you have coursework planned, such as a live-fire shoot house course where plates are part of the PPE. Or you could be looking for a setup to use in your professional work. Or, maybe you are searching for a carrier and armor to use in a worst-case scenario.
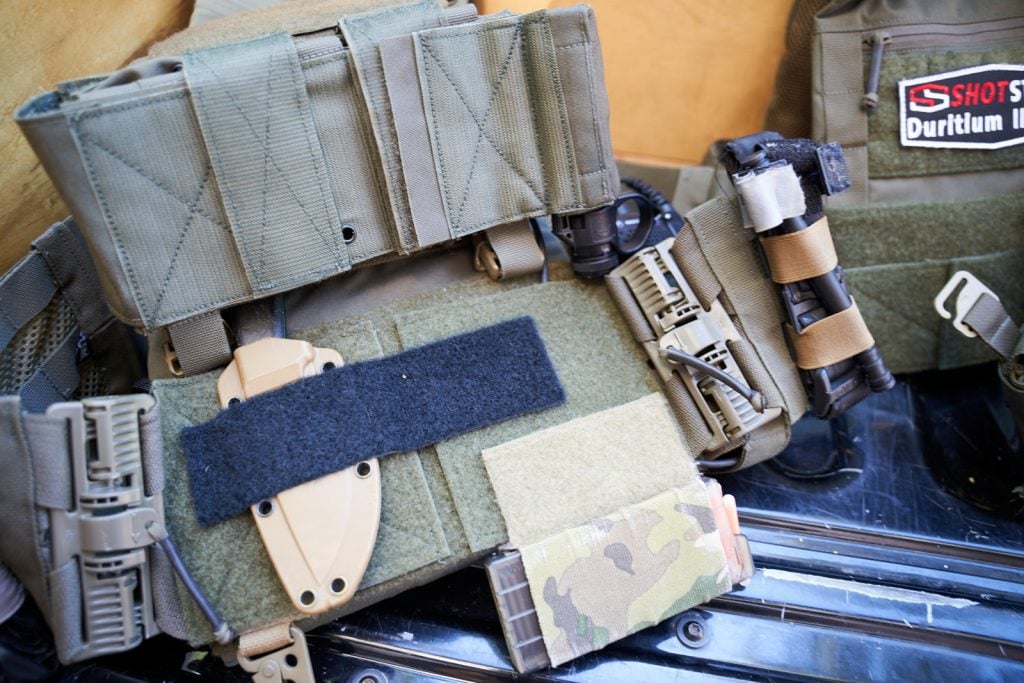
On this carrier, I am using a pretty basic setup. The placard is composed of two layers. The bottom layer is a 3 mag M4 base and the second is a full-width pocket. The ability to easily and quickly customize is one of the reasons the MEPC is my favorite.
Regardless of why you are shopping, I think my thoughts on my current setup might help you to determine what plate carrier and plate combination is best for you.
The DM Mission Essential Plate Carrier and SHOT STOP Armor
This combination provides a superior balance between performance, versatility, and comfort.
Disclosure
I have received goods from both Defense Mechanisms and SHOTSTOP at no cost. Plate carriers, accessories, and plates were received by me in the hopes that I would provide feedback and media coverage (like this article) of those products. You should know this. You should also know that the gear I received was given without the expectation of a positive review—just a fair and objective opinion. You should also be aware that I have spent plenty of my own money with both of these companies. I placed the very first order that Defense Mechanisms ever received and I have purchased 4 sets of SHOTSTOP plates with my own coin.
What I think you should take away from this disclosure is that I have objectively evaluated this gear and it is not only worth my effort to write about it, but I also spend my own money on it. I can’t think of a stronger endorsement.
The Defense Mechanism MEPC
The Defense Mechanism Mission Essential Plate Carrier is a lightweight durable carrier that can easily be customized to fit your mission even if your mission changes.
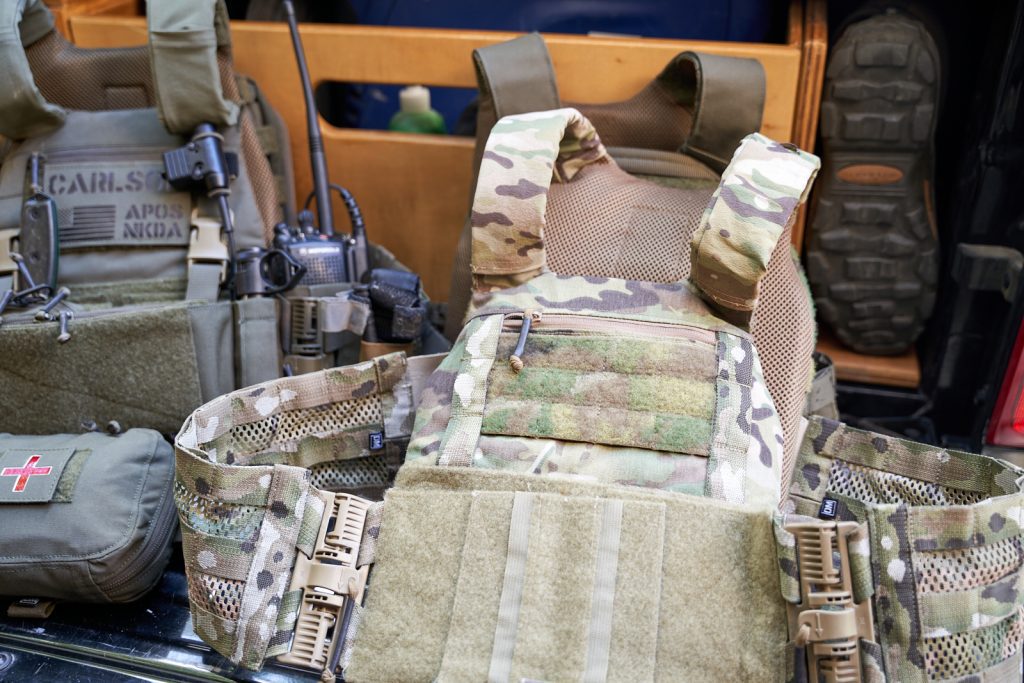
My original Defense Mechanisms MEPC, ready to run slick.
The foundation of the MEPC is the front and rear plate bags. Both of the bags are built from 500 denier Cordura for durability and feature a 3D mesh liner for comfort and enhanced airflow. The front and rear plate bags are connected and fitted with a set of overlapping hook and loop straps. These straps are secure and provide a wide range of adjustability to fit a wide variety of people.
The hook and loop shoulder straps are secure, easy to fit, and allow for a large range of adjustability to ensure your plates are where they belong.
The two plate bags are sized to fit the size plates they will carry, not the size of the person. The plate bags can accommodate plates up to 1” thick. If you have thicker plates you should increase the size of your plate bags one size.
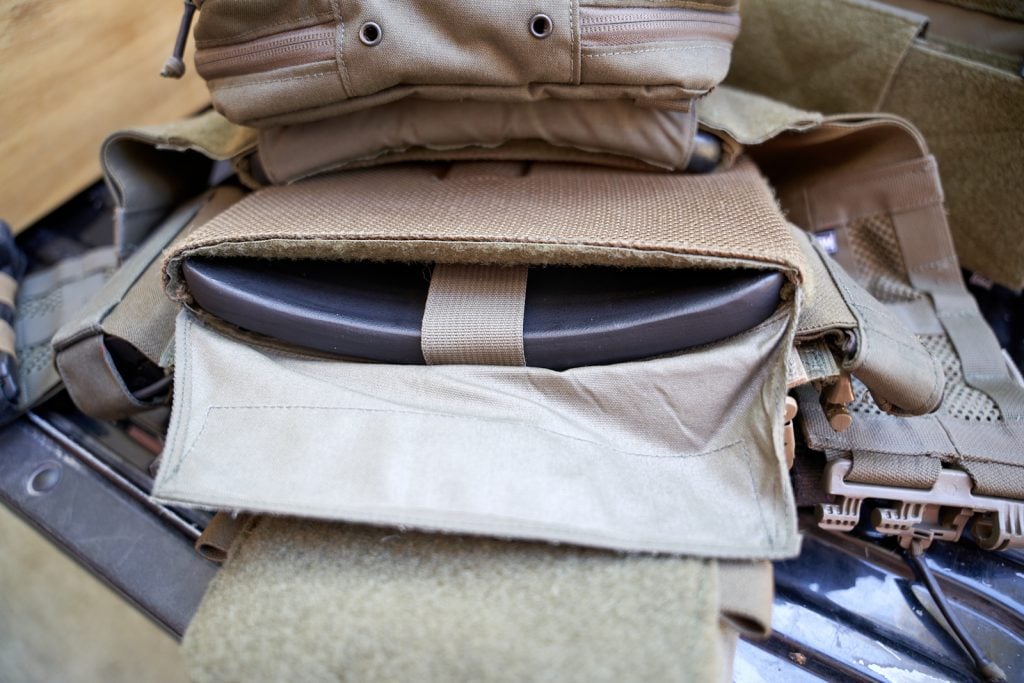
With the hook and loop flap pulled back you can see the plate is secured in place with a retention strap.
Plates are held in place in both the front and rear bag by a velcro strap that lifts the plates to the top of the bag and then enclosed by a second velcro flap.
Here you can see that the SHOTSTOP PA plate is held in with both the retention strap and a flap to ensure the plate stays where you need it.
Front Plate Bag
The Front plate bag of the MEPC features a zippered admin pouch, a loop field for use with patches or nav tools, and QASM buckles to attach a placard. The QASM buckles can be removed if you want to use a G-Hook Placard base or simply run your front bag slick. The front bag has a generous loop field for the attachment of a hook cummerbund and is compatible with any hook and loop cummerbund.
The QASM buckles are easily removed to allow for a G-hook placard to be used, or simply to run slick.
Rear Plate Bag
All of the rear plate bags are equipped with a set of hook and loop shoulder straps that mate with the front bag, a hook and loop field for patches and or PID lights, and a fold-flat drag handle. Just like with the front bag the plate is secured with an adjustable hook and loop strap and an additional hook and loop flap.
The rear bag flap helps to hold the rear plate in place and also covers the rear hook and loop of the cummerbund to help prevent snagging.
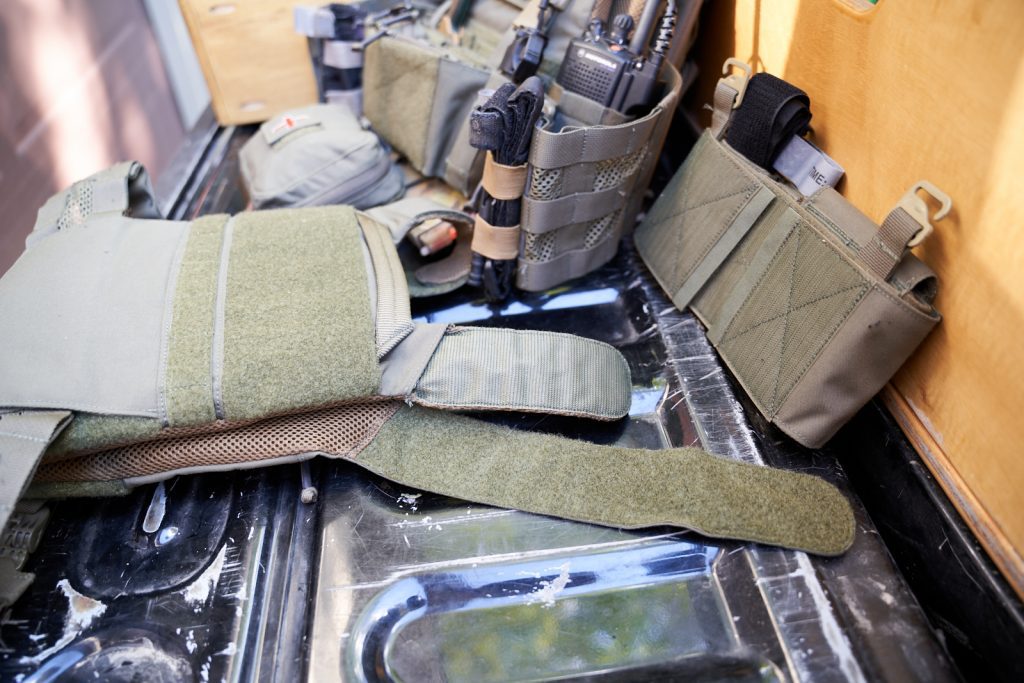
The flap also acts as a cover for your hook and loop cummerbund to help prevent snagging. When it comes to the rear plate bag you have a choice between two options, slick or Molle. My first DM MEPC setup was a slick rear plate bag. The slick rear bag is lighter weight and contains a single row of Molle with a loop face.
The optional Molle MEPC rear plate bag allows for the addition of gear to the back of the carrier. I added a Recondite Rear Pack to my carrier to tote a bit of food, some layers, and additional first aid gear.
My current setup is the Molle rear bag which allows for the attachment of gear to the rear plate. If you are looking to run comms, breaching tools, or a Recondite bag on the rear plate bag, as I do, you are going to want the Molle rear bag.
Mission Essential Plate Carrier Options
What really makes the MEPC excel in my opinion is the modularity of the carrier. This is achieved through add-on options that enhance the performance of the plate carrier. From communication sleeves to placard options DM strives to be a problem-solving company. Their mode of operation is to innovate and solve problems experienced with traditional gear setups.
I’m currently running my MEPC placard with three layers. I may pair this down to streamline my kit a bit.
The MEPC options begin with assembling a custom placard that can be changed at any time. The placard can have the foundation of 3 AR-15 mags, or simply a hook and loop placard base where you can customize multiple layers to carry exactly the gear you need.
The hook and loop system allows a wide variety of gear to be carried easily. In addition, it is easy to quickly refit your setup to meet your needs for the moment.
In addition to the placards, you can outfit your carrier with additional options such as split communication sleeves, various cummerbunds, additional pouches for communications gear, or for specific tools such as the Liberty Dynamics Enhanced Diversionary Device.
My kids both have plate carriers as well. Of course, they have a placard set up to meet their needs. The AR-15 mag pouch holds a tourniquet, the pistol mag pouch usually carries a snack, and the velcro pouch carries whatever they don’t want me to see.
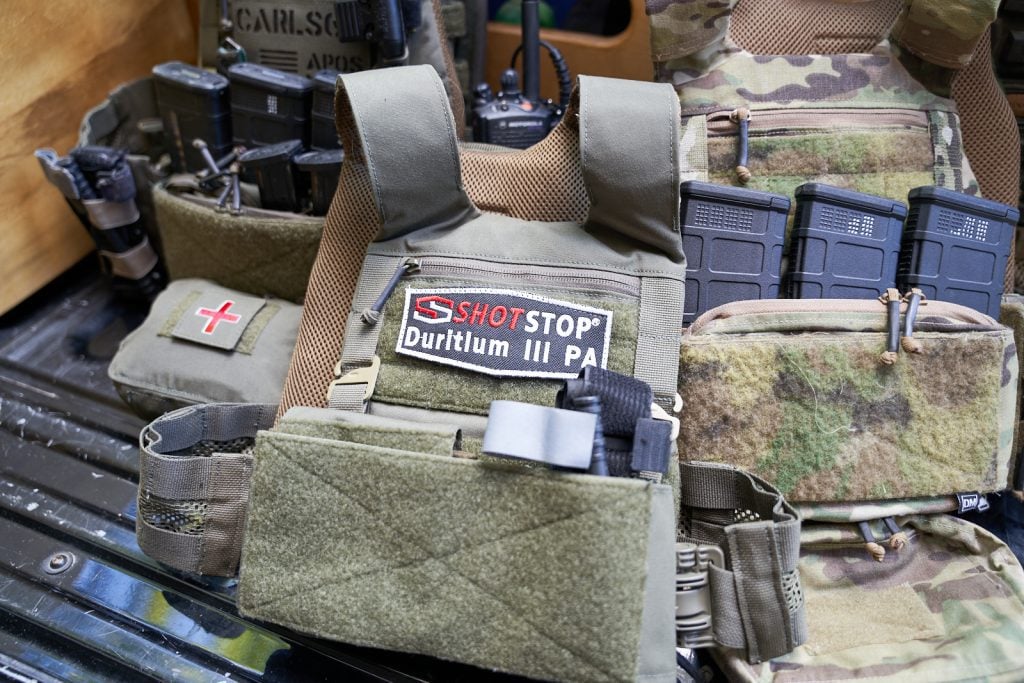
SHOTSTOP Diritium III+ PA Plates
Inside my DM MEPC sits a set of SHOTSTOP Diritium III+ PA plates. SHOTSTOP’s Diritium plates are lightweight, comfortable, and durable. The materials and construction of the plates are both proprietary and lend to the overall effectiveness of the plates. I’ve had the opportunity to watch these plates be absolutely abused—to the point of being set on fire and shot with multiple rounds of 5.56, .308, and 7.62×39 including edge hits. The plates simply perform.
As I’ve watched the plates be systematically, intentionally, and violently “disassembled” it is clear that the solid construction is a series of layers of proprietary polymer. These layers are able to absorb the energy from rifle rounds and dissipate it into the plates with minimal back face deformation. Of course, the plates are NIJ certified and they grossly exceed the standards the NIJ sets forth for certification.
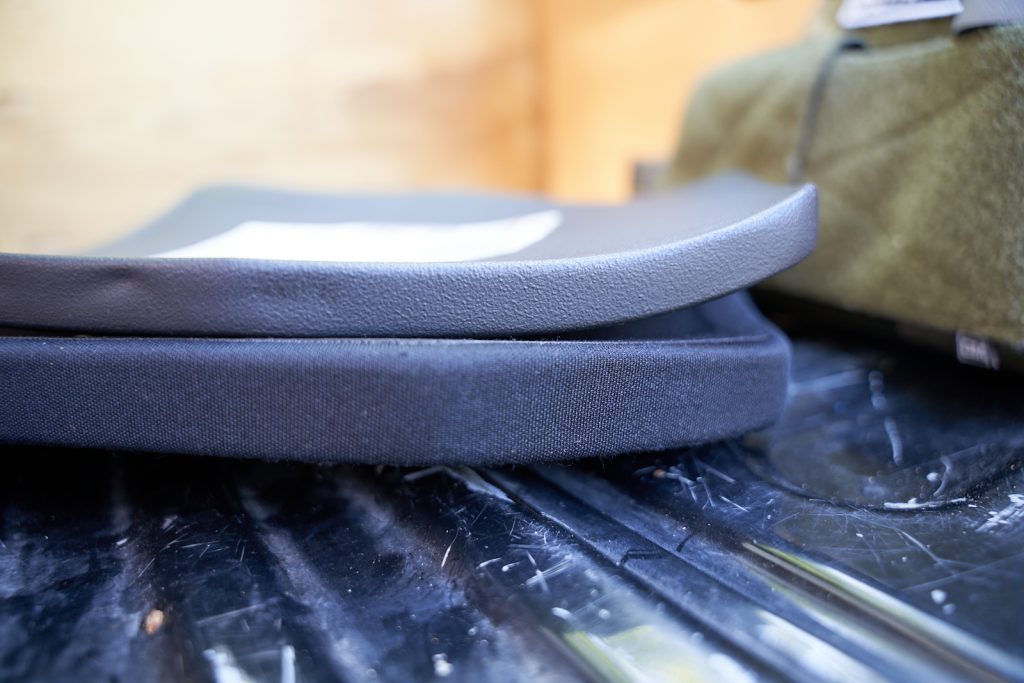
Curves
The double curve PA plates from SHOTSTOP are certainly worth the upgrade. They are more comfortable, thinner, and have a 15-year warranty. As a result, they are of tremendous value.
In addition to being lightweight, the SHOTSTOP PA plates feature a double curve. As someone who has worn single curve plates, I have to say I am a huge fan of the double curve. Our bodies are built with more than one curve so it only makes sense that the stiff armor plates match our shape as closely as possible. Having the plates fit your form is worth the extra cost. A set of plates that matches your body is more comfortable alone. When laden with gear, that closer fit helps to distribute the weight of your kit evenly. In addition, the double curve exploits the thinness of the plates. Together, the thin plates and the multi-curve design help to bring the gear closer to the body. The result is increased comfort and reduced strain. That is a win.
Body Armor Value
One of the attributes that help SHOTSTOP stand out in my mind is value. The PA III+ plates really stand out compared to the offerings standard in the industry. The PA plates are positively buoyant with a 10×12 shooters cut plate weighing in at just 2.7 pounds. The thickness of the double-curved plates is just .7 inches.
All those specs are great. What is really impressive is that the PA plates are backed by a 15-year warranty. The industry standard is 5 years. The SHOTSTOP plates are priced lower than the comparable plates. In addition, they have a 15-year life which increases the value of the plates by 3x.
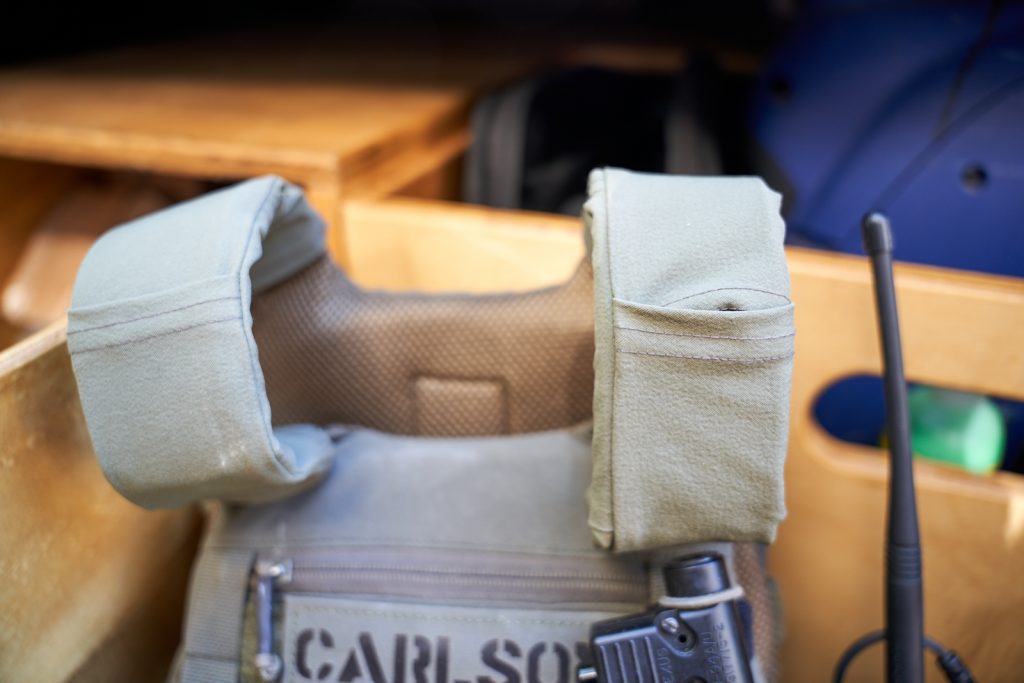
The relatively new padded split comm sleeve. Certainly a better solution than a blade and a flame.
Why the DM MEPC and SHOTSTOP PA Plates Stand Out
After 4 different carriers and 3 sets of plates, I’ve finally settled in on what works best for me. The combination of the Defense Mechanisms MEPC and the SHOTSTOP III+ PA plates is the ticket. The system is lightweight, modular, and comfortable to wear. The result is the perfect setup for me. I can quickly and easily configure my gear to suit my needs and my rig is comfortable to wear. This leads to more time, effort, and energy invested in my training and less wasted effort, wearing, donning, and doffing my gear.
The folks at Defense Mechanisms are problems solvers and they pay attention to their customers. Rumor has it that the relatively new split comm sleeves were born when the Owner of DM, Tim Marshall, watched me take a blade to my traditional one-piece comm sleeve to thread some cables.
Both the Mission Essential Plate Carrier, its accessories, and SHOTSTOP plates are available through the Defense Mechanisms website making the actual shopping just about as easy as setting up and using this plate/carrier combination.