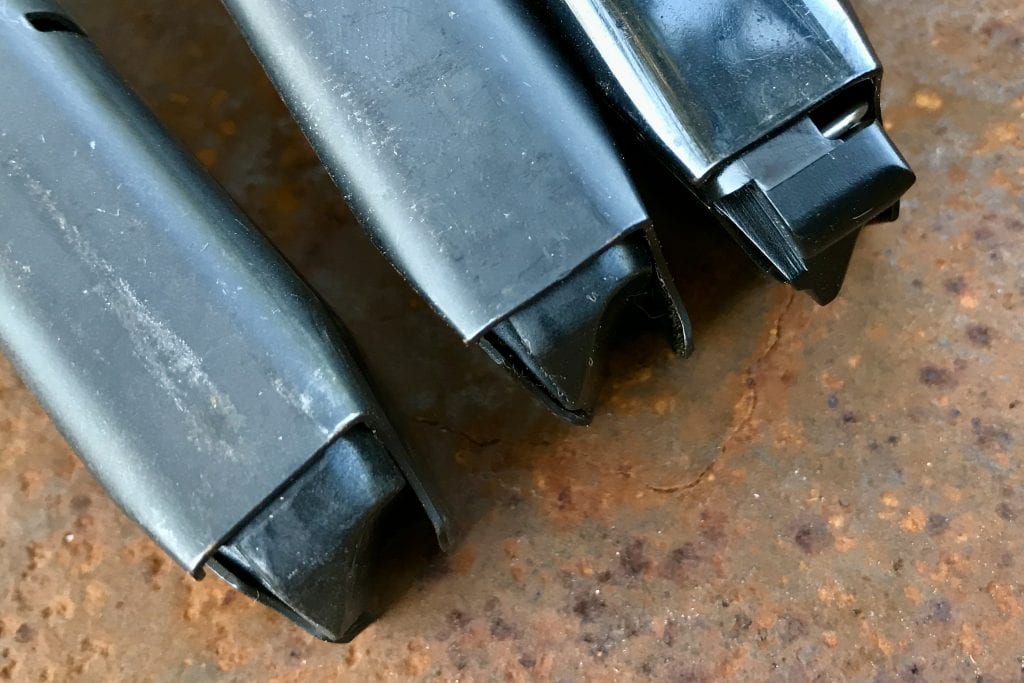
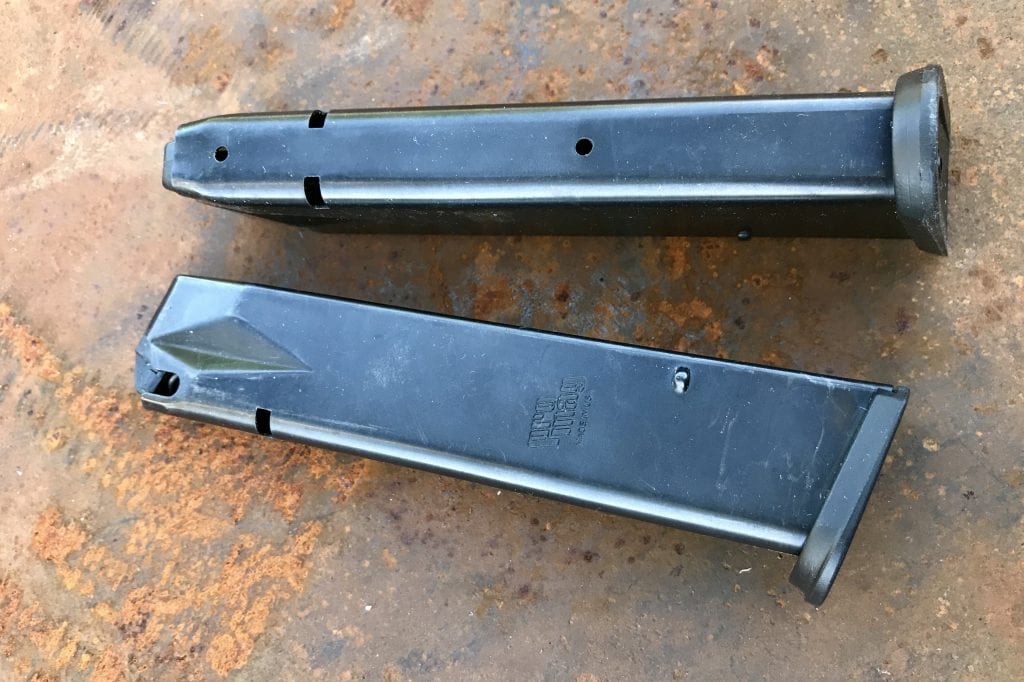
CategoriesNew Gun Releases

Two New Magazine Extension Kits for VP9 and VP9SK

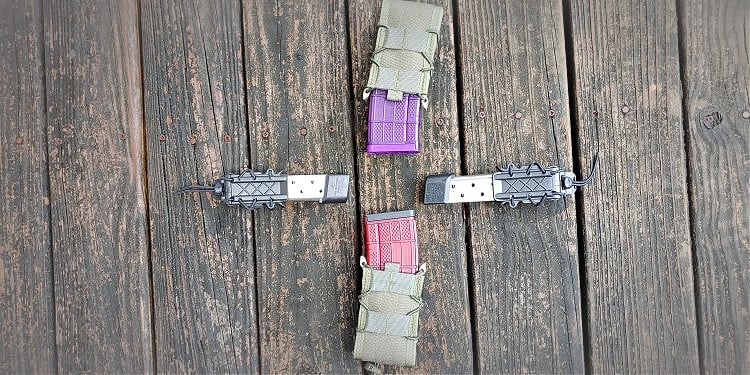
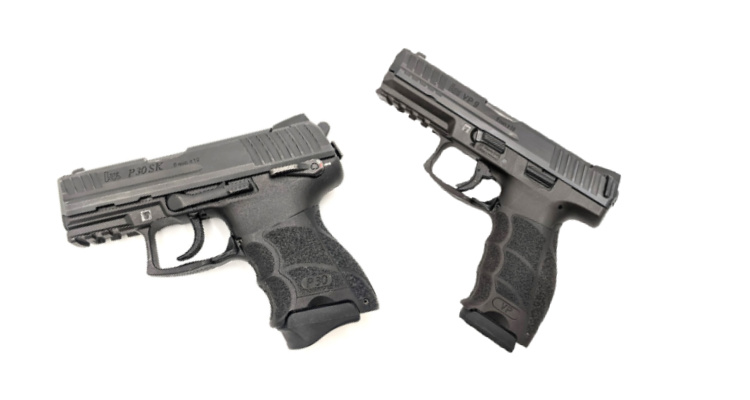
In the last couple of weeks, XTech Tactical released two new magazine extension kits, one for the full-sized VP9 and one for the subcompact VP9SK. Both kits increase the capacity of factory mags by two rounds, and they only take a few seconds to install.
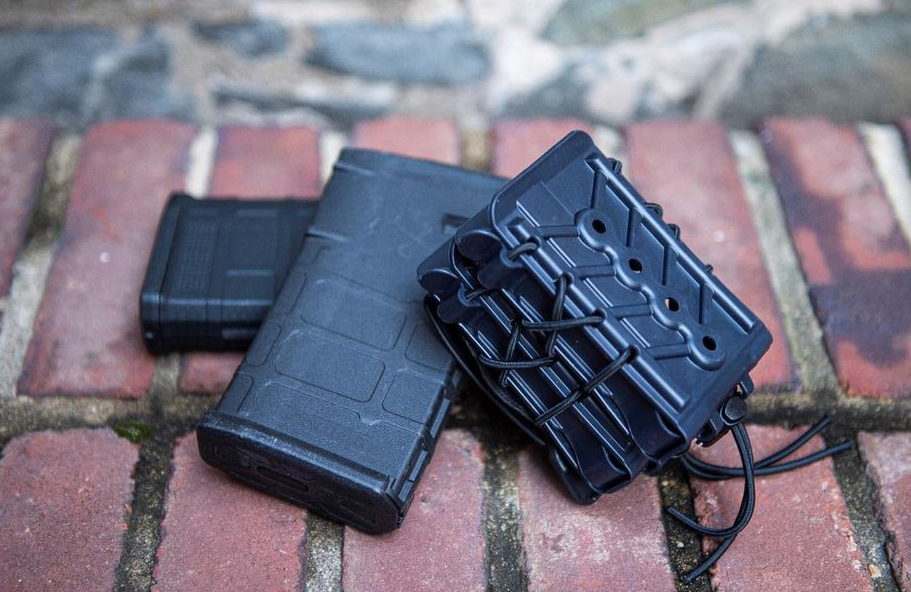
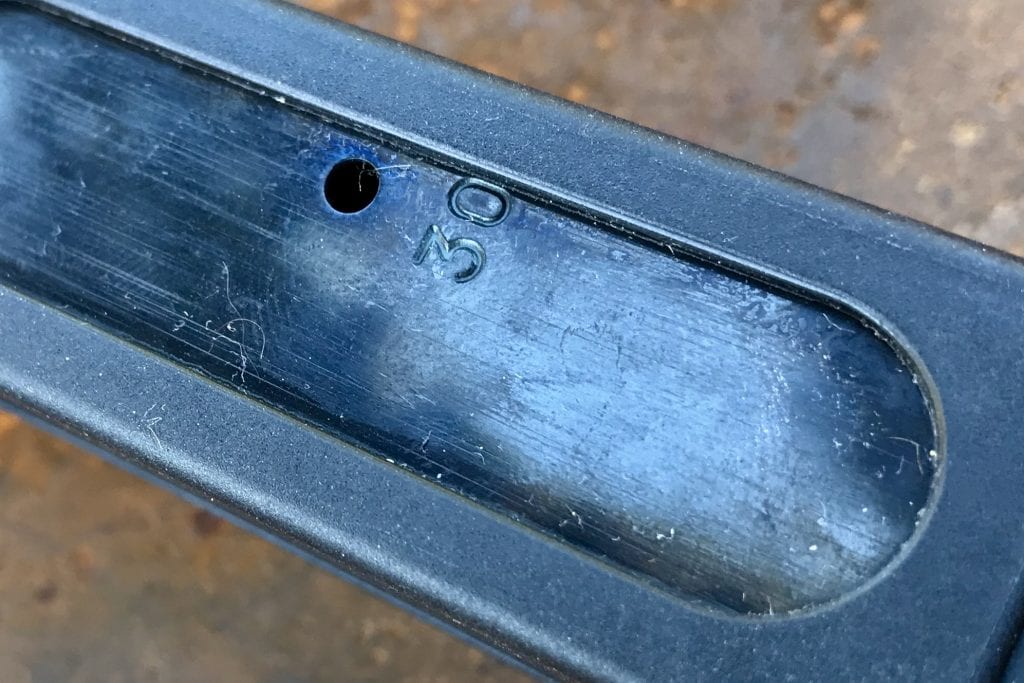
Yesterday, Daniel did this video installation demonstration. Watch how he installs the kit components to convert a factory VP9 15-round magazine to a 17-round mag.

https://www.youtube.com/watch?v=AXt3cJ–q3c

Here are the two kits.

HK VP9 & P30 9mm 15 to 17 RD Conversion Kit

With this kit, you can increase your 15-round VP9 factory mag capacity by two rounds, as shown in the video above. 

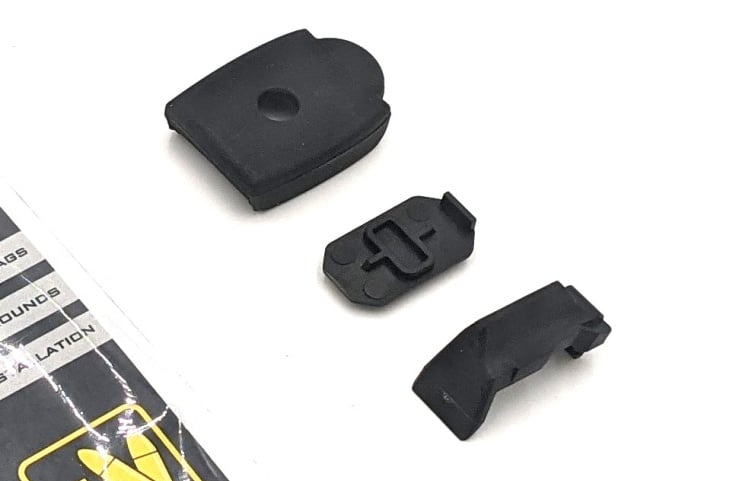
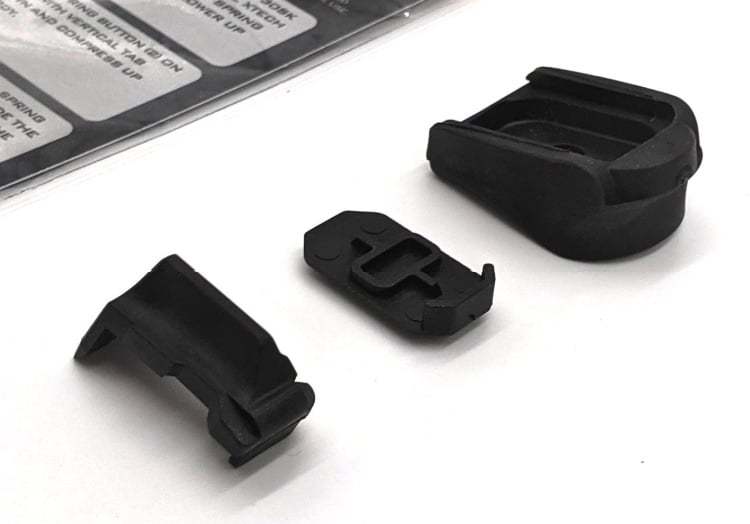
VP9 magazine extender kit components

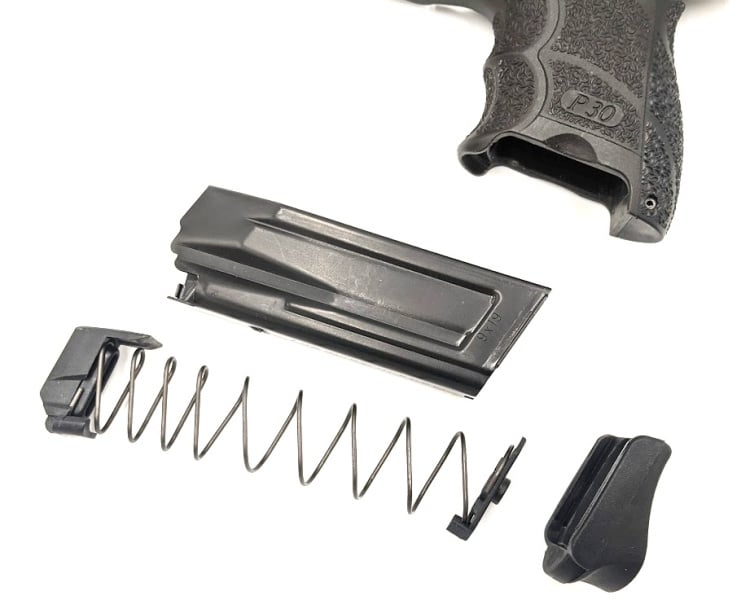
This kit includes the new base plate, spring button, and follower.

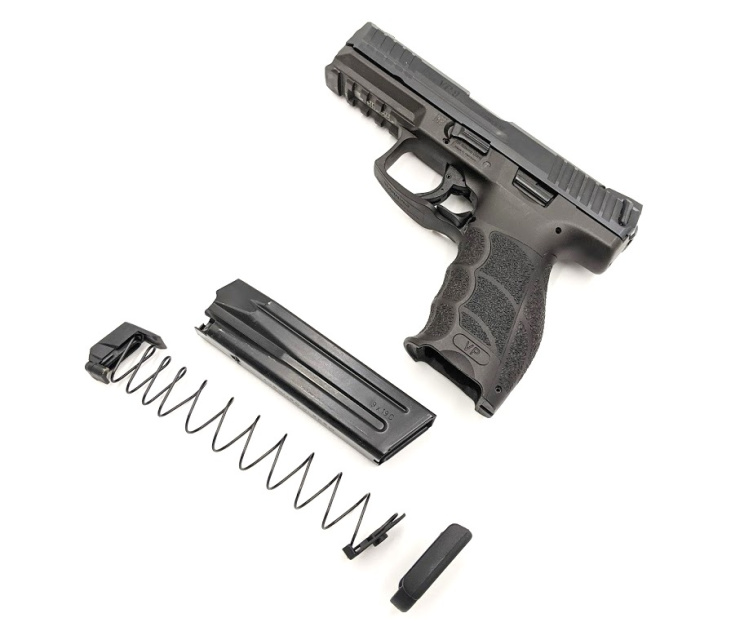
VP9 magazine extension kit from Xtech.

The kit uses the factory magazine spring & body.

From XTech:

XTech Tactical has released its VP9/P30 9mm Magazine Conversion kits for the Heckler and Koch VP9 & P30 9mm. The kits convert factory H&K 15rd and XTech Tactical 15rd magazines to 17rds. The kits are MADE IN THE USA and are $17.95.

The kit includes a follower, spring button and base plate and will add two rounds to existing 15d magazines. The kit will not add rounds to the VP9 17rd magazines. The kit can serve as a direct replacement for damaged factory base plates.

VP9 Magazine Extender Kit Specs

•It Fits the HK VP9 and P30 9mm

•For use with 9mm 15 round magazines – use factory spring

•Converts factory HK magazine from 15 to 17 rounds

•Tool-free, easy installation

•Made in the USA

•Uses factory spring & body (Not Included)

•MSRP is $17.95


HK VP9SK & P30SK 9mm 10 to 12 RD Conversion Kit

This kit makes it possible for you to quickly convert your factory 10-round HK VP9SK magazine from 10 to 12 rounds. The company says this conversion kit has been found to work very reliably with the HK factory magazine spring and body. 

HK VP9 magazine extension kit

Here’s what you get with the kit: a follower, spring button, and base plate.


XTech Tactical Magazine Extender kit for VP9SK

The kit uses the factory spring and magazine body.

The design permits quick conversion of the factory magazine from 10 to 12 rounds. The company says this conversion kit has been found to work very reliably with the HK factory magazine spring and body.  

From XTech:

XTech Tactical has released its VP9sk/P30sk 9mm Magazine Conversion Kits for the Heckler and Koch VP9sk & P30sk in 9mm. The kits convert factory H&K 10rd magazines to 12rds while also providing a much-improved grip of the pistol. The kits are MADE IN THE USA and are $17.95.

The kit includes a follower, spring button and base plate and will add two rounds to existing 10rd magazines.

The magazine extender is less overall length and size than the H&K factory finger extension while offering the user 2 additional rounds.

The kits are in stock and shipping!

VP9 SK Magazine Extender Kit Specs

•It Fits the HK VP9SK and P30SK 9mm

•For use with 9mm 10 round magazines – use factory spring

•Converts factory HK magazine from 10 to 12 rounds

•Tool-free, easy installation

•Optimal ergonomics for recoil control

•Made in the USA

•Uses factory spring & body (Not Included)

•MSRP is $17.95 (at the time of this writing)


Stephanie Kimmell is the firstborn daughter of Missouri’s Pecan King, worthy scion of a Vietnam veteran sailor turned mad engineer-orchardist-inventor-genius. With a BA in technical writing, she freelances as a writer and editor. A Zymurgist greatly interested in the decoction of fermented barley and hops, she is in many ways a modern amalgam of Esther Hobart Morris, Rebecca Boone, and Nellie Bly. She hunts, fishes, butchers, and cooks most anything. When not editing or writing, she makes soaps and salves, spins wool, and occasionally makes cheese from cows she milked herself. Kimmell is a driven epistemophilic who loves live music and all sorts of beer.

CategoriesGun Reviews

The Sig Romeo1Pro — Sig’s Latest Duty Ready Red Dot

I can’t keep track of Sig’s new releases. They seem to have a constant stream of new guns, optics, suppressors, P320 grip modules, and optics coming out. One of the latest is the successor to the Romeo1, the Romeo1Pro. Sig gave the Romeo1 a few upgrades that most duty and serious competition shooters demand.

What exactly did Sig change about the full-size Romeo1? Well, let’s dive in.

Romeo1Pro vs. Romeo1

In a world where we already have the Romeo1, you might be asking what the point of the Romeo1Pro is? The Romeo1Pro provides a noticeable difference in performance and outclasses the Romeo1 everywhere but the price.

The Romeo1 packed 5,000 hours of battery life, and the Romeo1Pro quadruples that with 20,000 hours. Plus, the Pro model utilizes a new point-source emitter to provide a much brighter dot than the Romeo1. Both offer ten daylight brightness settings, but the Pro gives you two-night vision settings.

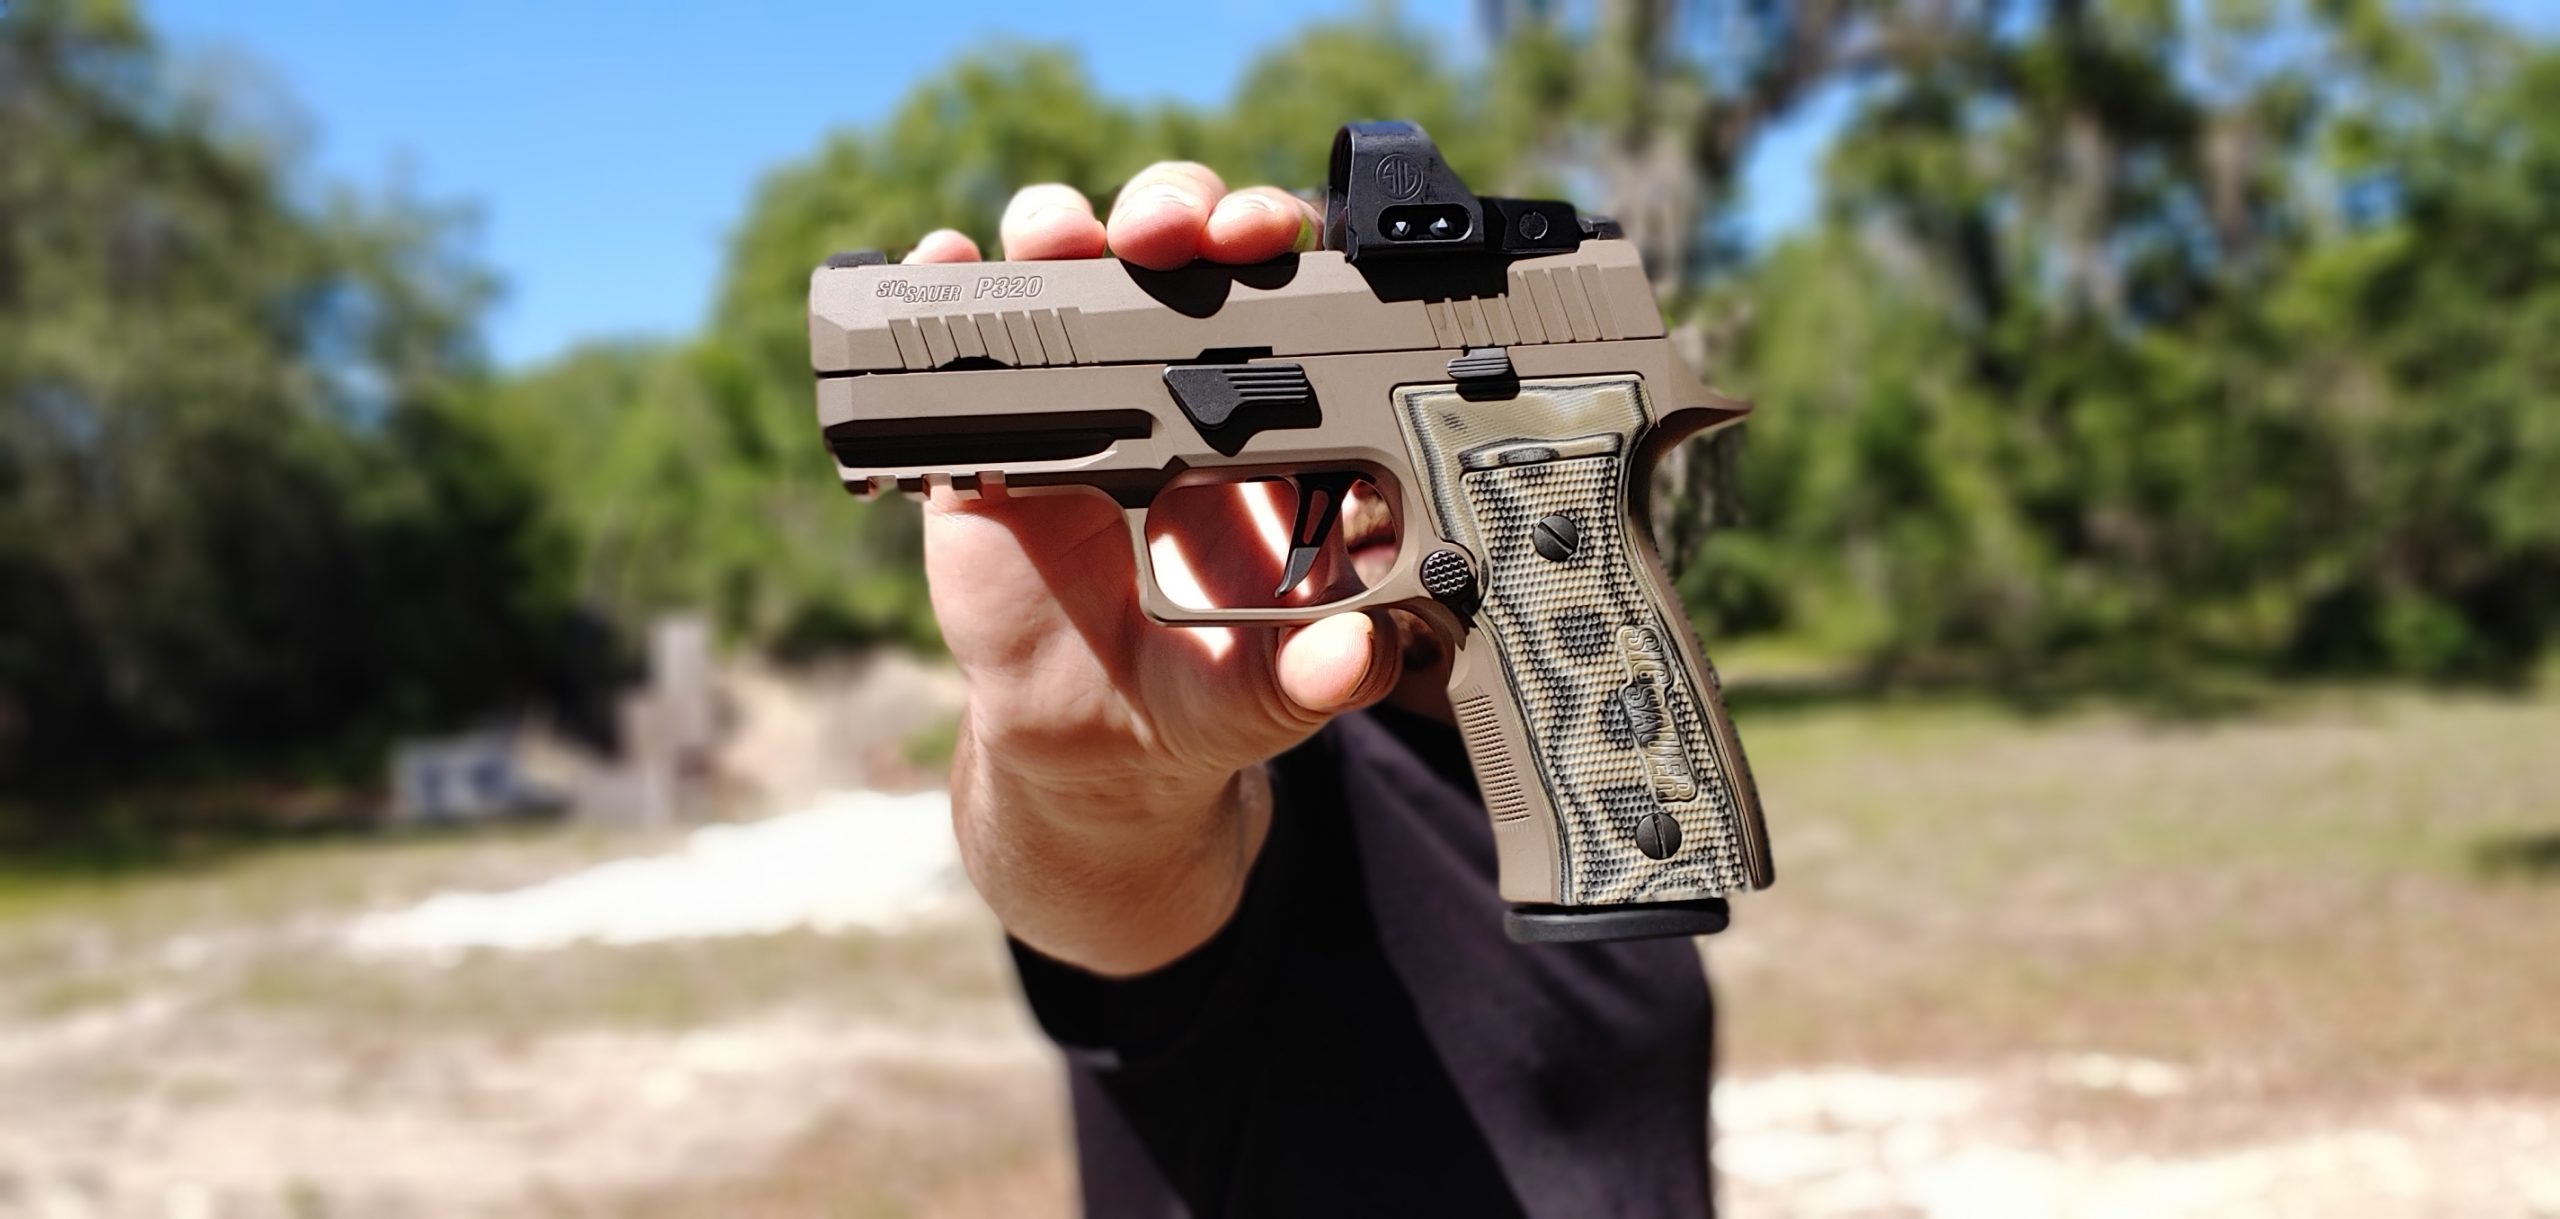
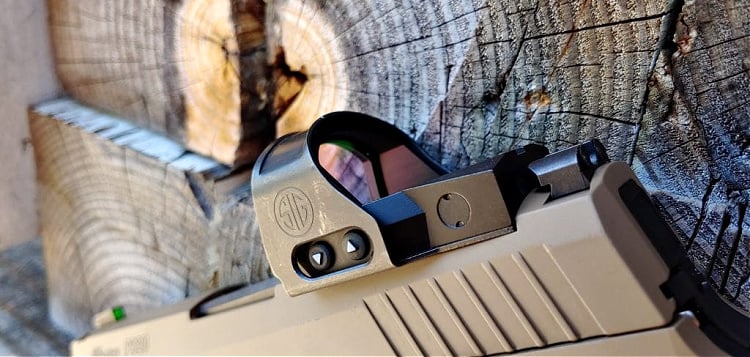
Sig Sauer P320 with Romeo1Pro red dot sight

Wanna be faster? More Accurate? Increase your potential range? Get a red dot on your handgun.

The Romeo1Pro weighs .02 ounces more. It’s slightly longer but also slightly thinner. The difference is fractions of an inch, so it’s hardly noticeable. The Romeo1Pro also comes with a big stainless steel shield that adds a hefty layer of protection to the optic. It adds some weight and bulk but is completely optional. I’ll rarely say no to an extra layer of protection.

The Romeo1Pro Broken Down

If window size matters, then you’re gonna love the size of the Romeo1Pro window. It’s 30mms and massive in design. It’s seriously huge and wide. It fills your vision, and to me, a big window makes the dot easier to find if you goof your presentation.

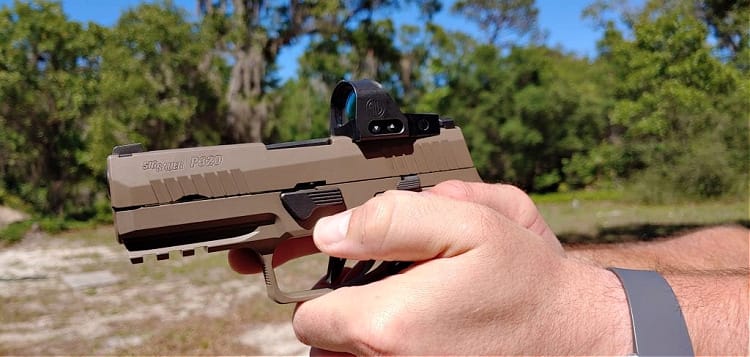
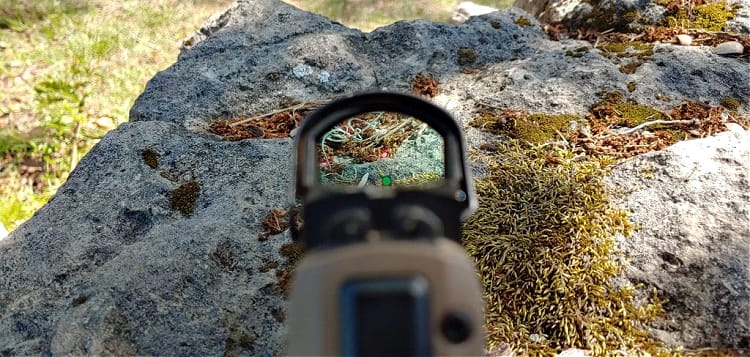
Sig Romeo1Pro red dot sight 3MOA dot visible through sight window

The 3 MOA dot is highly visible and very easy to see.

Shooters can choose between 3 MOA or 6 MOA reticles, and the optic comes in black or FDE. As a heads up, the Romeo1Pro does not fit Romeo1 mounts. Sig infused the MOTAC system into the Romeo1Pro.

Sig Romeo1Pro red dot sight 30mm window

A 30mm Window gives you an easy-to-find dot.

This motion-detecting technology will automatically shut the dot down after it sits stationary for two minutes. The dot will fire back to life as soon as it detects movement. Movement can be as little as the vibration of a car. The lens has a very visible blue tint.

To the Range with The Romeo1Pro

I had a Sig AXG who needed an optic to fill that slot. What better choice for a Sig pistol than a Sig optic? As you’d expect, the Sig Romeo1Pro dropped on the AXG without issue. The footprint changed between the Romeo1 and Romeo1Pro. Sig moved to the Leupold DeltaPoint Pro footprint, which makes sense when you consider the Army’s new M17 is cut for the DPP.

The Romeo1Pro will fit on SIG M17 and M18 pistols, all Pro-Cut pistols, and X series guns. The AXG fits the Pro-cut series guns and makes mounting the optic quick and easy. SIG also includes a tool to make zeroing the optic very easy. The tool can also store a spare battery, which is also very handy.

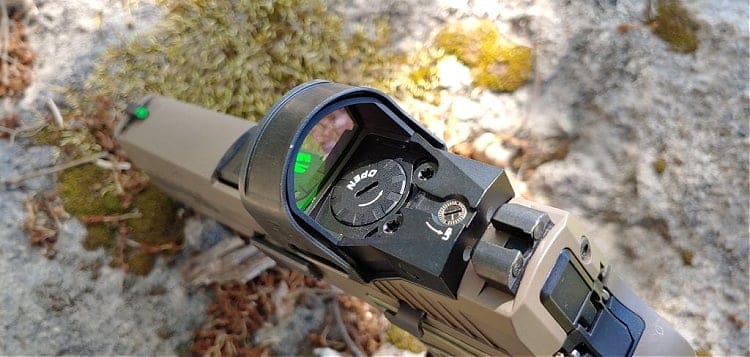
Sig Romeo1Pro top loading battery

A top-loading battery provides easy access to the optic and makes it easy to swap batteries.

The turrets feature Sig’s new TruHold Lockless Zeroing System. The TruHold system uses twin adjustment springs that ensure you keep your zero for round after round and for bump after bump. The turrets have a handy little reference line for making adjustments. If you use the line, you can visually see each adjustment.

That’s kind of handy when wearing hearing protection on a range with multiple shooters. You don’t have to rely on hearing and feeling the click to see what adjustments you’re making. It’s a smart design that makes zeroing quick and easy. I’m using the 3 MOA variant, and a 6 MOA version is also available.

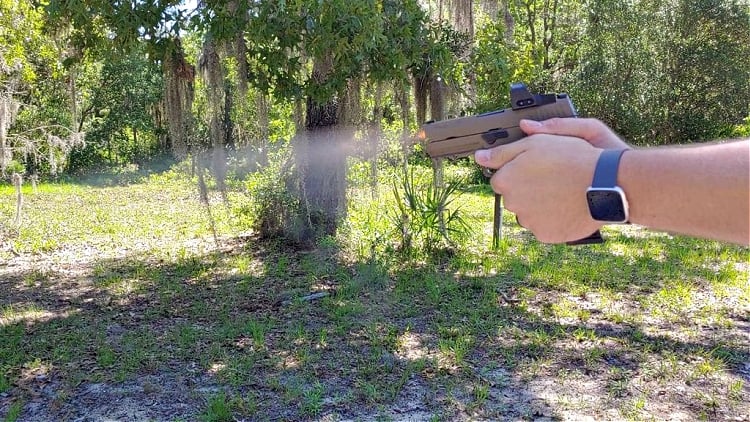
Sig P320 muzzle flash in the daylight

Capturing muzzle flash in the daylight is a real hassle.

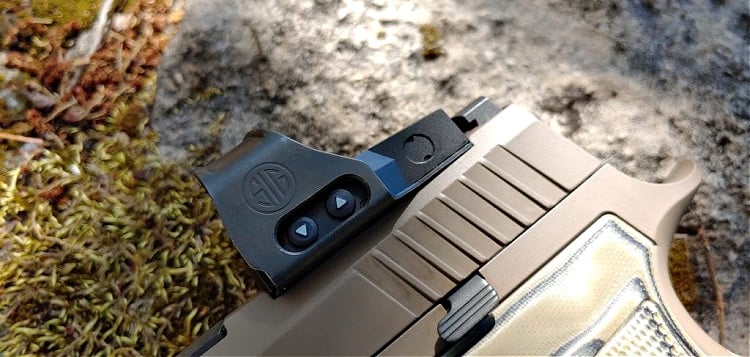
While zeroing, I messed with the brightness settings. The big steel shroud does make it a little harder to reach the buttons, which is annoying. The dots provide a very tactile and audible click with each press. That fancy new emitter and that bright blue tint provide a super bright red dot. The highest setting is too bright, even for high noon in Florida.

Hitting Steel

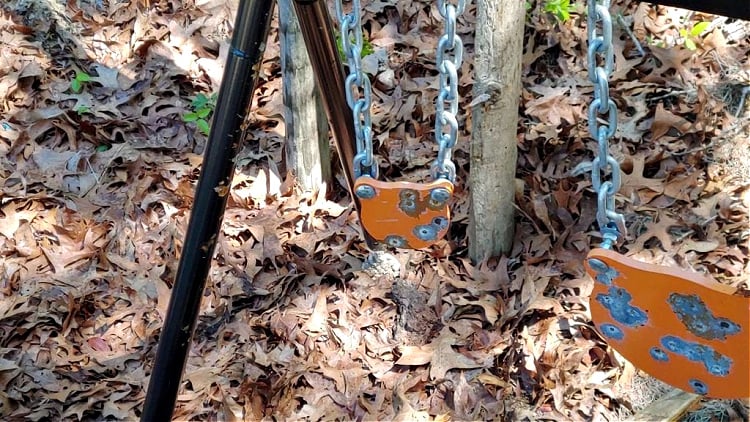
My wonderful wife provided me with an awesome set of steel targets. They consist of a 25% IPSC target, an 8-inch gong, a 6-inch gong, and a teeny tiny 4-inch gong. I can’t resist not trying to shoot all four targets as fast as possible.

steel targets

Oh hey little buddy, how you doing?

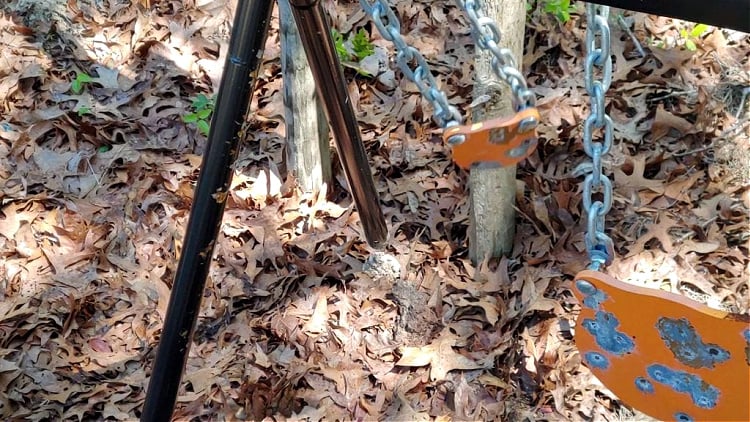
With the Romeo1Pro in place, I cleared the rack on my first try. After that, I put the 3 MOA dot on the little 4-inch gong, and at 15 yards, I was able to keep that piece of steel rocking and rolling. With iron sights, I’d hardly be able to even see the small gong, much less hit it.

steel targets

Ouch, sorry I shot you.

To keep the lead and steel warfighting, I stepped back all the way to 50 yards. At this range, I wasn’t ready to kill my ego trying to hit the 4-inch gong, but I would light up the IPSC and 8-inch gong. I went ten for ten on these moderate-sized steel targets. The Romeo1Pro features a super clear and crisp red dot that makes it easy to see against the steel targets.

I went for the 6-inch gong, and while it was a good bit smaller, I could still decimate the gong. I had to shoot a little slower and let the target stop rocking a bit, but I could still go five for five with it.

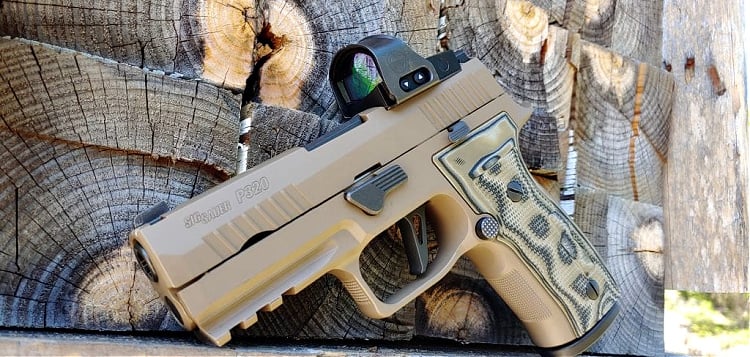
Sig Sauer Romeo1Pro red dot sight on P320 pistol

A Sig on a Sig, what’s not to love.

Again, the red dot makes this relatively easy. Handgun red dots like the Romeo1Pro allow you to utilize the true potential of your handgun. They take you well beyond what your iron sights are capable of.

As a Dot

3 MOA sits on the small side of red dots for a handgun. Many would probably prefer a dot this small on a long gun, and the 6 MOA variant on a handgun. With that being said, the bright dot design and the clear lenses of the Romeo1Pro provide a reticle that’s plenty easy to see.

Sig Romeo1Pro steel hood, control buttons

The steel hood provides excellent protection to the optic but makes the buttons tough to reach.

Even when it comes to fast shooting, the dot never flickers or fails. Switching between targets results in no reticle blur, and the circle stays circular. It also never flutters between shots, which poorly made dots often do. It can be somewhat unnoticeable if you do not specifically look for it. I tried some hot +P defensive loads, and I couldn’t get it to flicker with those either.

With a target focus, getting the dot on target takes almost zero effort. I can pop that bad boy up and get it on targets, both big and small, with ease. I ran a few snapshot drills with headshots with zero issues. The dot was also easy to find. As long as my presentation wasn’t garbage, my poor targets suffered from it.

Durability Testing

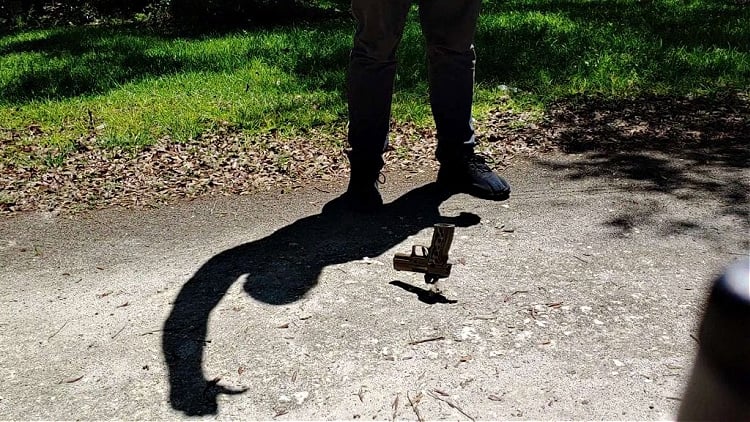
Sig claims the hood adds an extreme level of durability to the optic, so I went and tested that out. I threw the Sig AXG, equipped with the Romeo1Pro.

Sig RomeoPro1 durability test throw.

Catch!

I just threw it away from me several times. Then I dropped it three times, once on each side and once on top.

Sig Romeo1Pro durability test drop

Sorry Romeo, but I had to drop you…more than once.

I then tested it to see if it held zero. I wasn’t surprised when it did because these tosses and drops didn’t even scratch the finish. Sig also brags about the RomeoPro1 having an IPX7 rating, so I dropped it in a Tupperware container full of water for 30 minutes.

Sig RomeoPro1 red dot sight submerged in water for waterproof testing.

Let’s see exactly how waterproof this little Sig optic can be.

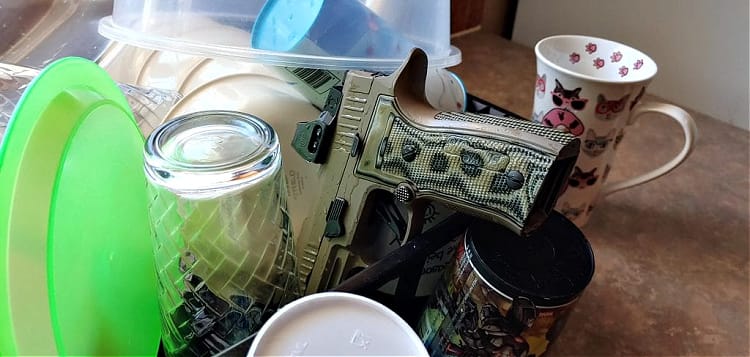
When I finally pulled the Romeo1Pro out, I found a fully functioning red dot. As I type this, it’s sitting in the dish rack drying off.

Sig AXG with Romeo1Pro red dot sight drying in dishrack after being submerged in water for waterproof testing.

The things I do for you people. They mostly drive my wife crazy.

In Living Color

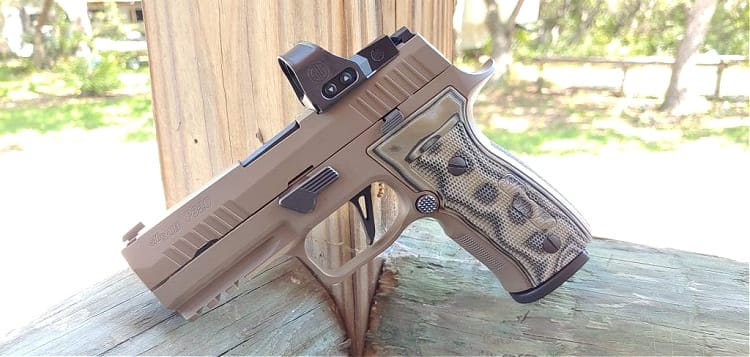
The SIG Romeo1Pro red dot provides shooters with a full-sized mini red dot. This big honking red dot provides shooters with a massive window, a very bright and very clear dot. It’s easy to use with excellent controls and is very easy to zero. You can go smaller for concealed carry purposes, but for home defense and competition use, the Romeo1Pro presents a much better option than the original Romeo1.

Sig AXG with Romeo1Pro red dot

Optics are all the rage these days. What do you think? Let us know below.

It’s a very capable red dot that stands up to the rigors of heavy use and stands with the big boys of the optics world as a competent contender for your handgun.

Travis Pike is a former Marine Machine Gunner, a lifelong firearms enthusiast, and now a regular guy who likes to shoot, write, and find ways to combine the two. He holds an NRA certification as a Basic Pistol Instructor and is the world’s Okayest firearm’s instructor.

CategoriesSkills and Gunhandling

Shoot gooder: 3 ways to aim a pistol

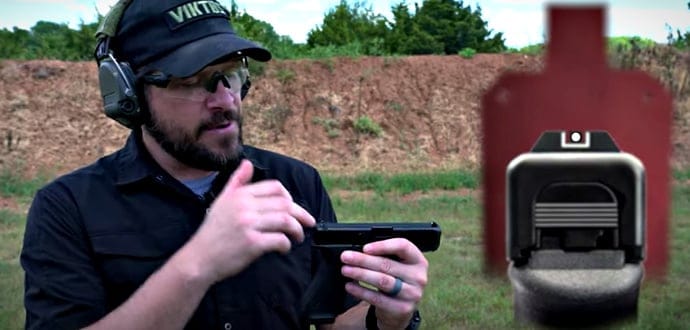
Aiming a handgun has a lot with where you put your focus. In the Skills and Gunhandling video below, Shaw demonstrates how to aim a handgun using three different methods. Each method has its advantages, so it’s worth it to learn about all three. The actual name of the video is 3 ways to use your sights. Most of us have been taught how to aim a pistol using the usual “accepted” way of accurately acquiring the sights by focusing on the front sight blade before putting accurate rounds downrange. As you’ll see, however, there are a couple of other ways. 

This article is from October 2019.

How to Aim a Pistol

1. Hard Sight Focus.

Focus on the front sight. That’s how most of us are taught. We’ll talk about that briefly, then discuss a couple of other methods.

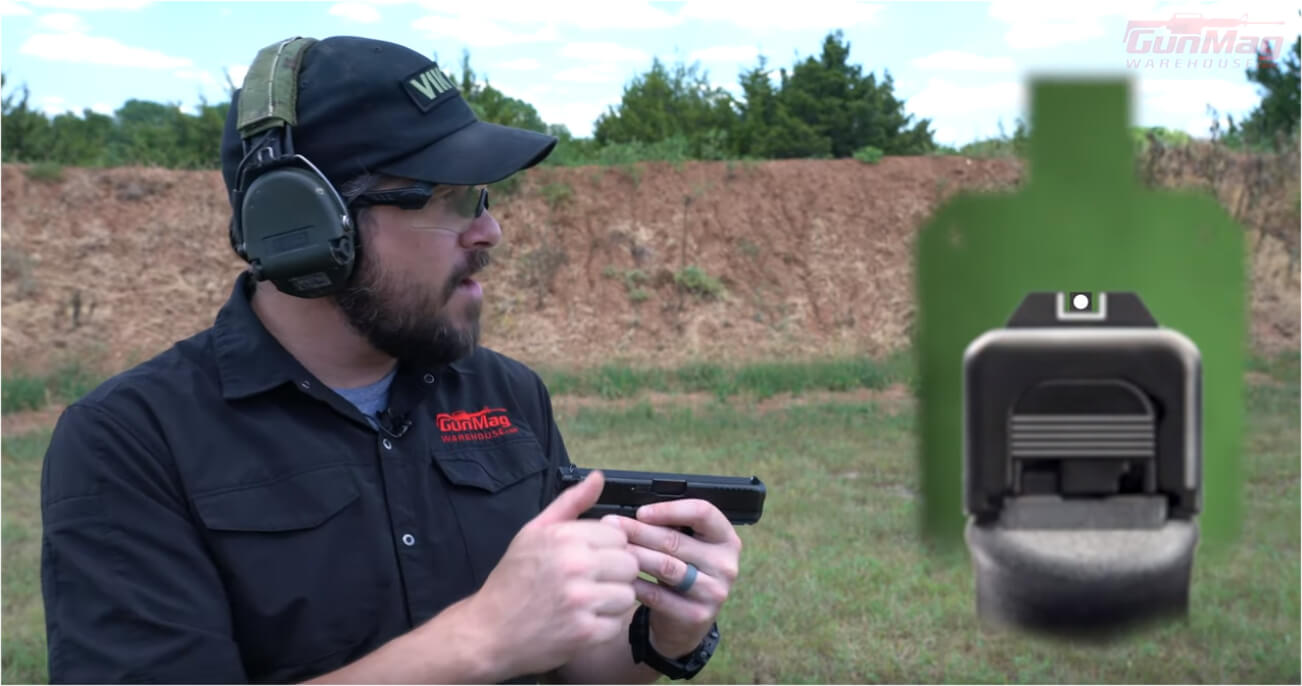
how to aim a pistol, hard front sight focus

Chances are if you’re reading this, you know the drill. Focus hard on the front sight blade, center it in the rear notch with an equal amount of space to either, and flush across the top — then take that sight alignment, focus hard on the front sight, superimpose it over where you want to hit, and press the shot.

how to aim a pistol and shoot accurately

This is not a hard front sight focus – but it is a viable option for shooting accurately under certain circumstances.

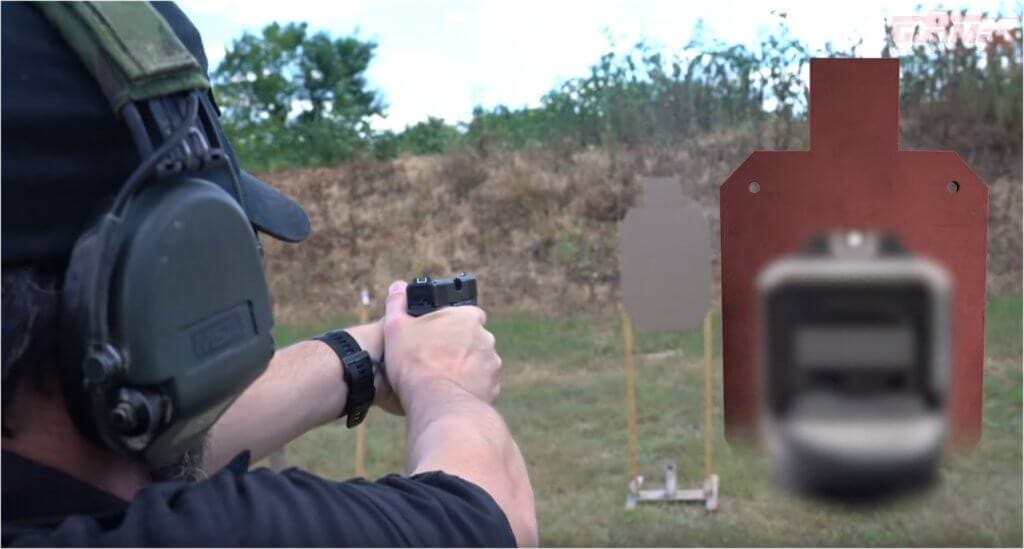
2. Hard target focus.

A hard target focus doesn’t really involve the sights at all. It depends on skill level and training and is very situational (range, backdrop, etc. – which really is any shooting, but it’s even more critical here). Aiming a handgun with this method involves, as the name implies, a hard focus on the desired target area. Though the sights are not directly referenced in this shooting style, body alignment and weapon position in relation to the target are important.

how to aim a pistol, hard target focus

Aiming a handgun. Soft front sights, soft rear sights, but aligned and superimposed over the target area - it works well, particularly for those who have corrected vision.

Aiming a handgun with soft front and rear sights that are aligned and superimposed over the target area works well, particularly for those who have corrected vision.

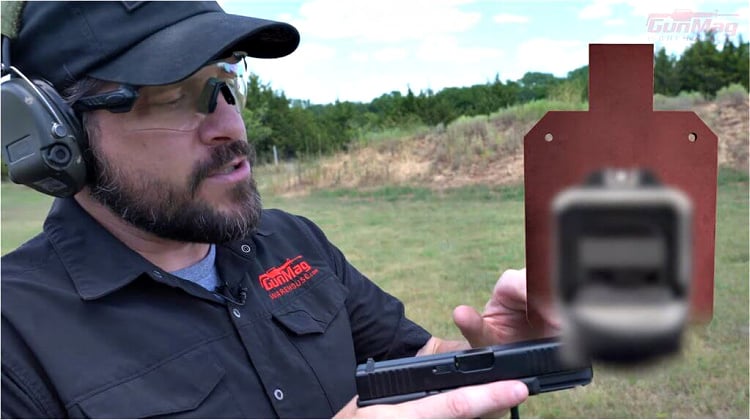
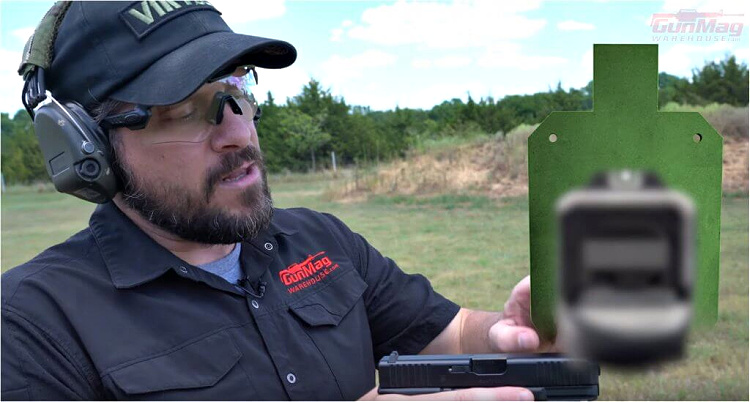
3. Target Focus with Soft Front Sight

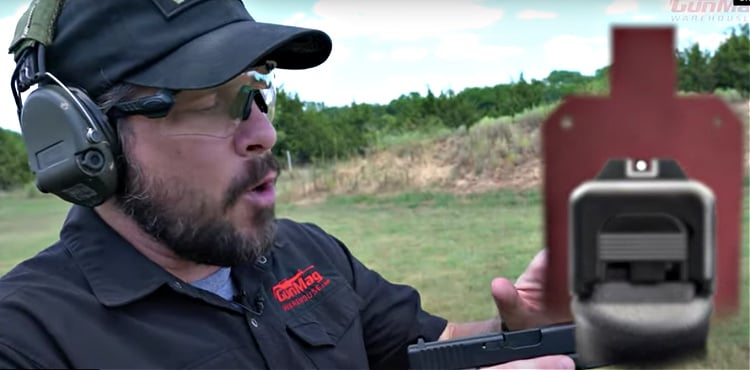
This final method for how to aim a handgun is particularly effective for shooters wearing progressive (not transition) lenses, bifocals, trifocals, or the like. It does not involve a hard focus on the front sight, but rather is an alignment of soft front and soft rear sights, superimposed over the target before pressing the shot (i.e. aligning a blurry front sight instead of a blurry rear sight). This means you’re effectively using the front and rear sights much like you would a red dot sight.

Aiming a pistol, target focus with soft front sight.

Watch the Video, and Subscribe to GunMag TV!

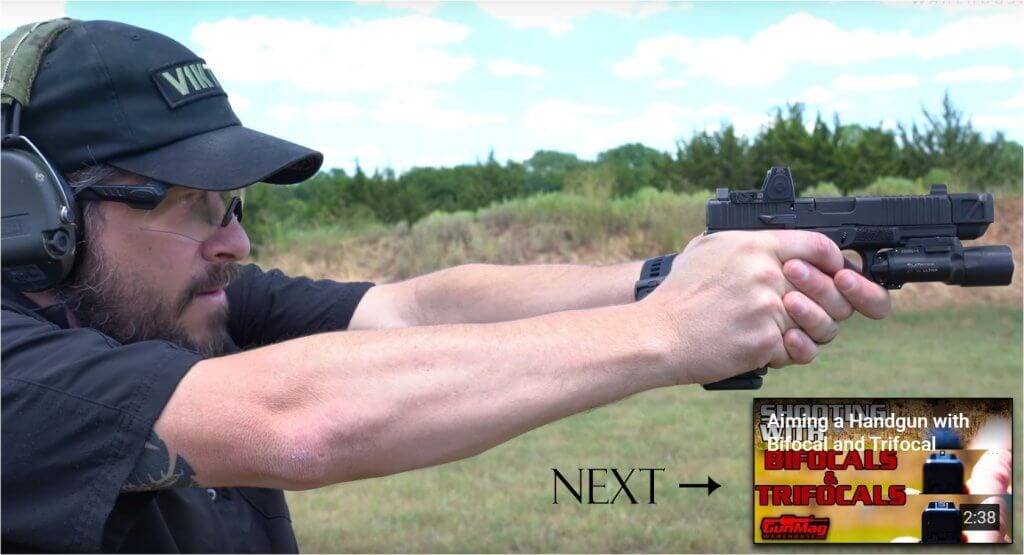
Up Next: Aiming a Handgun with Bifocals and Trifocals

how to aim a pistol, aiming a handgun with bifocals, trifocals, and transition lenses.


Reminder from the beancounters: If you’re looking to make a change (or upgrade) your firearm, we have several varieties of pistol sights available at GunMag Warehouse.


GunMag TV

GunMag Warehouse is developing a badass YouTube channel. Take a minute and check it out.

GunMag TV: the GunMag Warehouse YouTube channel

Josey Wells is a former military man who spent most of his career assigned to 11th Special Forces Group and JTF-6 (including a little work with Coronet Nighthawk in its final days and a couple of OEF-CCA missions), moving on to a civilian billet around the time JTF-6 transitioned to JTF North. He is an intemperate gambler who enjoys shooting 2-Gun Action matches (though he never seems to win any). Formerly a SOF team leader with the Triarii, Wells currently works “GFC Violent Persuasion Services” serving as an advisor to an SMU south of the US-Mexico border, and lets us use his name for some of our basic news posts because “Admin” is boring. Like many other fictional characters, the Missouri native is capable of frequent and improbable feats of valor.

CategoriesAccessories

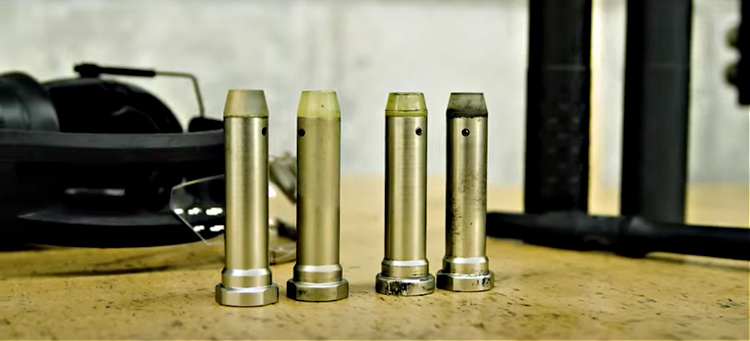
How Buffer Weights Affect Bolt Performance

What do you get when you mix, match, and switch buffer weights and suppressors? Does it make a difference? How does each combination affect bolt velocity?

Those are the questions that SilencerCo tackled when they played with various buffer weights with and without two different types of suppressors.

Two questions emerged that needed to be answered.

The first was to find out how different buffer weights affected the bolt velocity, from the 3-ounce standard H2 buffer found in the M4 and most off-the-shelf AR-15s to the much heavier HX that weighed in at almost 9 ounces. Even though it may seem obvious that the heavier buffer would slow down the cycle rate, they had to be sure and had to set a baseline for the next part.

The second question was to find out how the gas-trapping characteristics built into various suppressors affected the bolt carrier speed with the various buffers, from lightest to heaviest.

Gathering the Data

First up was the M4, shot 18 times, each with a different suppressor (or no suppressor) and buffer weight. It was shot once with each of the five buffers, first with no suppressor and then with each of the two suppressors. The first suppressor was a Saker .556 designed for the AR platform’s standard caliber. The second suppressor was a larger bore .45 can that allowed for more gas to escape.

Suppressor

Suppressors are a great way to reduce noise, but they can also affect buffer performance and cycle rate.

As expected, there was quite a difference in the performance of each buffer, especially when the suppressors were added. The tighter tolerance .556 retained more gas, thereby barely slowing down the bolt. The wider .45, which allowed more gas to escape the muzzle, had less effect on the bolt velocity.

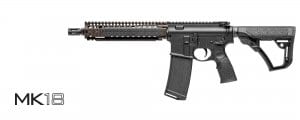
But does the barrel length make a difference? To find out, they switched to an MK 18 with a 10-inch barrel to see if the extra six inches in the M4 made a difference. Their conclusion? Nope, not a bit.

MK18 used in buffer weights suppressor science testing

Barrel length can also play a role in suppressor and buffer performance.

The key differentiator in both cases was the buffer itself.

It came as no surprise to anyone that heavier buffers slowed down bolt velocity, but it was interesting to see just how much it mattered. Even the slightest weight difference affected performance quite a bit. However, their conclusion was that even though the chronograph showed significant performance differences, the average shooter would be unaffected by the change in velocity.

The biggest finding as far as suppressor performance is that the decibel reduction is virtually identical regardless of buffer weight. Again, this is not a huge surprise, as the amount of gas making the bang is not dependent on the buffer, but this experiment solidified that conclusion.

Check out the science for yourself in the SilencerCo video. And when you’re done, check out our selection of M4 mags and accessories for your AR.

Read more about SilencerCo in the archives.

Want more Gun Mag Warehouse? Follow us on Instagram @gunmagwarehouse

David Workman is an avid gun guy, a contributing writer to several major gun publications, and the author of Absolute Authority. A logophile since way back, Workman is a quickdraw punslinger and NRA RSO and Certified Pistol Instructor. He helps train new shooters on basic handgun skills and CCW requirements and is a strong advocate for training as much as practicable. “Real-world shootouts don’t happen at a box range.”

CategoriesRange Gear

Top Five Beretta M9 and 92FS Magazines

Before we jump into a discussion of M9 magazines, I’ll admit I’m a bit of a Beretta fan. Ironically, my love of the brand began with a Taurus—a PT92—that was used as a prop in the 1996 Baz Luhrman Romeo and Juliet film. Such a kickass take on the classic–the gas station gunfight alone was worth the price of admission.

The second gun I ever bought was a decommissioned 92FS from a police department. And over the years, I’ve owned several. The fanciest was a stainless 92 that I had rebuilt by Wilson Combat into a 92G—the greatest of all 92 variants. That remains one of my favorite guns of all time, but I gave it away to a friend who felt even more love for it than I did.

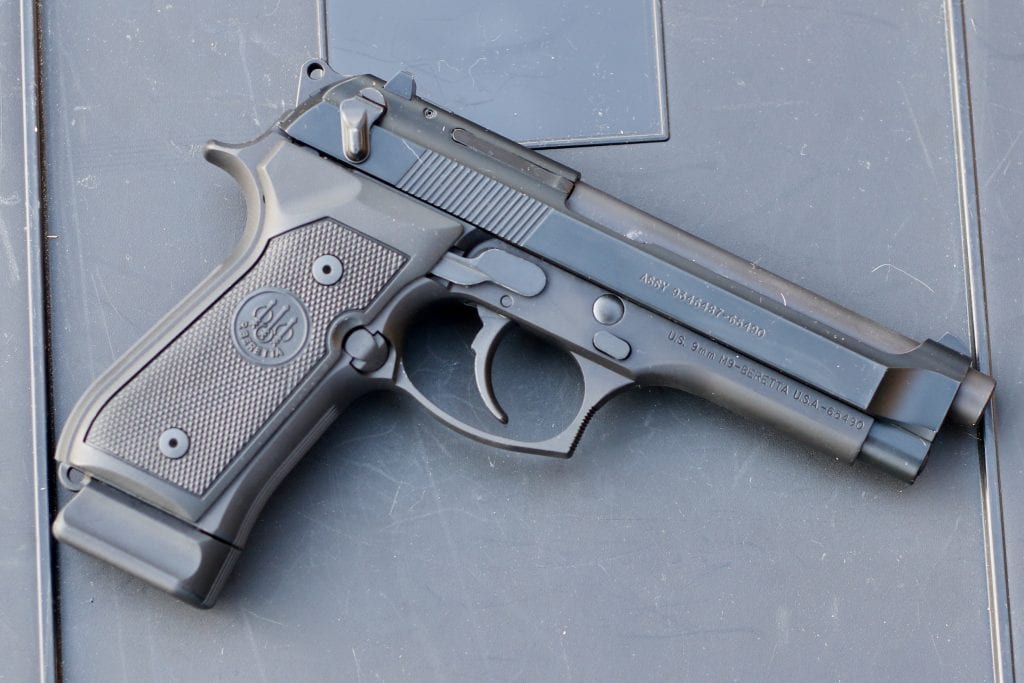
As far as handling goes, the Beretta 92FS is easy to control.

As far as handling goes, the Beretta 92FS is easy to control.

I regularly carried a 92 for years—right up until I bought a Sig P226.

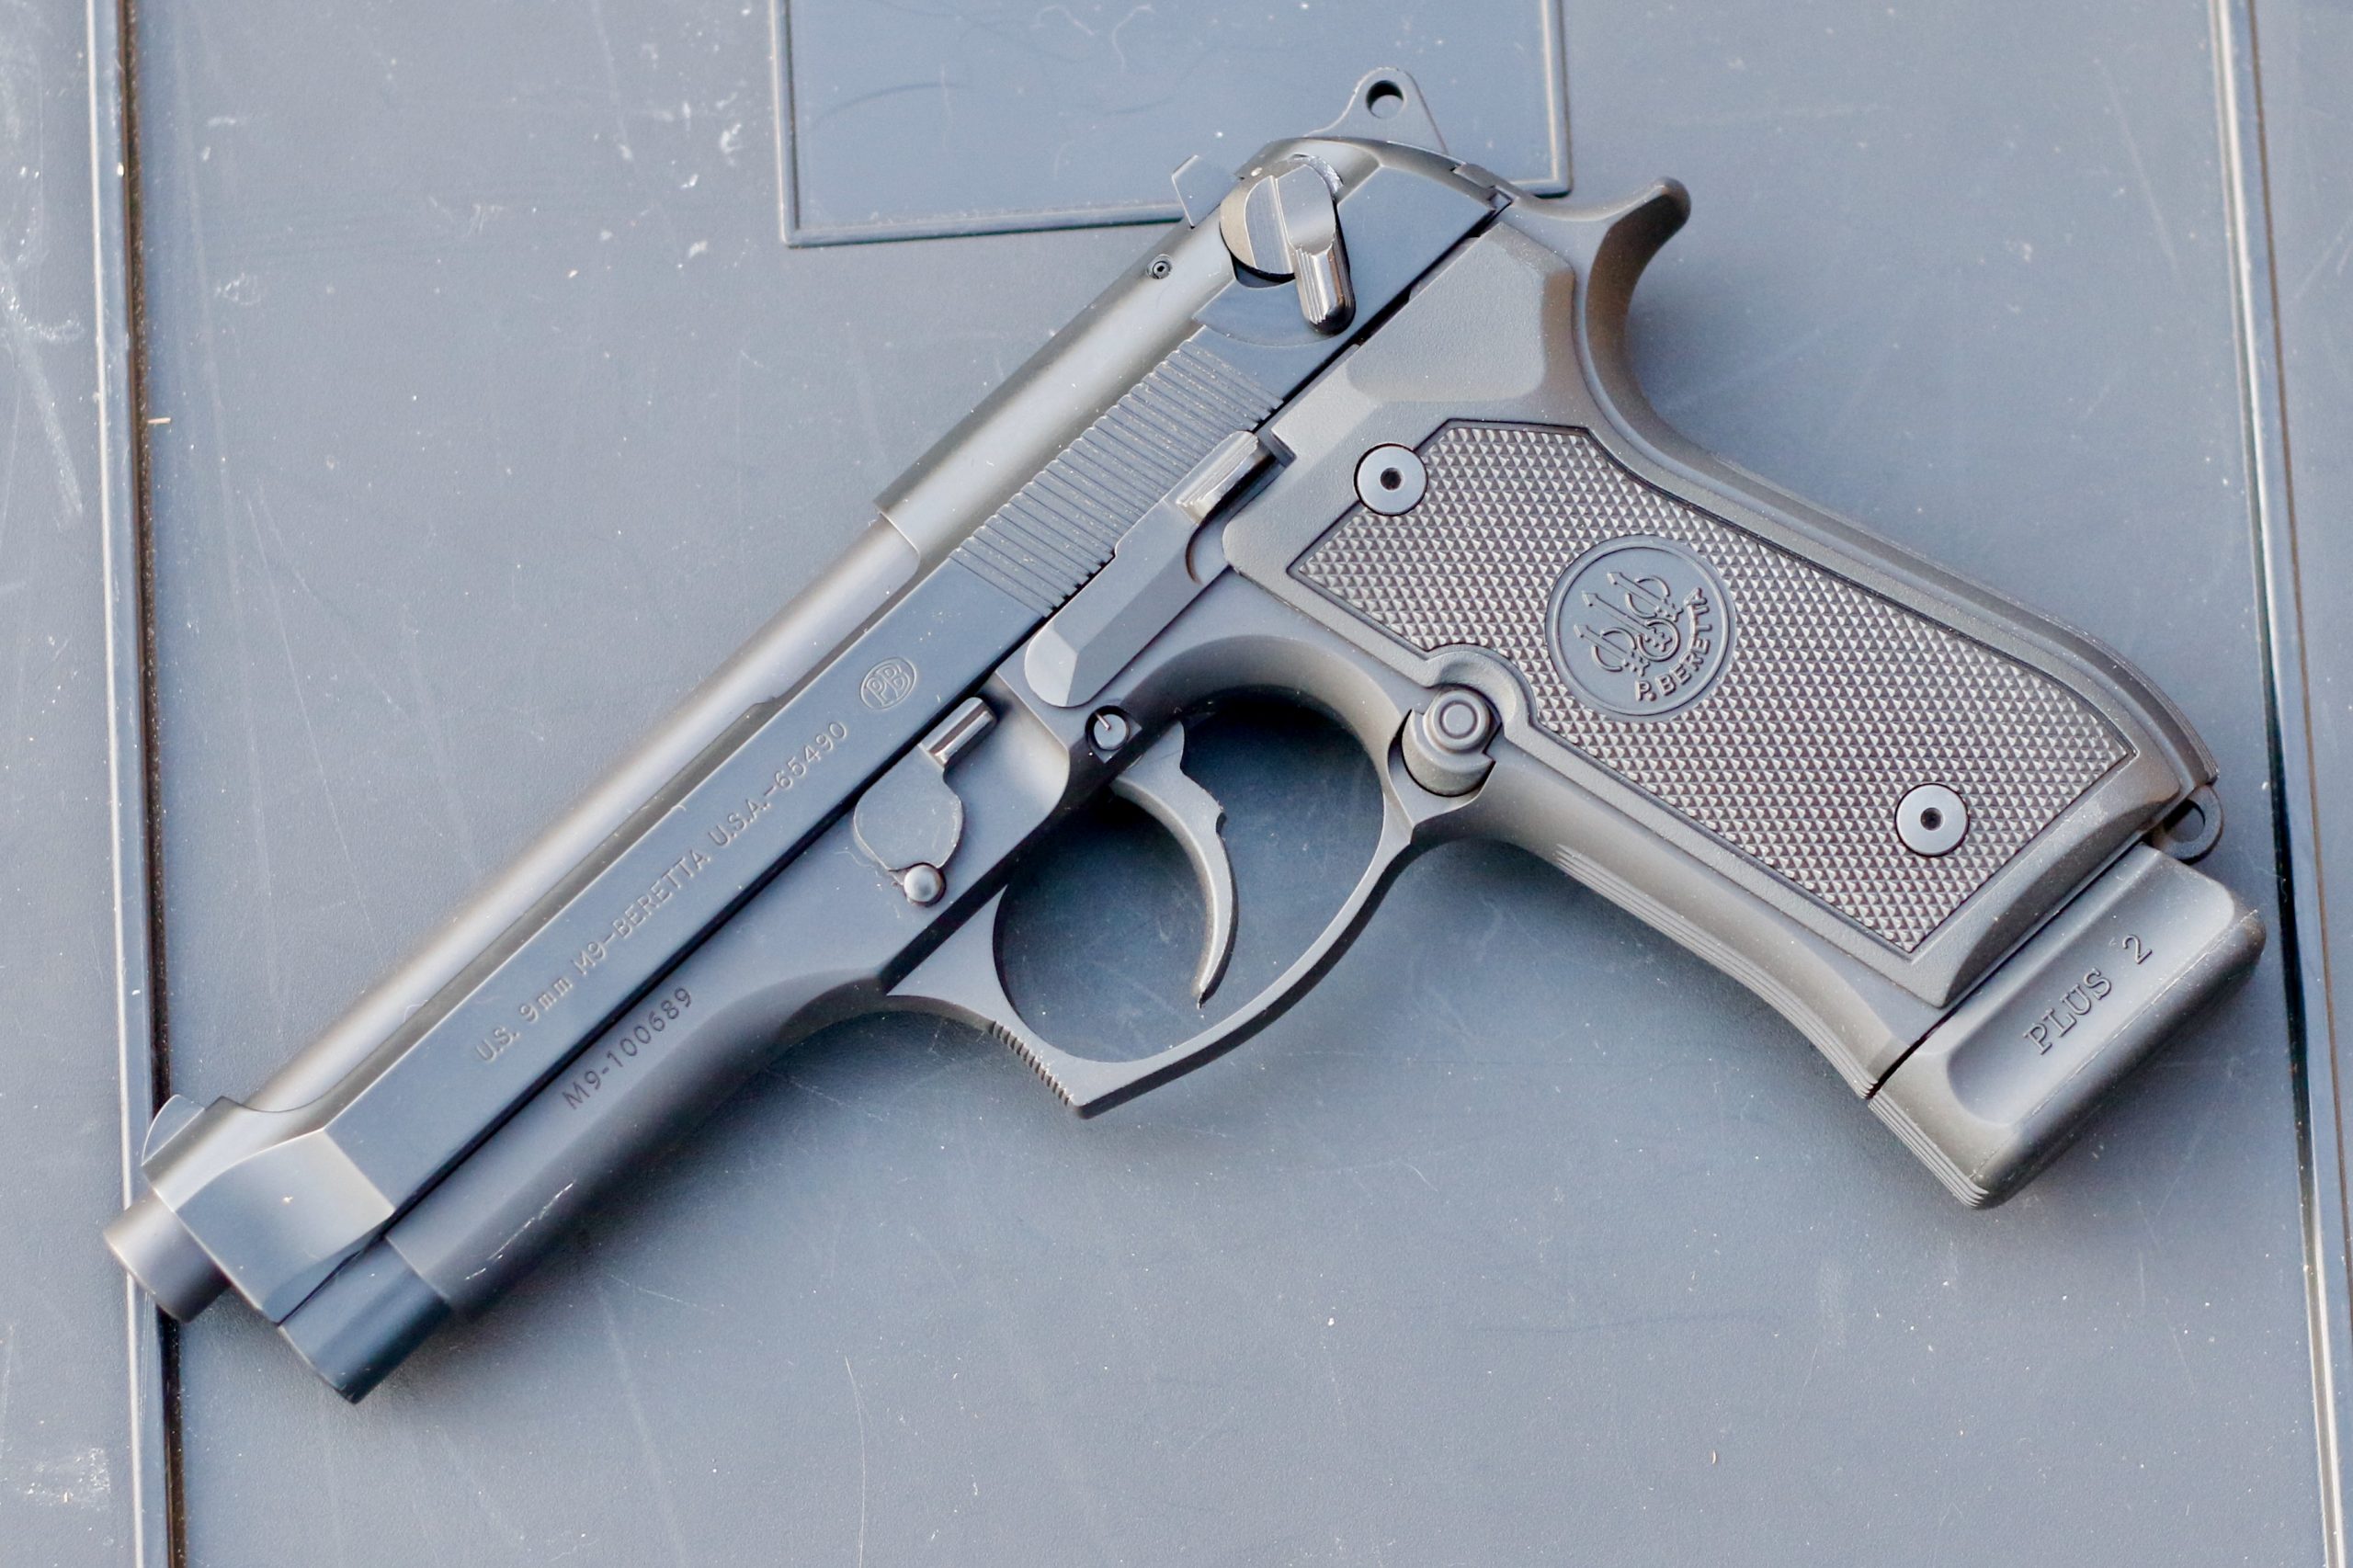
The 92FS, or in this case a gun that’s stamped M9, is still a rock star. And it remains in my range rotation.

Feeding the 92FS

When I bought this gun, it came with a couple of weedy magazines. The 92FS is not a small gun, and the grip is absurdly large by contemporary standards (thanks to the screw-on grip plates). 13 round magazines in this gun feel oddly insulting to the M9’s legacy. Yet they exist. And I think there might be some lingering mag capacity laws out there that make the 10 round, and 13 round, and even 15 round magazines worth knowing about.

But I like the 20s. More on that in a moment.

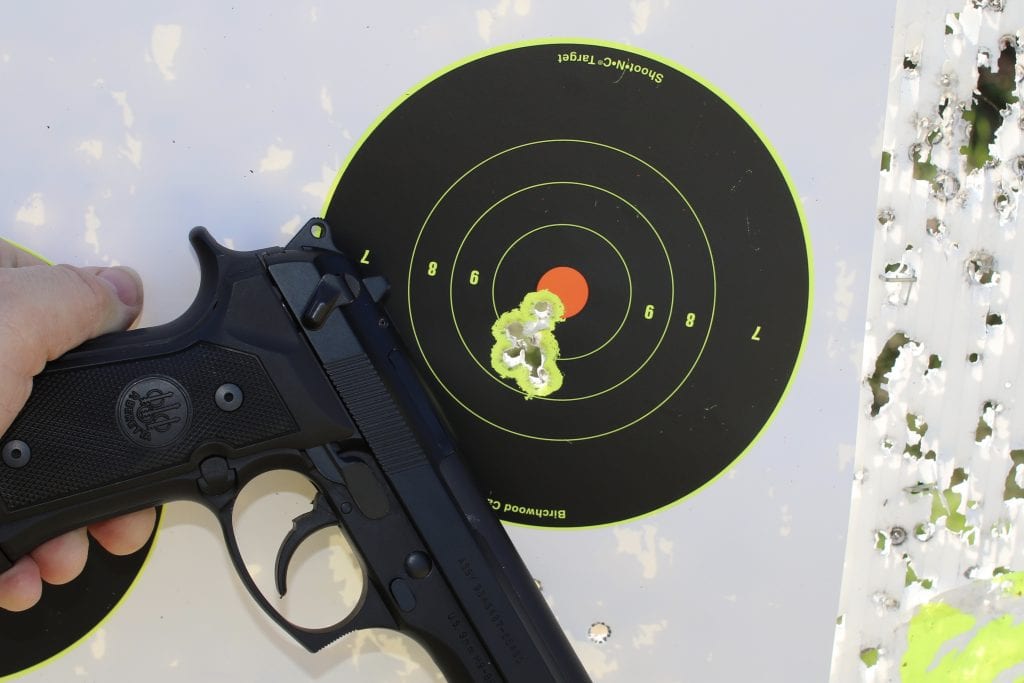
 Beretta M9, target, shot group.

I may have more time behind the trigger of an M9 than I do any other handgun.

Shooting the 92FS

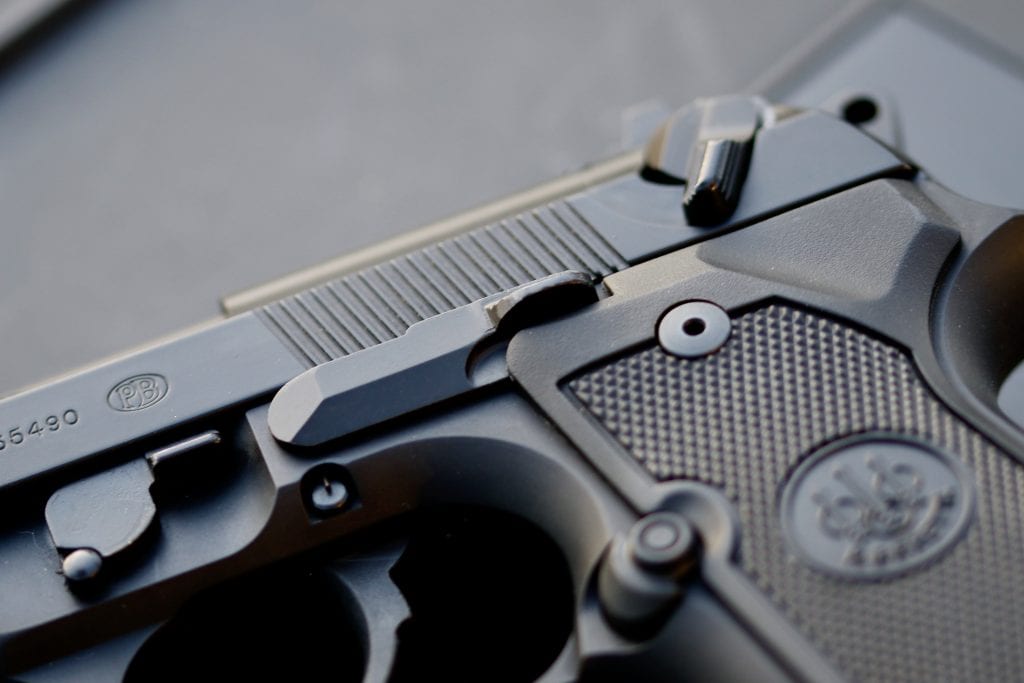
Beretta builds a solid pistol. The reason I liked the Wilson upgrade—and the P226, too—is that the traditional safety lever functions as a decocker. As I’m not one for external, manual, slide, or frame-mounted safeties, this makes shooting both of these guns that much faster for me.

The Beretta shoots flat.

It shoots flat. This shot is of my 13-year-old shooting it.

And the 92FS flies. The balance of the frame’s weight with the skeletonized slide works well for me. I can hold it down very flat, even with +P 9mm. This is a gun that I can run fast, and a gun that I can run accurately.

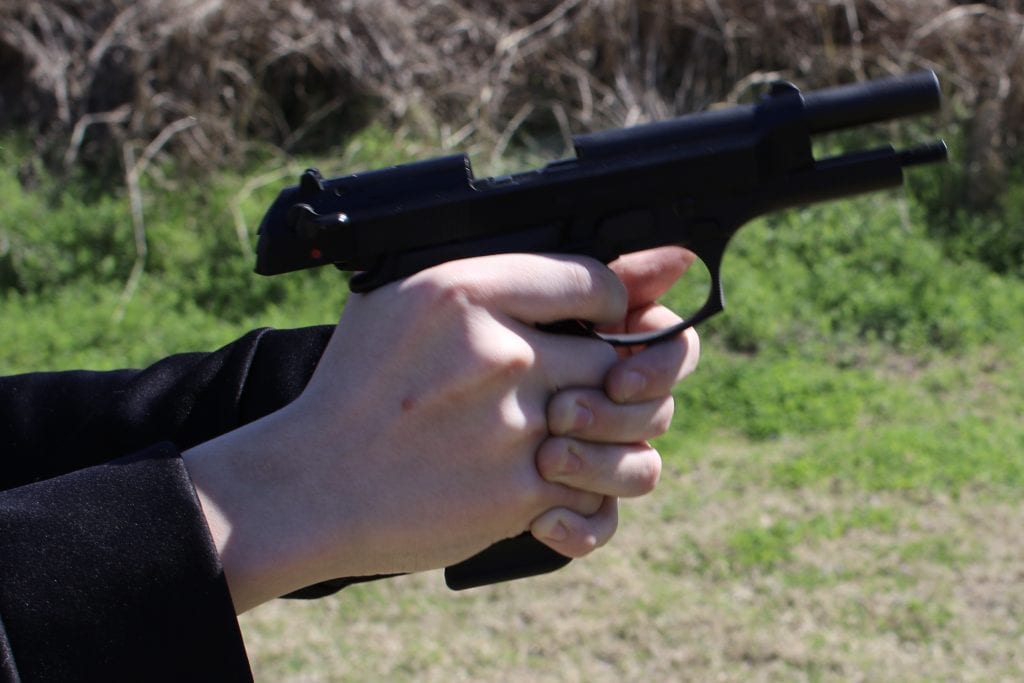
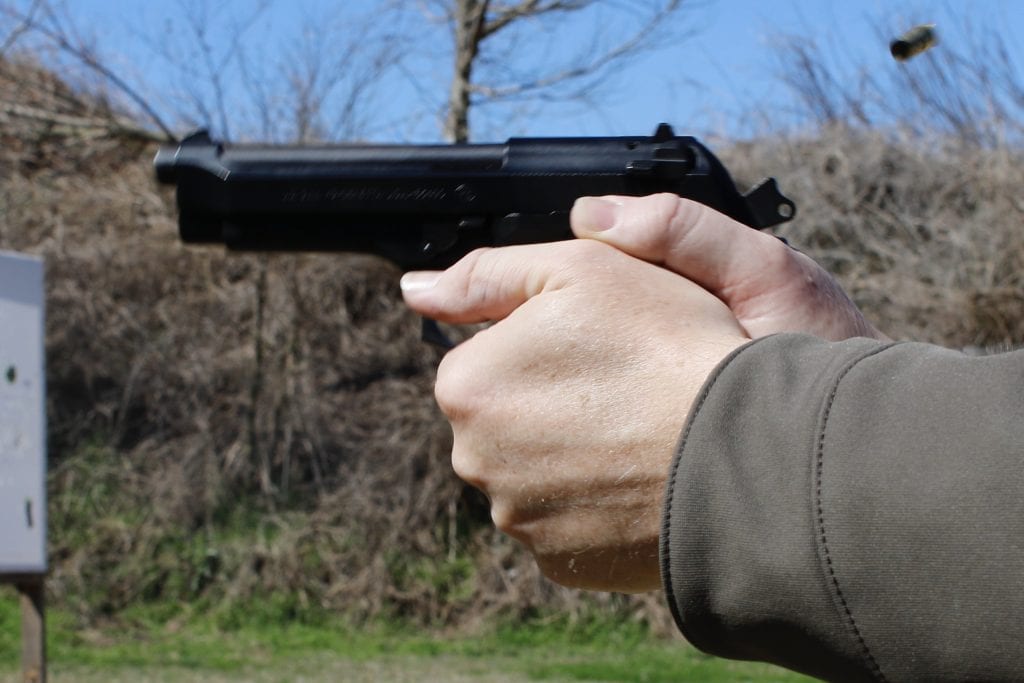
Beretta 92FS. That brass is hardly ejected and I'm 100% back on target.

This is the same gun in my hands. That brass is hardly ejected and I’m 100% back on target.

The balance of the M9 continues to impress me. I’ve been carrying the P226 for a while now, but sometimes I think I should put the old Beretta back in the daily rotation as my go-to full-sized pistol.

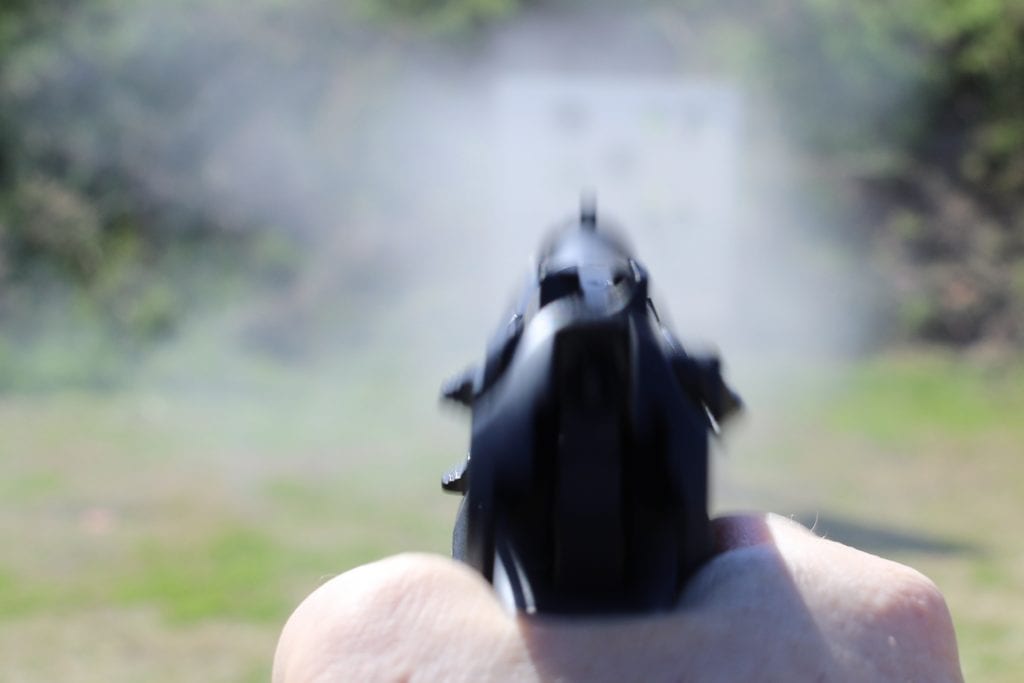
Beretta M9 muzzle rise

This is about all the muzzle rise I get, even one-handed.

But what about the M9 magazines?

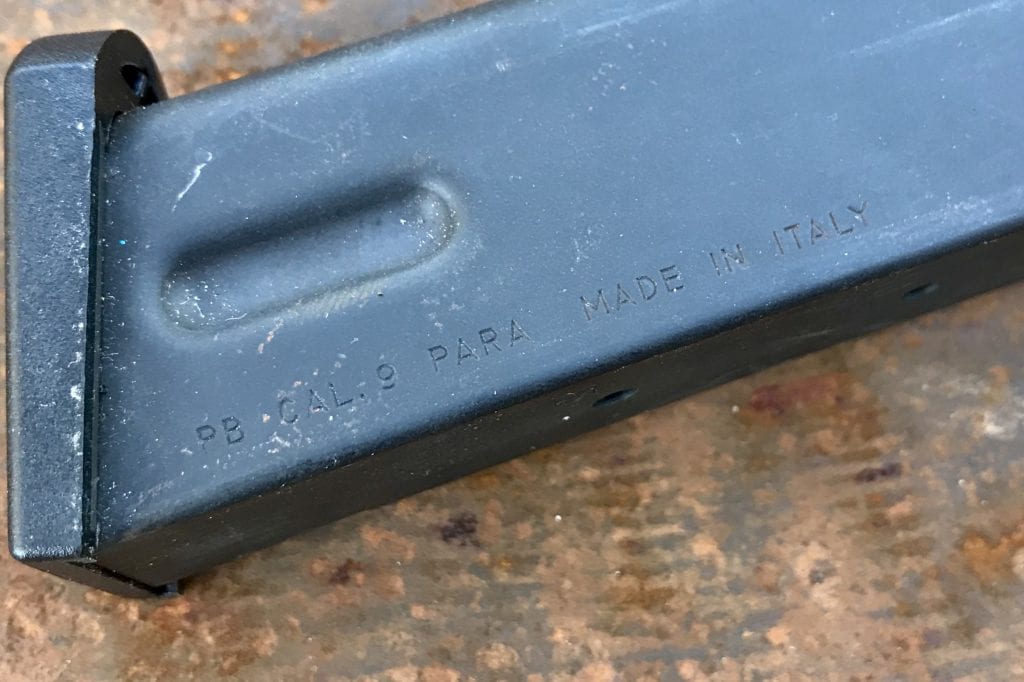
As soon as I picked up this gun, I knew I’d need some new mags. The 15 round mag isn’t bad—but there’s so much more room in there. They even have to stamp the steel in on the sides to keep the capacity limited.

Beretta M9 magazine stamped to restrict capacity.

The equivalent of a dowel in a shotgun’s tubular magazine.

The 20 round mags are the sweet spot for me. The increase in capacity doesn’t change the balance, and I’ve yet to have a mag malfunction on me.

I find that you either love the 92FS or hate it. I'm on the love-it side.

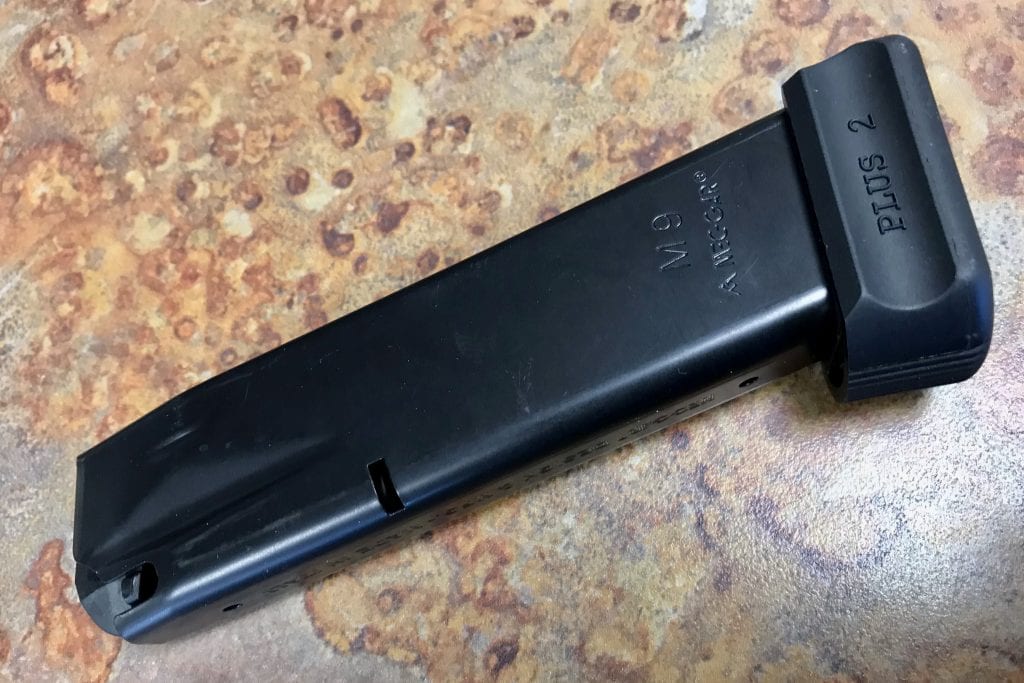
This is a 20 Round mag from Mec-Gar. These are my favorites, and the ones I carry in the M9.

For me, the winner is the 20 round mag from Mec Gar. I really like the bumper, and I’ve used these in this gun for more than three years now with no hiccups. Mec-Gar makes solid mags (and often mags the mags that are sold with guns as “factory” mags).

Mec-Gar Plus 2 heavy bumper adds a touch more length to the M9's grip.

The heavy bumper on the end of the Mec-Gar Plus 2 adds a touch more length to the M9’s grip.

If you want a solid flush-fit mag, Beretta makes good 18 Round mags. 18 seems to be the nice middle ground between the 13s and 15s but is still not 20.

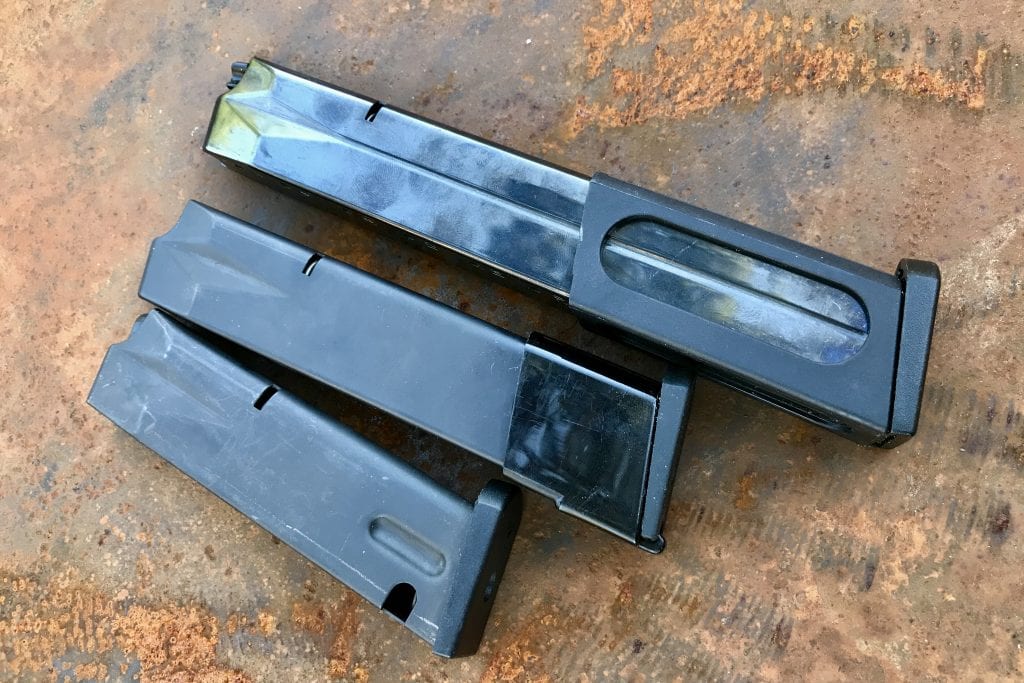
Beretta M9 magazines: 15 rounds, 20 rounds, and 30 rounds.

15 rounds, 20, and 30. I love the increase in capacity with these.

Beretta also makes 20 round mags. These are not as compact as the Mec-Gar but are still good mags. The middle mag in the image above is a 20 round mag. It protrudes from the grip by more than an inch, so has a collar that extends down over the baseplate. This is a bit of insurance—the last thing you want is for the rounds to exit the wrong in of the magazine.

Bigger M9 magazines?

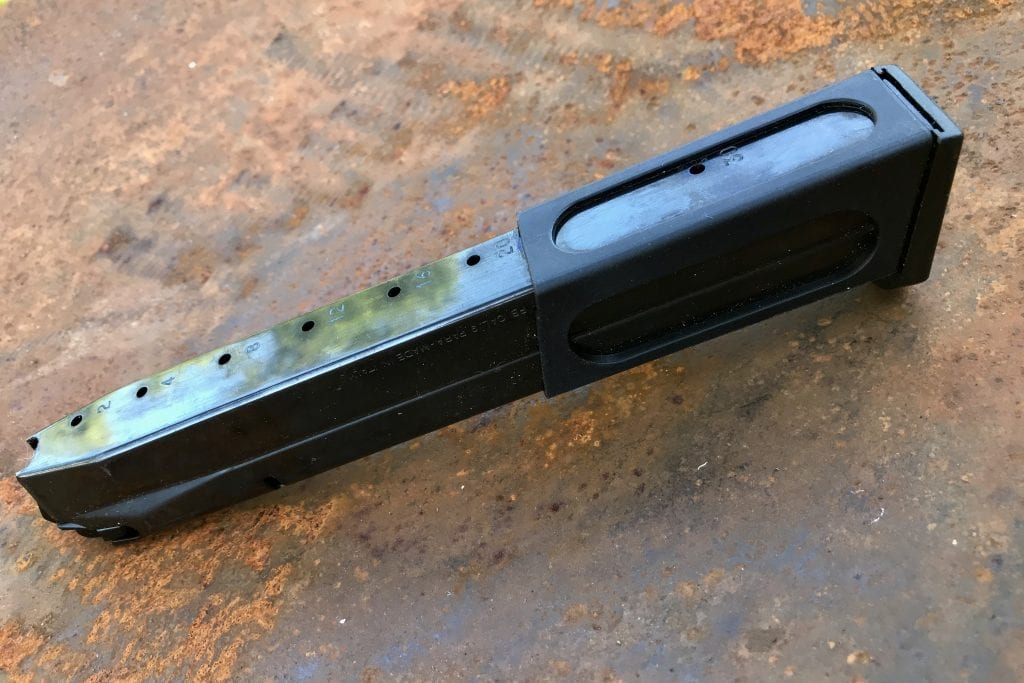
The 30 round Beretta factory mag is a serious upgrade to the M9 capacity.

The 30 round Beretta factory mag is a serious upgrade to the M9’s capacity.

The really long dudes are Beretta 30 round mags. These are extendo-long. 30 rounds add a bit of weight to the bottom of a 92, but not so much that the gun isn’t manageable.

The 30-round M9 magazines are great for the range. Carrying them is awkward, of course, but this isn’t really a magazine built for EDC or even duty. But if you hate reloading on the range, this is the mag for you.

As you stack these 30-round Beretta M9 magaziness with cartridges, the springs can get stiff.

As you stack these mags with cartridges, the springs can get stiff.

As the fine print on the GMW pages note—these mags will fit more than the M9. Any of the Berettas—the 92FS, 92D, 92F, 92G, 92 Brigadier, 92 Elite/EliteIA/Elite II, 90-Two in 9mm, 92 Billenium, 92 Combat Combo, 92 Stock, 92 Vertec, 92 Type L (Inox, Carry), even the CX-4 Storm (with 92FS adapter). The same design has been in use now for many years, and will likely pull forward into new designs. It works well—why monkey with it?

Close up of followers in M9 magazines.

Some followers help close up the body of the mag. Others leave a small gap where range garbage can get it.

You can’t really go wrong.

All of the M9 magazines that I’ve seen are steel. There are stainless bodies, but they’re very rare. Much more common is the powder-coated steel, or the blued bodies.

Sig P226 mags have the mag-catch much higher on the magazine body--but they're still easy to confuse.

Sig P226 mags have the mag-catch much higher on the magazine body—but they’re still easy to confuse.

And don’t get confused with the multitude of other mags that are built off of similar designs. I have numerous unmarked mags for my Sig P226 that look almost identical. Many are even made by the same companies. The only visible difference is the mag-catch location, and I often have to check both in guns, just to remember which is which.

David Higginbotham is a writer and editor who specializes in everyday carry. David is a former backcountry guide in the Sangre de Cristo Mountains and Boundary Waters Canoe Area who was a college professor for 20 years. He ultimately left behind the academy for a more practical profession in the firearms industry and was (among other editorial positions) the Managing Editor for a nascent Mag Life blog. In that Higginbotham helped establish The Maglife’s tone and secure its early success. Though he went on to an even more practical firearms industry profession still, he continues to contribute articles and op-eds as time and life allow.

CategoriesGun Reviews

SIG P220 West German Made- Swiss Engineered

It’s 1975, and you’re the Swiss Military. Your sidearm is the fantastic Sig P210, but boy, oh boy, is it starting to show its age. The P210 utilizes a single action only system, sports a long 5-inch barrel, and has been kicking around since 1949. You need a new service pistol, and your favorite Swiss Arms maker has you covered with their new Pistole 75, aka the Sig Sauer P220.

The Mighty P220

Unlike your previous pistol, the P220 incorporates a modern double-action / single-action setup that eschews a manual safety. The first shot delivers a long double-action trigger that requires a very intentional press to discharge. Subsequent shots utilize a much lighter and shorter single-action trigger pull. Sig fitted a decocker to the pistol in the best place possible to return the gun to double-action after the party is over.

Sig P220

When the Swiss needed a new service handgun Sig had a new option for them, the P220.

Almost half an inch of barrel has been shaved off to make the pistol a bit more compact than the P210, and the P220 is four ounces lighter than the old warhorse. The Sig P210 utilized a Petter Browning system, but the P220 would be the first gun to use the new Sig Sauer system. This closed the need to license the Petter system and resulted in a more modern and robust pistol design. Like the P210, the P220 utilized a 9mm cartridge and a single stack magazine.

Sig P220 .45 ACP

America loves our 45 ACP and even the Swiss-Germans acknowledged it.

Even though the P220 is more compact than the P210, it’s still a massive gun. It tips the scales at 30 ounces, is 7.7 inches long, 5.5 inches tall, and 1.5 inches wide. Trust me, it fills your hand well, and even my big hands are challenged by it. If I ran out of ammo, I could beat you to death with it.

The Sig Sauer System

The Sig Sauer system locks the barrel and slide together using an enlarged breech section on the barrel, locking into the ejection port. Most Sig pistols utilize this system, as do many other modern pistols. The Sig Sauer system creates an easier to manufacture pistol that’s more reliable and accurate than previous designs.

Sig P220

The Decocker makes it easy to decock the gun to double action mode.

Besides being the first pistol to use the Sig Sauer system, the P220 was the first Sig Sauer pistol. Prior to the P220, you had Sig and J.P. Sauer and Sons. Both made excellent firearms, but the Swiss are notoriously fickle among exporting firearms. J.P. Sauer, a German company, was capable of producing and exporting pistols to the international market.

Since then, Sig Sauer has become one of the biggest names in not only handguns but rifles, optics, suppressors, and squad support weapons.

The West German Sig P220

J.P. Sauer and Sons were German, and if you know anything about history, you know that in 1975 the Berlin wall separated Germany into West and East. David Hasselhoff had yet to take that commie wall down. This leads to the famous West German markings on Sig Sauer Pistols.

My P220 wears the famed marking. Are the West German P220s better than the standard models? There is some debate among Sig fanboys. I can’t speak from experience, but someone once told me, “A modern Sig is likely a pretty good gun, but I know a West German Sig is a good gun.”

Sig Sauer P220 in .45 ACP

The P220 is massive. It’s a huge gun that verges on 1911 size. 

The Pistole 75 variant of the P220 came in 9mm, which was the caliber Europe chose for their warfighting pistols. When Sauer imported the guns into the United States, they offered 9mm variants, followed by 45 ACP variants. This was the late 70s and early 80s. We loved our freakin’ 45 ACP.

Sig P220 slide release

The slide release started a tradition with Sig pistols. Mainly making it almost impossible not to pin down.

Sauer worked with Browning to import these pistols, and they were labeled the Browning BDA. No to be confused with the other Browning BDA pistol. These early pistols utilize the very European heel magazine release. After 1980 we saw imports wearing the standard push-button magazine release.

My Little West German Sig

Our sample here came after the Browning days and wore the SIGARMS stamp for import. This is also a 45 ACP model, which is seemingly the easiest to find. After the P225 and P226, Sig P220s in 9mm weren’t a big seller and 45 ACP remained as an alternative to the 1911. 45 ACP guys seem to love guns with low capacities and heavyweights.

Sig P220 in .45 ACP

The P220 does have a very striking appearance. Mine has been to hell and back more than once.

Lord knows how many hands this P220 passed through before it came my way. The old stamped steel slide has lost most of its original finish. It looks rough, and the old night sights are dead. However, the old dog still has some bite in it.

Sig Sauer P220

The Sig P220 is what brought Sig and Sauer together.

An extremely smooth trigger delivers a wonderful double-action and single-action trigger pull. I imagine thousands upon thousands of trigger pulls have honed the trigger to an extremely smooth pull. The long double-action trigger rolls rearward like a finely done revolver trigger.

Sig Sauer P220 in .45 ACP

The P220 provided the Swiss a modern fighting implement.

Staging the trigger during your double-action pull is possible. You can hold the hammer almost entirely cocked and ensure you have a good sight picture before finishing the trigger pull. The single-action offers a little take-up and what barely qualifies as a wall before breaking and firing. A short reset ensures the trigger is ready to rock and roll again quite quickly.

Dispensing 45 ACP

Like the trigger, the slide is well worn. It’s broken in and allows for a smooth pull that feels like the slide is on ball bearings. It glides rearward with ease. The decocker and magazine release are well-honed and both easy to use.

Surprisingly, the gun offers a high level of reliability. It looks beat up but still eats, shoots, and ejects consistently with a wide variety of ammunition types. Even modern 180-grain JHPs have no issues feeding through this old fighting pistol. Heck, even crappy steel-cased stuff doesn’t provide any issues with the gun.

Sig P220 single stack magazine

The Sig P220 magazine gives you a single stack with limited capacity. 8 to 10 rounds are all you get.

I love shooting this gun. It delivers an excellent experience with every trigger pull. The outstanding trigger pull in single action makes it easy to deliver accurate fire at various ranges. I tickled myself, hitting a small 4-inch gong at 20 yards trying to clear the deck. Hearing those big 45 ACP rounds hitting steel warms my heart.

Those Swiss German built one helluva gun.

But….

Much like the Government size 1911, the P220 wears the badge of being obsolescent. It weighs a ton and doesn’t offer the capacity to justify the weight or size of the gun.

Sig P220 and Sig AXG

The Sig P220 with its great-grandson the SIG AXG.

Sadly warhorses like this are getting harder and harder to find, at least with the West German stamp. It’s an interesting piece of history from a curious time. Not only is it a product of its time as a handgun, but it’s marked appropriately as such. The world has since moved beyond a split Germany, beyond widespread communism, and beyond single stack boat anchors.

Sig Sauer P220 and P320 steel frames

Sig loves its steel frames, in both 1975 and 2021.

Although of those three, the only one worth visiting is the single-stack boat anchors. The P220 helped make Sig Sauer the company it is today. The descendants of the P220 make up a beloved line of pistols with a long history of service. The P220 brought together a Swiss and German company that now makes America’s newest service pistol and America’s favorite concealed carry pistol. The P220 is the butterfly effect that’s pushed Sig Sauer to the mainstream.

Travis Pike is a former Marine Machine Gunner, a lifelong firearms enthusiast, and now a regular guy who likes to shoot, write, and find ways to combine the two. He holds an NRA certification as a Basic Pistol Instructor and is the world’s Okayest firearm’s instructor.

CategoriesSkills and Gunhandling

Media Mayhem—Can shotguns hit two targets with one shot?

Movie Madness is all about finding the truth behind tropes regarding guns, gear, knives, tactics, and more from the world of fiction. We explore tropes from video games, movies, tv, and whatever other media comes our way. In our first edition of the truth about tropes, we are going to look at an old video game shooter myth about shotguns. This one goes all the way back to Doom. It’s spread since then, and notably, landing multiple hits with one shotgun blast has been a popular enough trope to become an achievement in Doom 3, Rise of the Tomb Raider, and The Last of Us. 

Doom video game, origin of the trope that you can make multiple hits with one shotgun blast.

We all know that shotguns work through the spread of the pellets from an individual shotshell. Pellet accountability is a big thing in home defense and the tactical use of shotguns. A single stray pellet can kill an innocent person, and that is why patterning, careful shot placement, and training are critical in shotgun deployment.

Doom video game. Can you successfully blast your shotgun once to hit two man-sized targets in a defensive situation? 

The question is, can you use a shotgun to purposefully hit two man-sized targets in a defensive situation? 

How practical is it, and what load and range is it effective at? 

If it is possible, is it practical? 

Our goal is to find out. 

Shotguns, Ammo, and Test Parameters 

For this experiment, I am using my favorite Benelli M4 shotgun. It’s loaded down with a cylinder bore choke, and the barrel is 18.5 inches long. The M4 is an all-around excellent shotgun for tactical use, and it typically finds its way into the hands of everyone from SWAT cops to SAS commandos. It’s a favorite of first-person shooters and an all-around sexy shotgun. 

Benelli M4 shotgun

Ammo wise, I am using nothing but buckshot, and I have a range backpack full of buckshot to experiment with. For this test, I’m using 00, 0, No 1, and No 4 buckshot loads from various brands. I’m using VTAC targets and placing them side by side. My plan is to measure each group after each shot to find out just how wide a spread you can get so we could see the effective range of spread each load has. This allows me to measure just how far the targets can be apart and still be affected by the blast. 

shotgun test with 00, 0, No 1, and No 4 buckshot. Ammo for shotguns

Science Time 

Science was not my favorite subject. To be fair, none of them were my favorite. That’s why I joined the Marines instead of the Air Force. However, I’m going to attempt an experiment that doesn’t involve crayons. I have my ammo, my gun, and my target. All that’s left to discuss is range. 

In video games, shotguns can hit two or three bad guys from all of two feet away. In real life, a shotgun doesn’t spread that far that fast. I’m going to start at 25 yards, and after firing one round of each load, I’ll move forward 5 yards. My point of aim will be sitting right between each target. This will be a single round elimination. 

VTAC targets

The testing criteria is simple. Fire one shot, unload, show clear, then go downrange to mark and measure where the pellets land. If a load fails to spread far enough to hit each target, it will be eliminated and will not be tested at the next yard line. 

Let’s get to it.

The 25 Yard Line

Number 4 

Number 4 was an impressive load at 25 yards and landed pellets on both targets in an impressive way. This includes several shots to the head and torso. The spread was a mighty 23 inches from left to the right. 

ammo for shotguns Federal ammunition 12-gauge 2 3/4 inch buckshot No. 4 used in test to see if you can hit two targets with one shot using a shotgun.

Number 1 

The Number 1 buckshot load hit each target with authority but didn’t strike the vital zones nearly as much as the number 4 at this range. The total spread was 20 inches left to right. 

0

Single Aught or 0, buckshot loads worked at this range, but only four pellets hit the two targets, and none landed in the vital zone. The spread was 16 inches total. 

25-yard test results using four different buckshot loads. Can you hit two targets firing a shotgun only once?

00

Double Aught or 00, buckshot failed and only hit the between the targets and the right target. 

The 20 Yard Line

Number 4

Number 4 again succeeded in hitting both targets with hits in the vital zones. The spread was 13 inches. 

buckshot pattern test at 20-yards. Can you hit two targets with one shot?

Number 1

The number 1 load worked the best at twenty yards with two more pellets in the vital zones than number 4. The spread was 15 inches. 

0

The load failed to spread to both targets, with pellets hitting the left target and the center. 

ammo for shotguns Remington Buckshot 12-gauge 2 3/4 inch 0BK. Can you hit two targets with one shot? Shotgun test.

The 15 Yard Line

Number 4

The Number 4 load at 15 yards spread to both targets but scored no vital hits and spread 10 inches. 

Can you hit 2 targets with one shot? 15 yard shotgun pattern.

Number 1

The Number 1 load hit each target at 15 yards but scored no vital hits with a spread of 11 inches. 

Ammo for shotguns Winchester SuperX 12-gauge No.1 Buckshot used in shotgun test: can you hit two man-sized targets with one shot?

The 10 Yard Line 

At ten yards, neither the Number 1 or Number 4 load spread between each target. 

No 1 and No 4 buckshot pattern at ten yards, did not hit two targets with one shot.

Shotguns, Spread, and Tropes

The conclusion is simple, yes it works, but not to the effect that video games show. At 25 and 20 yards, shotguns could theoretically hit two bad guys with one load. The thing is, the bad guys have to be sitting close with little room between them. Your best bet is two guys down a 25-yard long hallway coming at you standing side by side which is an unlikely scenario. However, even if you have that scenario, is it more efficient than just firing twice? Is it practical? 

Buckshot 9P/00 12 gauge shotshells used in test to see if it's possible to hit two man-sized targets with one shot of shotguns.

I think it’s evident that no, it’s not a practical technique worth training for. The only vital hits were scored at 20 and 25 yards, and when it worked at closer ranges, the shots were mostly in the arms and shoulders of the targets. 

Shot pattern in test to see if its possible to hit two targets with one shot of shotguns .

Interestingly enough, the United States military experimented with an interesting choke during the Vietnam war. It’s known as a duckbill choke, and the idea is to change the spread from vertical to horizontal and increase the chance of landing an effective hit on moving targets or even multiple targets. 

It does spread the shot more horizontally, but practical use and testing showed the intended effect didn’t open the spread up enough to be useful. 

How Could It Work? 

We need bigger shotguns! Loaded with bigger shells! Something like a four gauge could be an efficient weapon at dispersing enough shot to hit multiple targets in an efficient way. However, that kind of weapon would need to be tripod-mounted and possibly crew-served. The more I talk about it, the more I like it. 

benelli shotguns

Oh Benelli you beautiful Minx – Courtesy Taran Tactical

Anyway, back on the subject. The tactic of scoring two or even more hits with a shotgun is far from practical, but it is possible with the right load and at the right range. 

Buy your shotgun magazines at the Warehouse!

Be sure to watch GunMag TV too.

GunMag Warehouse on Instagram

Follow GunMag Warehouse on Instagram for daily updates: @gunmagwarehouse.


Travis Pike is a former Marine Machine Gunner, a lifelong firearms enthusiast, and now a regular guy who likes to shoot, write, and find ways to combine the two. He holds an NRA certification as a Basic Pistol Instructor and is the world’s Okayest firearm’s instructor.

CategoriesAccessories

A Scorpion with a More Potent Sting

How do you add venom to a Scorpion? By taking one of CZ’s most successful pistol caliber carbines and upping the potency with a few accessories that give it just a bit more sting.

Online reviewer Garand Thumb (not his real name, but a very real painful problem) recently got hold of a stock CZ Scorpion EVO 3 S2 Pistol Micro with Folding Brace. He made a few key upgrades to make it a bit more shootable and, well, just all-around cooler.

As he points out, “The cool thing about the CZ Scorpion is that there’s a lot of aftermarket support for it.”


So, how did he upgrade the CZ Scorpion?

Starting at the tip, he added an HB Industries muzzle device and a Gemtech Lunar 45 suppressor. In addition to adding a suppressor to the muzzle, he also threw on a silencer lug for quick removal and to allow for different suppressors to more easily swap off and on. Adding a lug to a barrel makes it more interchangeable with other suppressors that might not match the muzzle’s pre-existing thread depth.

Unsatisfied with the original handguard, Thumb upgraded to the lighter-weight polymer-reinforced HB Industries Paske Sapper that offers a simple M-LOK mounting solution. On that, he mounted an EOTech holographic optic to compliment the included iron sights because, well, who doesn’t like a dot on a PCC?

Addressing a common complaint about the OEM charging handle being too small and thin to get your hands on, Thumb upgraded to the easier-to-actuate HB Delta Extended Charging handle, mounted out of the way on the left-hand side.

Noting that the receiver and magwell are unchanged, Thumb points out the quality of the magazine design, which has been adopted by many other PCCS, including the AKV. With plenty of aftermarket support for CZ Scorpion magazines, Thumb specifically mentions his appreciation for the design quality and reliability of Magpul mags. 

He also switched out the magazine release latch, and for the safety, he upgraded to the HB Industries EVO 3 safety on one side and a safety deleter on the other side.

For a better grip angle he swapped out the original grip with a Paske Pathfinder grip, and wanting a better trigger, he chose a Theta 4 trigger, both from HB.

Finally, he added a Magpul Zhukov stock and a stock adapter from Reptilia.

CZ Scorpion, unfolded

The new Scorpion adds a bit of color to your choice of small Pistol Caliber Carbine.

One huge selling point for a Scorpion is the availability of aftermarket parts and accessories. You can get them everywhere, including here (hint, hint). This is one of the many aspects of the gun that Thumb mentions in his laundry list of favorite features.

The CZ Scorpion EVO 3 S2 Pistol Micro with Folding Brace

The CZ Scorpion EVO 3 S2 Pistol Micro with Folding Brace offers a ton of features in a very small package, ideal for Close Quarters Battle.

Check out all the rest of his comments in the video. When you’re done, check out our selection of Scorpion mags and accessories.

Want more Gun Mag Warehouse? Follow us on Instagram @gunmagwarehouse

David Workman is an avid gun guy, a contributing writer to several major gun publications, and the author of Absolute Authority. A logophile since way back, Workman is a quickdraw punslinger and NRA RSO and Certified Pistol Instructor. He helps train new shooters on basic handgun skills and CCW requirements and is a strong advocate for training as much as practicable. “Real-world shootouts don’t happen at a box range.”

CategoriesNew Gun Releases

Strike Industries’ New AR Flat Top Overmolded Pistol Grip

Strike Industries just announced a new reduced-angle pistol grip that is compatible with the AR10, AR15, aftermarket Ruger 10/22 stock/chassis, and modern bolt-action rifle chassis that require flat-top AR-compatible pistols. With a 15-degree angle, it offers a more ergonomic and comfortable position for the hand and wrist than a standard angle. If you’re looking to upgrade your Personal Defense Weapon, you might want to check this out.


Strike Industries reduced angle AR grip

With a 15-degree angle, Strike Industries says this is better suited for confined spaces, PDW setups, and modern shooting positions — compared to the standard 25 to 30-degree AR grip angle. The grip also has internal storage space that’s accessible by removing the rubber plug at the bottom.

Strike Industries 15-degree AR pistol grip package contents

The package includes the grip, screw, crush washer, and plug.

The video below demonstrates how to install it.

From Strike Industries

The Strike Industries Flat Top Overmolded Pistol Grip (15-Degree) is a rubberized texture pistol grip for aftermarket Ruger 10/22 stock/chassis, modern precision rifle chassis systems, AR’s and any weapon that does not use or want a beavertail grip.

The specific dimensional design is made to be comfortable and compatible for a Ruger 10/22 aftermarket stock/chassis platform, but will fit any modern bolt-action rifle chassis that can only use a flat top AR compatible pistol grip. Also for any AR-15 or AR-10 shooter who desires the most compact setup as possible with the 15-degree grip angle for a confined space operation or PDW setup.

Similar to the SI AR Overmolded Pistol Grip, this flat top has the same surface which improves control of your weapon. The grip is more streamlined and tapered where the webbing of the hand goes to allow more range of movement of the firing hand when accessing the controls. It has enough width in the palm area to maximize comfort during extended use when used with chassis system like a 10/22 or bolt rifle.

This grip includes all the installation hardware needed for a new build or to completely replace an existing pistol grip and features a secure storage underneath with an included rubber grip plug.

Enhance your AR, Ruger 10/22 or precision rifle chassis with this Strike Industries Flat Top Overmolded Pistol Grip (15-Degree) designed to give you improved comfort and control.

Compatibility

•Dimensional designed for aftermarket Ruger 10/22 stock/chassis
•Modern precision bolt-action chassis using AR style pistol grip
•AR-15 and AR-10 lower receivers
•Optional Plug Tool Holder

Specifications

•Length: 51.40mm (2.02″)
•Width: 29.17mm (1.15″)
•Height: 106.69mm (4.20″)
•Weight: 1.9 oz
•Weight with pkg: 3.6 oz

Package Contents

•x1 Flat Top Overmolded Pistol Grip (15 Degrees)
•x1 Pistol grip screw
•x1 Crush washer
•x1 Pistol grip plug

Product Features

•Flat top design compatible with aftermarket Ruger 10/22 stock/chassis, modern rifle chassis, and AR-15/AR-10
•Rubberized over-molded construction improves comfort and control
•15-degree angle suited for confined spaces, PDW setups, and modern shooting positions
•Secure storage underneath with an included rubber plug
•Streamlined profile and non-slip

Strike Industries AR Flat Top Overmolded pistol grip

Strike says this is for shooters who desire the most compact setup as possible with the 15-degree angle for a confined space operation or PDW setup.

Read more at Strike Industries.


Stephanie Kimmell is the firstborn daughter of Missouri’s Pecan King, worthy scion of a Vietnam veteran sailor turned mad engineer-orchardist-inventor-genius. With a BA in technical writing, she freelances as a writer and editor. A Zymurgist greatly interested in the decoction of fermented barley and hops, she is in many ways a modern amalgam of Esther Hobart Morris, Rebecca Boone, and Nellie Bly. She hunts, fishes, butchers, and cooks most anything. When not editing or writing, she makes soaps and salves, spins wool, and occasionally makes cheese from cows she milked herself. Kimmell is a driven epistemophilic who loves live music and all sorts of beer.

CategoriesRange Gear

Swampfox Justice: Good Optic for Duty Guns?

Sage Dynamics’ Aaron Cowan recently reviewed a Swampfox Justice to see if it was all it’s cracked up to be. (Spoiler Alert: The “cracked-up” part applies later. Stay tuned.) Is it rugged enough to find itself on the slide of a duty pistol? Can it take the beating optics often have to absorb when screwed onto the top of a gun that gets abused a lot over the course of repeated shifts?

Aaron has a standard evaluation process he takes all his optic reviews through for both consistency and the overall torture test: 2,000 rounds. He breaks the large round count into 500-round increments to pause and add additional non-round evaluations, such as drop tests, to see how the optic performs other functions besides just sighting targets. Expectations set, let’s find out how Aaron liked the Swampfox Justice.

Initial Impressions

Mounting and adjustments were fairly routine since it fits on a standard RMR footprint. No surprises there. The battery goes in the top, making installation and swaps easy. Adjustments are manual, which he liked, and the Justice features a “shake awake” feature to save battery life — although that is rated at over a year.

Swampfox Justice pistol red dot sight

Swampfox Justice pistol red dot.

Glass clarity is something Aaron focuses on (ha!) when evaluating an optic, and he finds this one exceptional. One thing he points out is how super clear lenses can deplete batteries faster because the dot has to be brighter to show up against a lit background. So it’s a trade-off between clarity and battery life. He notes a lack of distortion, making see-through easier and more accurate.

As for the dot itself, refresh rate or “flicker” was “very good,” meaning it did not lag or stutter as he transitioned targets or shook the gun, something that can cause a real problem on lower quality optics that use cheaper LEDs or projecting technology. He did notice, however, in certain backlit conditions a halo effect appeared on the lens. While he could still see the real dot aiming point, the extra red lights were distracting.

Swampfox Justice Halo Effect

The halo effect.

Drop Tests

One standard test Aaron throws in for all optic tests is a shoulder-height drop test down to a hard object such as concrete to simulate the effects of tough duty and see how well the optic holds up under adverse conditions.

On the first test, some chipping inside the frame appears in the top left corner of the lens. This concerns Aaron but isn’t a deal killer. Zero holds true, so he can keep shooting with no adjustments.

Swampfox Justice Drop Test

The 500-Round Burndown

Swampfox Justice burndown

Swampfox Justice burndown

Yep, you guessed it: it’s time for a 500-round test – with a catch. It’s on full auto. How does the optic do after all that constant shaking and recoil?

Swampfox Justice pistol red dot, burndown testing, 500 rounds at full auto

Nothing changes. Zero holds, no fading, no flicker. Optical perfection. And the lens crack isn’t worse.

Single Hand Manipulations

Next, it’s time to test the optic body as a reloading and racking tool, working it off the edge of a wood barricade. Will it hold up against repeated racking? Can it withstand this level of abuse? Aaron is concerned that the lens position — close to the front of the body — might be more susceptible to damage during these drills, but his fears turn out to be unwarranted. The Justice performs flawlessly.

The Crack-Up

As promised, here is the rest of the story on the lens crack.

Swampfox Justice drop test cracked lens

On the fourth and final drop test, it finally cracks beyond the small chip in the corner. In fact, the crack goes top to bottom in the left third of the glass. But Aaron is okay with the crack. Why? Because the whole lens isn’t destroyed, only a part of it. The dot still appears and is still zeroed.

Is it Duty Ready?

The shorter answer is no —sort of. Watch the video for Aaron’s answer and explanation in his own words.

Check out more Red Dot Sights at the Warehouse and Subscribe to GunMag TV!

David Workman is an avid gun guy, a contributing writer to several major gun publications, and the author of Absolute Authority. A logophile since way back, Workman is a quickdraw punslinger and NRA RSO and Certified Pistol Instructor. He helps train new shooters on basic handgun skills and CCW requirements and is a strong advocate for training as much as practicable. “Real-world shootouts don’t happen at a box range.”

X
Add to cart